Power Entry Module P/N 0702-001-862
1. Using a 7/64” allen wrench, remove the two socket head cap screws (P/N 0004-529-
000) (C).
Warning: The wires connected to the power module have limited slack. Be careful not to
pull the power entry module out too far. Doing so may place excess stress on the wiring
and connectors.
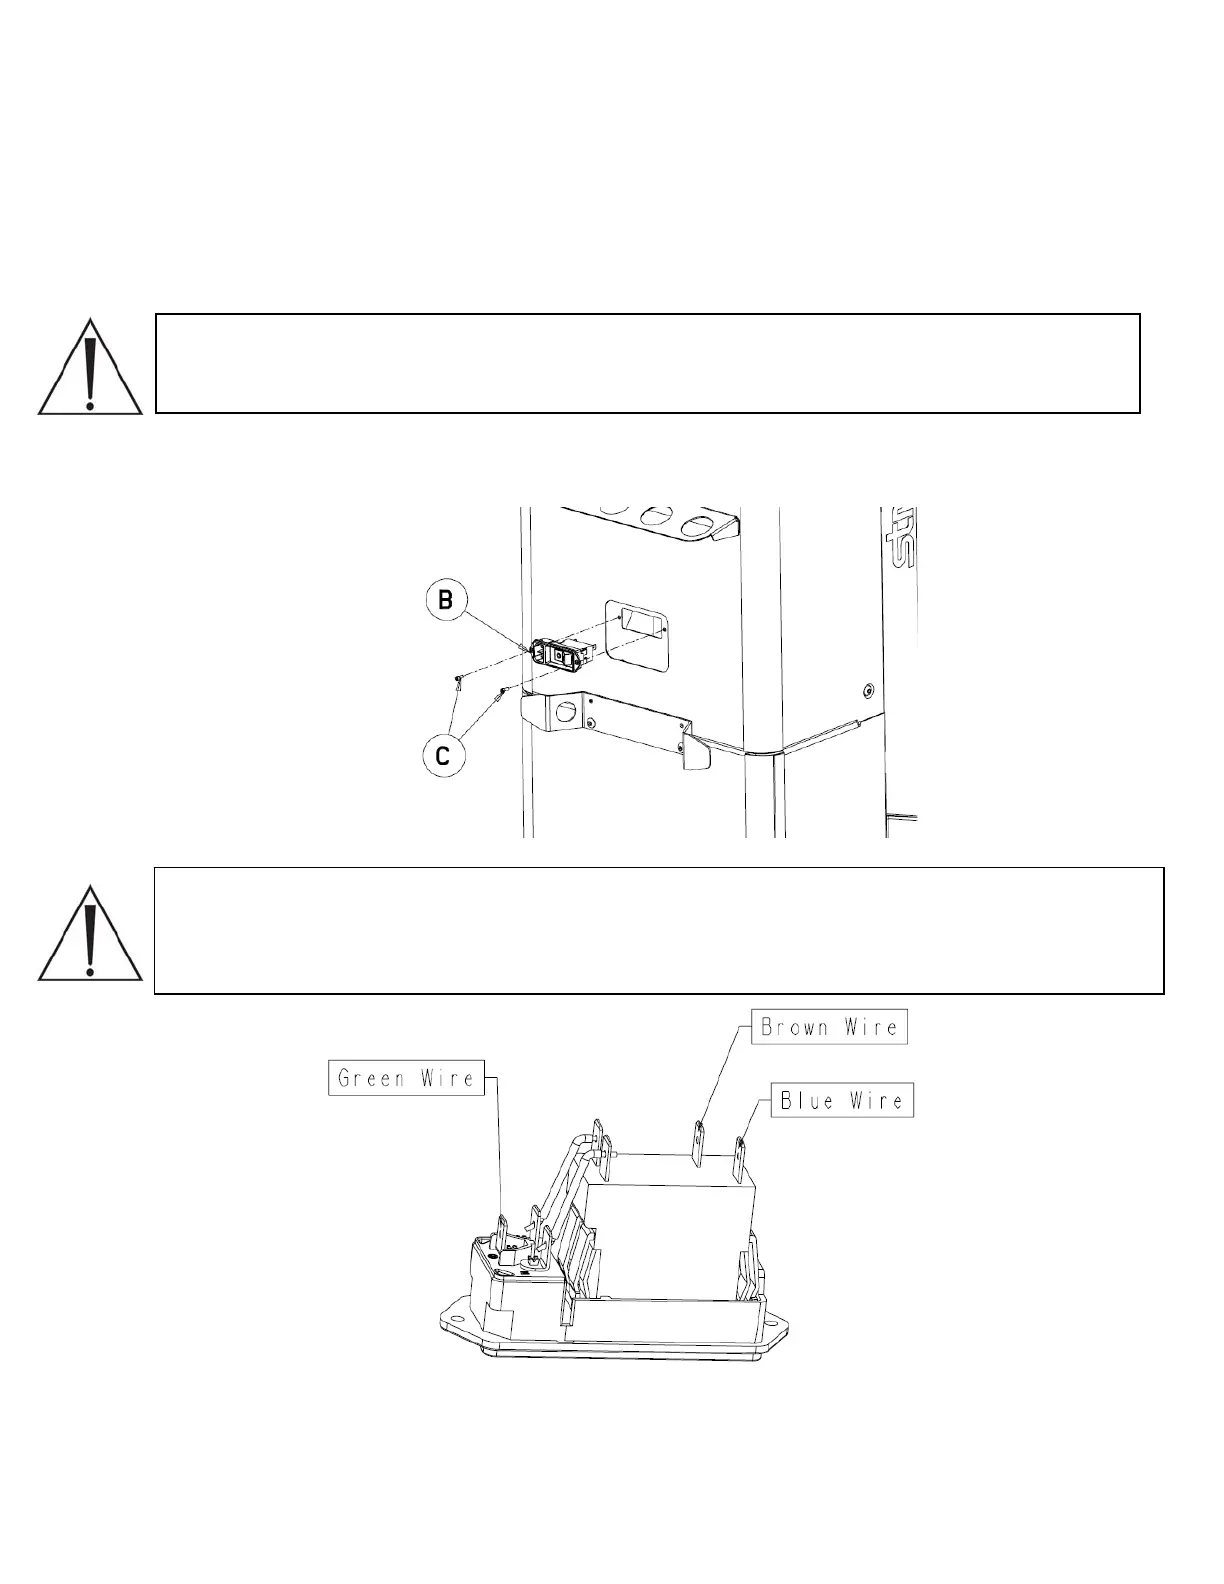
2. Pull the power entry module (P/N 0702-001-862) (C) out about two inches from the
rover and disconnect the green, blue, and brown wires from the back.
Note: When removing the wires on the back of the power entry module, pay attention to the
proper configuration. Extra prongs may exist that are not used for this application. The wires
should be connected as depicted below. The diagram represents removing the power entry
module and rotating it down 90°.
3. Remove the power entry module (P/N 0702-001-862) (C) and set aside.
2-68

 Loading...


