Power Distribution PCBA P/N 0702-001-035
Caution: Make sure proper Electro Static Discharge (ESD) measures are observed when
removing and replacing circuit boards. Failing to properly handle sensitive components can
cause damage to the circuits.
Warning: Make sure the rover is powered off before removing any circuit boards! Failure to
do so may cause serious personal injury and may severely damage the equipment.
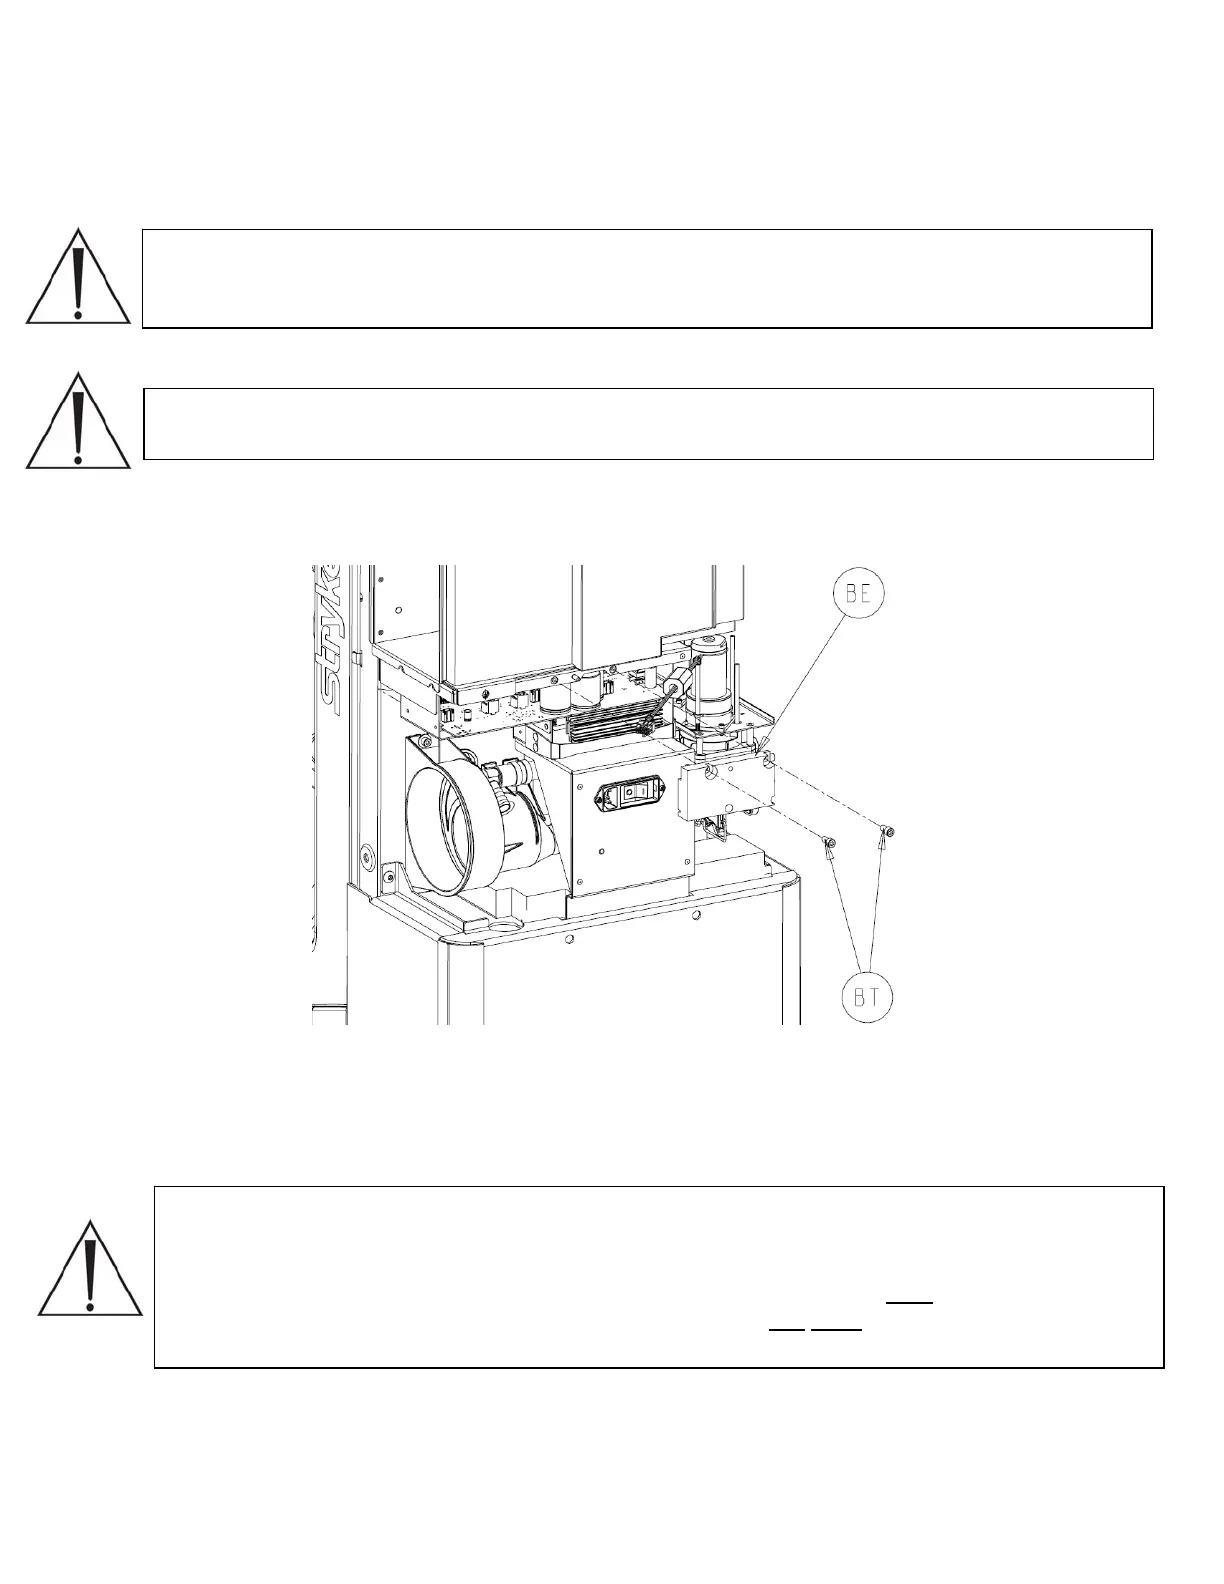
1. Using a 3/16” allen wrench, remove the two socket head cap screws (P/N 0004-645-
000) (BT) that secure the board block (P/N 0702-001-812) (BE) to the rover chassis.
2. Remove the board block (P/N 0702-001-812) (BE) and set aside.
3. Disconnect the four norprene vacuum sensor lines (two black and two white) going from
the vacuum manifold assembly going to the power distribution board.
Warning: The power distribution circuit board and the AC power circuit board interface with
the subsystems of the rover by mating connectors on the board with a series of backplane
connectors on the rover chassis. When removing these components, be sure to grasp the
board at both ends to ensure even distribution of pressure. Ensure ALL
connectors are
lined up correctly before reinserting circuit boards!! DO NOT force the circuit board into
place when reinstalling.
2-70

 Loading...


