EasyManuals Logo

Stryker Neptune 2 Service And Installation Manual

Stryker Neptune 2
232 pages
To Next Page IconTo Next Page
To Previous Page IconTo Previous Page
Page #39 background imageLoading...
Page #39 background image
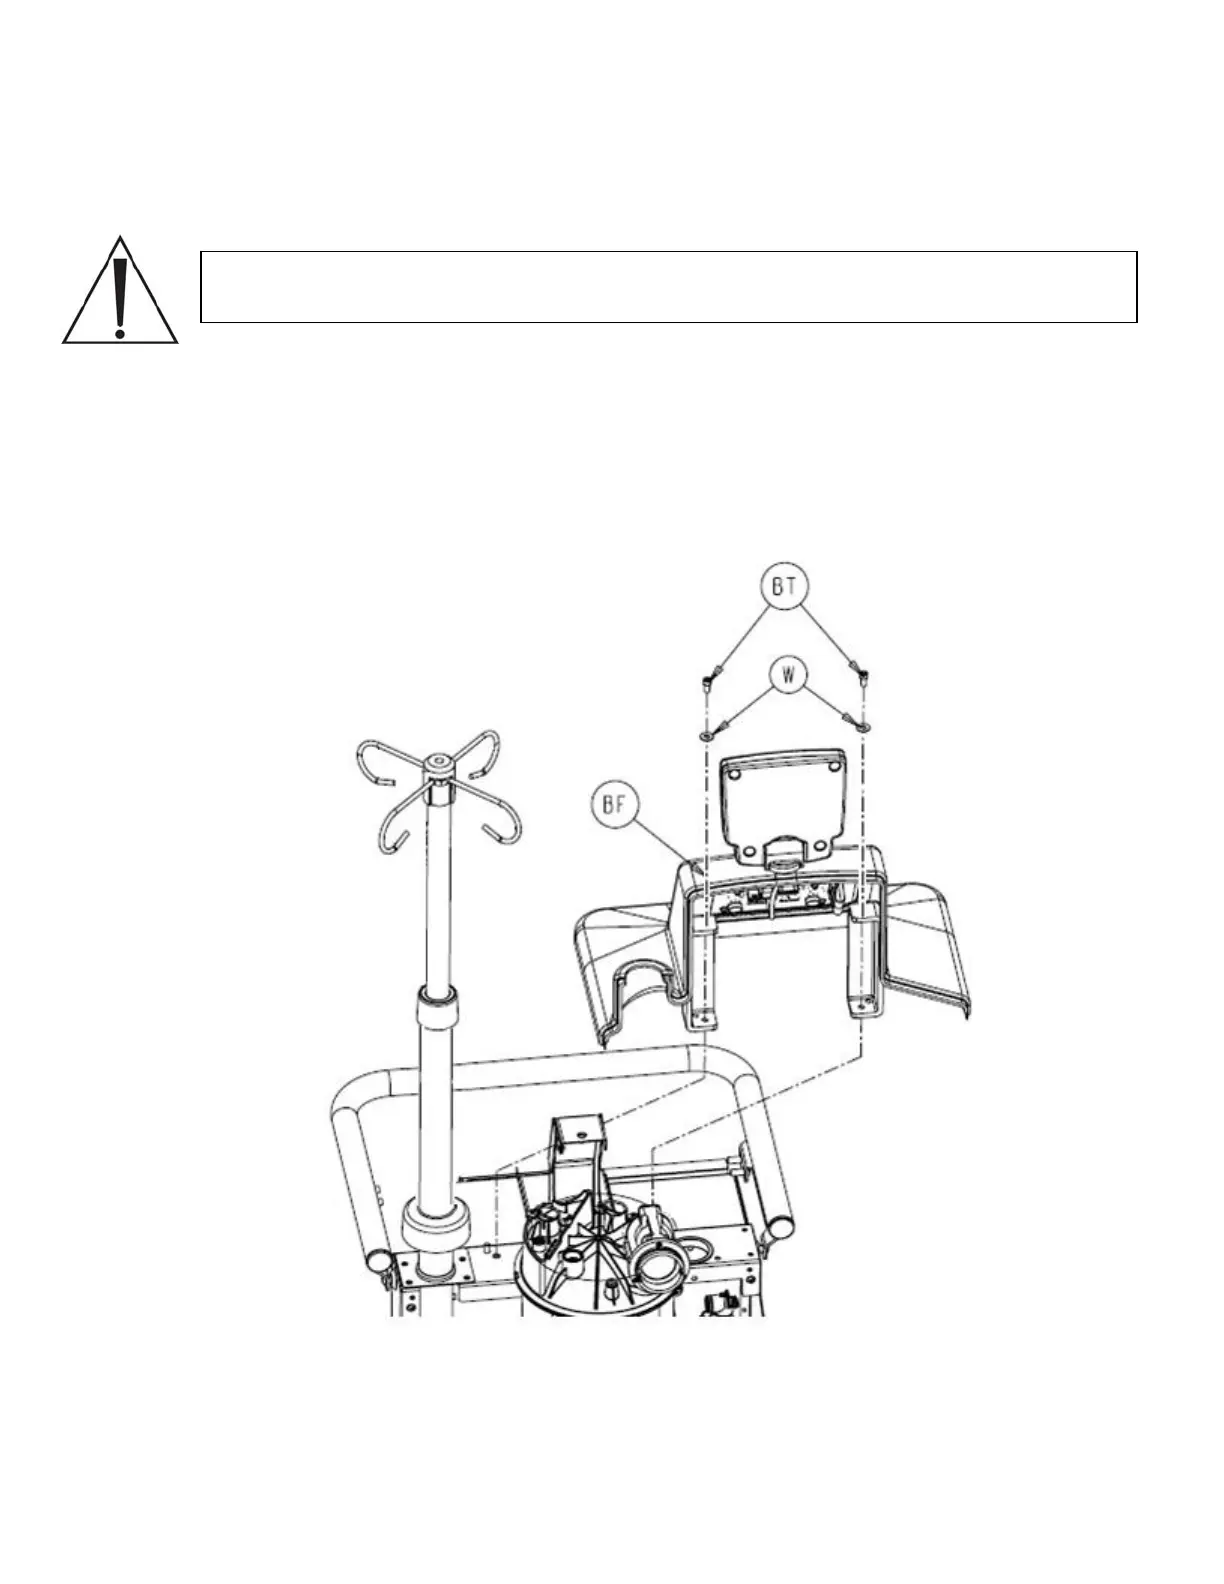
6. Remove two socket head cap screws (P/N 0004-645-000) (BT) and two flat washers
(P/N 0011-507-000) (W) from top cover assembly (P/N 0702-001-090) (BF).
Caution: Do not remove any connector by pulling on the wires. Doing so may
damage the equipment.
7. On the main control board (P/N 702-1-800), disconnect the cable labeled main
controller from the P2 connector and the cable labeled rover controller from the P4
connector. Unplug the serial number board from connector labeled J6 on the main
control board. (This connector is attached to the wire harness with a cable tie)
2-10

Table of Contents

Other manuals for Stryker Neptune 2

Questions and Answers:

Question and Answer IconNeed help?

Do you have a question about the Stryker Neptune 2 and is the answer not in the manual?

Stryker Neptune 2 Specifications

General IconGeneral
BrandStryker
ModelNeptune 2
CategoryMedical Equipment
LanguageEnglish

Related product manuals