3. Remove the rover power coupler cover (P/N 702-1-944) (P) and place aside.
4. Set the rover power coupler assembly (P/N 702-1-945) (N) inside the chassis. Take
caution not to put too much stress on the gray cable or bend the springs on the
assembly.
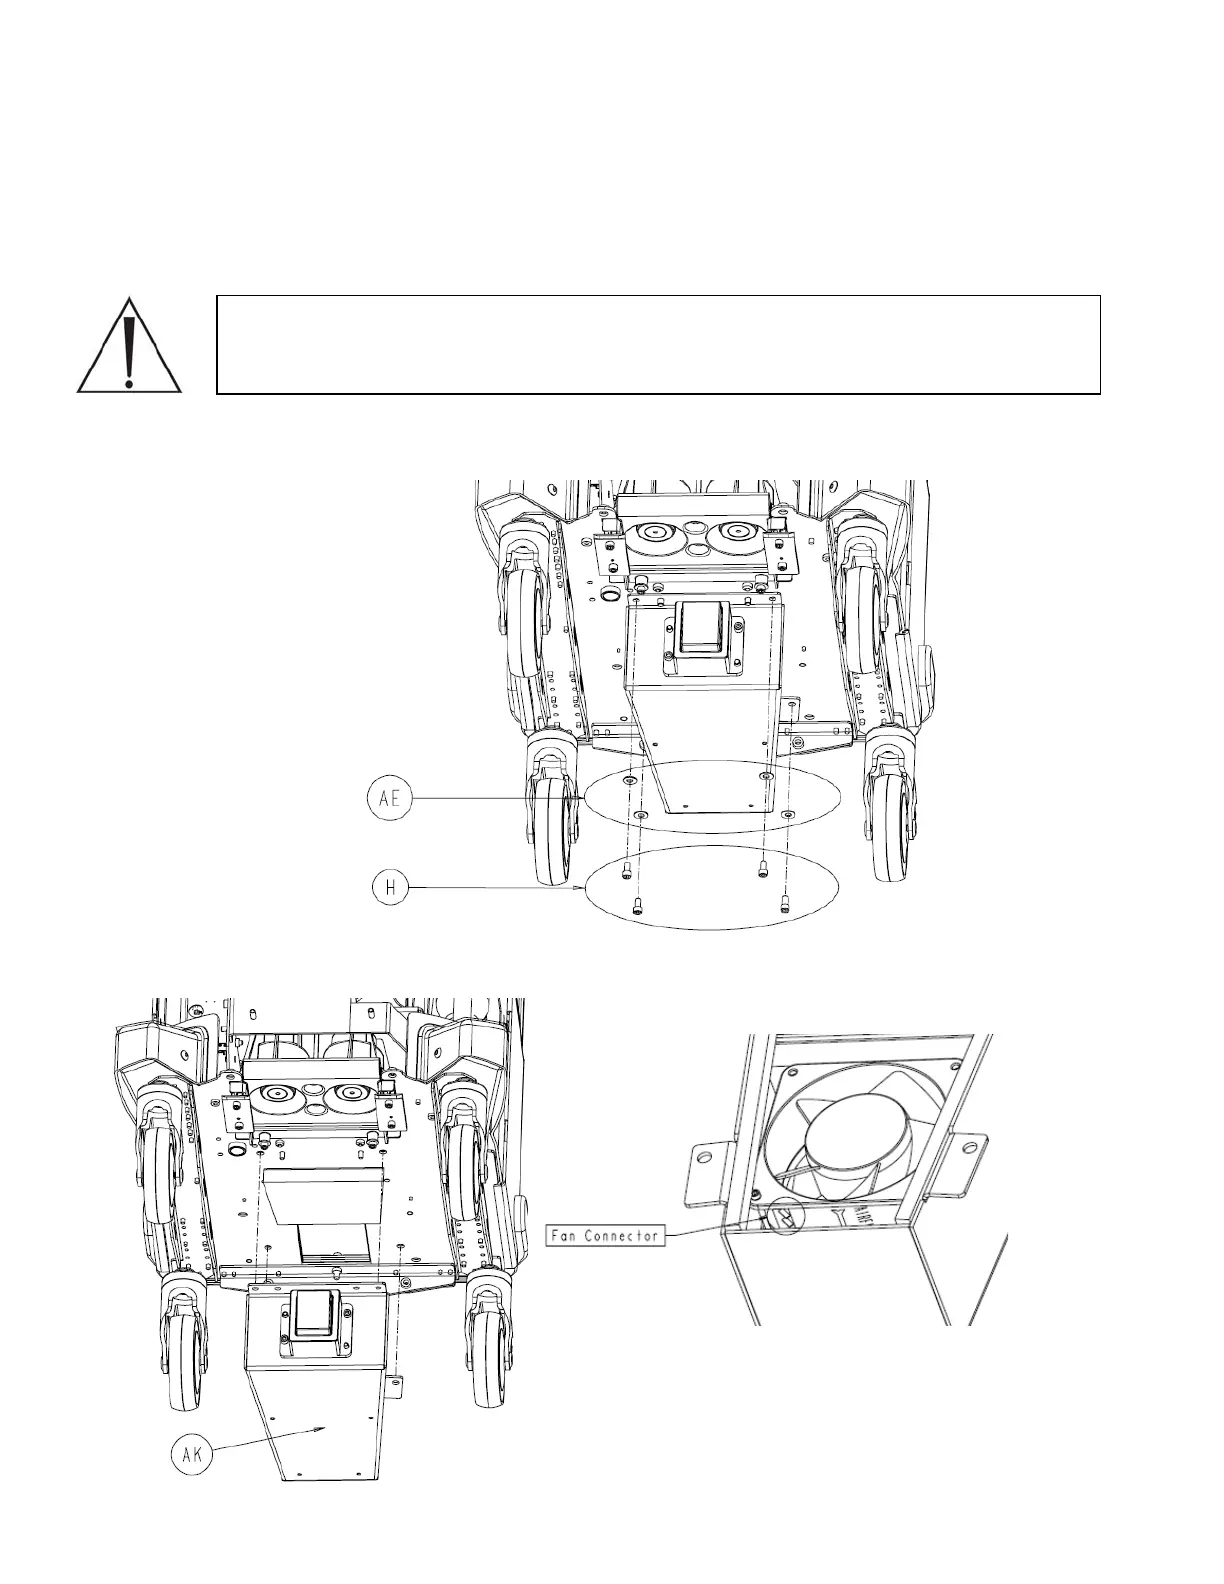
Note: The exhaust plenum assembly is heavy! When removing the hardware,
be prepared to support the weight of the plenum. Make sure to keep clear of the
underside of the plenum to avoid bodily injury.
5. Remove four socket head cap screws (P/N 0004-645-000) (H) and four ¼” flat
washers (P/N 0011-507-000) (AE) using a 3/16” allen wrench.
6. The exhaust plenum assembly (P/N 702-901-930) (AK) has a fan with a cable
connected to it. Disconnect the fan connector and set the assembly aside.
2-43
 Loading...


