GTS Technical Manual
9. April 2021 Edition: V1.00/2021 5-32
Copyright © 2020, Diversey
05.30.23 tool lowering unit - tool lowering unit - 3500µicro_V1.00.fm
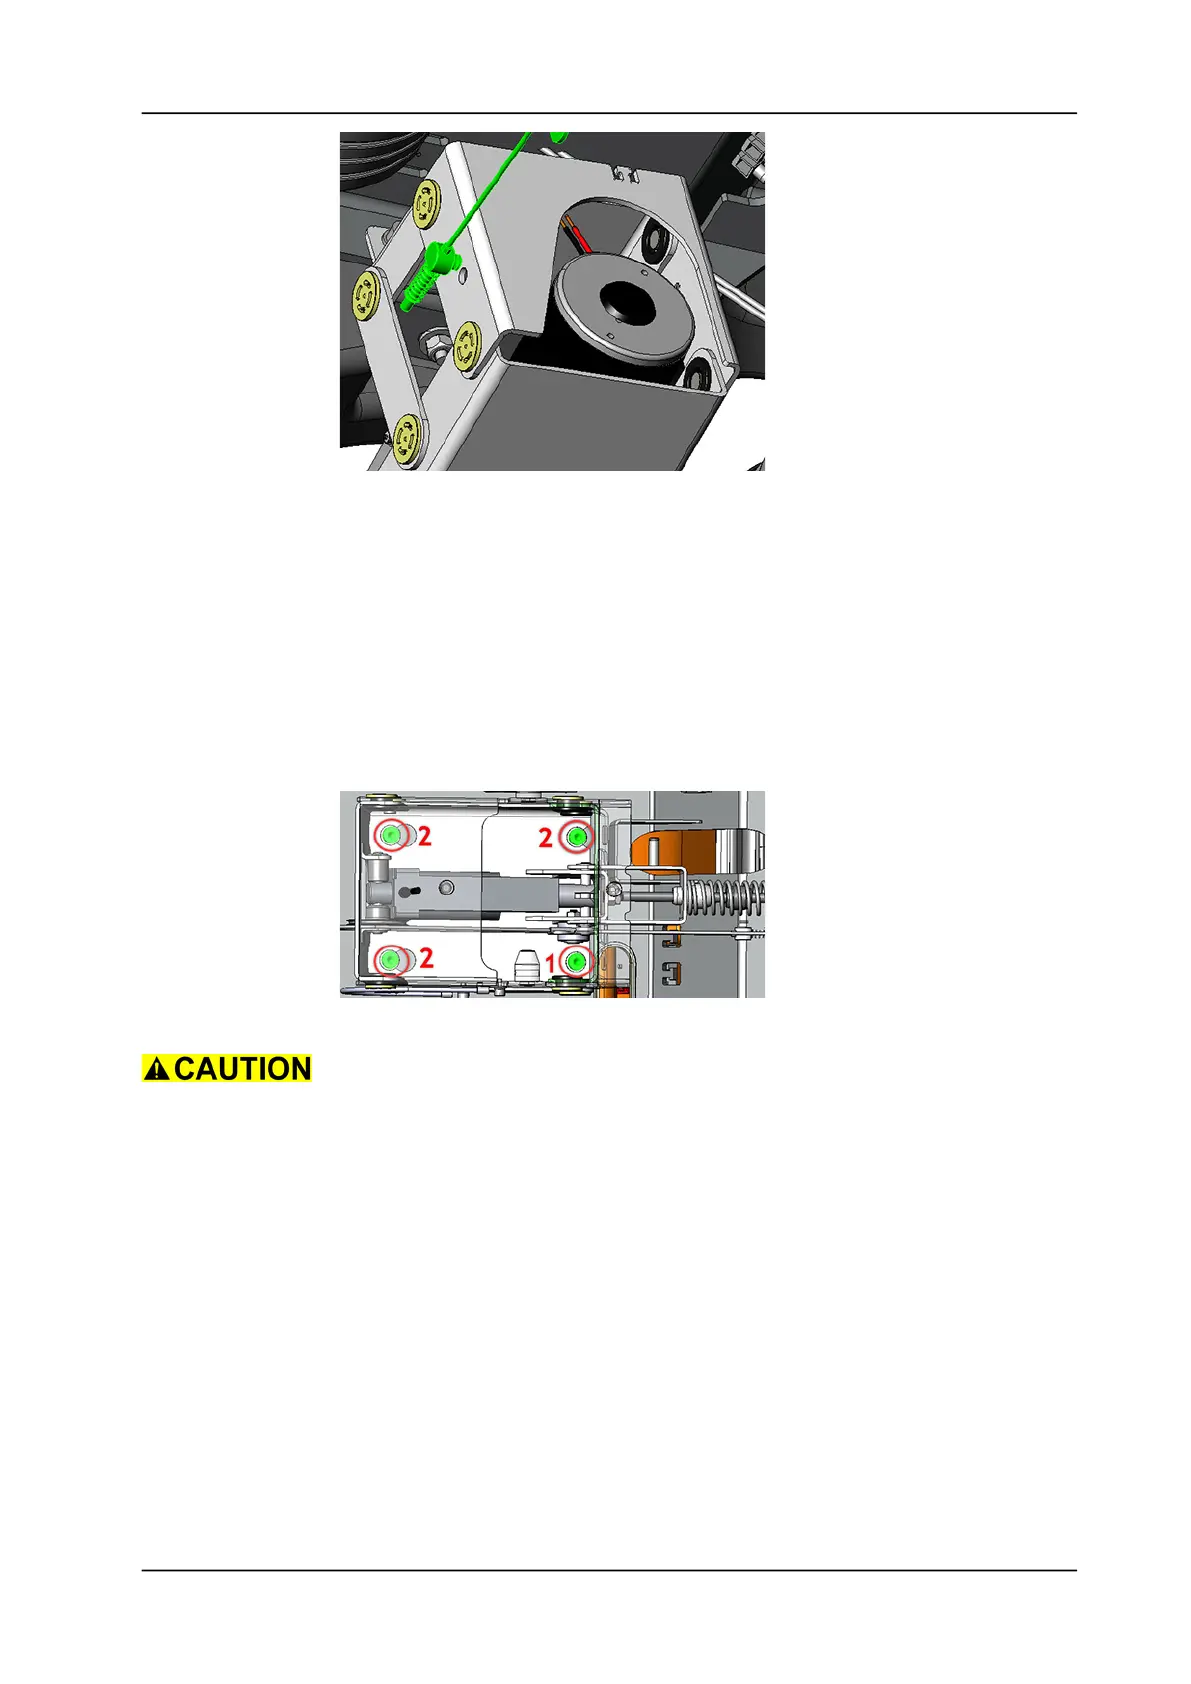
Picture 46: Metal rope fixation
Remarks
Further numbering refers to picture: Tool lowering unit fixation.
Four screws are holding the tool lowering unit on the machine chassis.
Three screws (2) are having a slot while one screw (1) secures the unit.
1 Remove fixation screw (4065050) of the tool lowering unit.
2 Loosen the 3 screws (4065050) of the tool lowering unit.
• Remove the tool lowering unit by pushing it to the back side.
Picture 47: Tool lowering unit fixation
Be aware of the weight of the tool lowering unit as it can fall down and
close.
Make sure that the metal rope compl (4134183) is free and does not
get caught when removing the tool lowering unit.
Only work on the brush lowering unit, when the emergency stop
button is permanently engaged.
There is a risk of cutting / squeezing fingers seriously if caught in the
closing scissors mechanism of the tool lowering unit. Do not reach
into the open tool lowering unit when loosening the screws or trying
to lower it down!
Missteps can lead to personal injury and damage to the machine.
• According to what you need to exchange, remove the existing
parts from the tool lowering unit and place it on the new one.