4-66 4181383 First Edition
ELECTRICAL
4
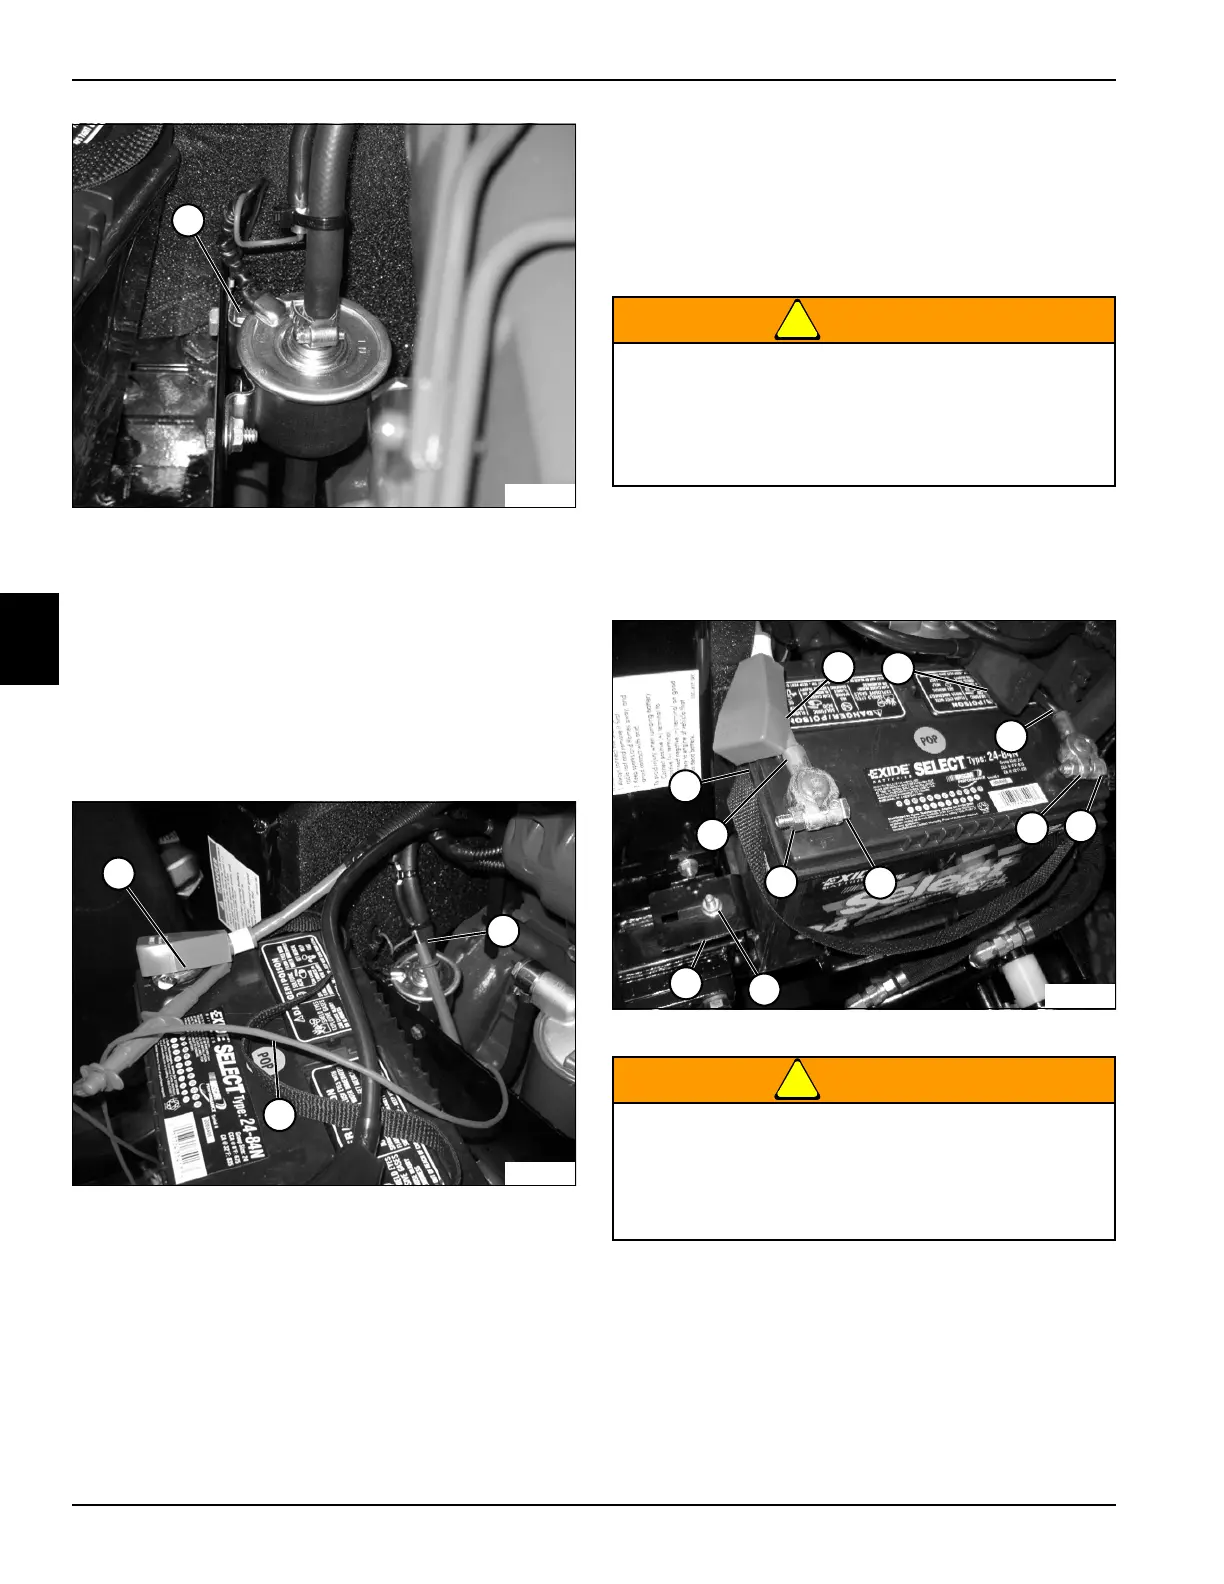
Figure 4-40
3. Connect the red test lead to the black fuel pump
ground wire (1).
4. Connect the black test lead to the negative (–)
battery terminal.
5. Check for continuity.
Is continuity indicated?
YES Proceed to step 6.
NO Check for proper ground at the pump.
Figure 4-41
6. Using a jumper wire (1), connect one end to the
power wire (2) pump side.
7. Touch the other end of the jumper to the positive (+)
battery terminal (3).
Does the fuel pump start?
YES The pump is good.
NO The pump is faulty; replace the pump.
Repair
Battery and Battery Tray
Removal and Installation
See Figures 4-42 and 4-43.
!
WARNING
1. Park the mower safely. (See “Park Mower Safely” on
page 1-5.)
2. Raise the hood.
Figure 4-42
!
WARNING
3. Remove nut (3) and screw (4), and disconnect the
negative (–) battery cable (5).
4. Remove the nut (9) and screw (6), and disconnect
the positive (+) battery cable (10).
5. Remove nut (7) and screw (not shown) and retainer
bracket (8) from the battery tray.
1
TN1616
TN1617
1
2
3
• Battery posts, terminals, and related
accessories contain lead and lead
compounds. Wash your hands after handling.
• Always wear eye protection when servicing
battery.
Always disconnect the negative terminal first and
positive terminal last. Connect positive terminal
first and negative terminal last. Use care when
testing live circuits to prevent arcing. Arcing
could result in death or serious injury.
TN1450
3
9
1
2
6
4
5
10
7
8
11
 Loading...


