4-76 4181383 First Edition
ELECTRICAL
4
Removal and Installation
See Figure 4-72.
NOTE
The raise and lower solenoid coils are shown; all
solenoids are removed and installed the same way.
1. Park the mower safely. (See “Park Mower Safely” on
page 1-5.)
2. Remove the center floorboard (raise and lower
solenoid coils) or locate deck valve beneath front
axle.
3. Disconnect the negative (–) battery cable at the
battery.
Figure 4-72
NOTE
Label connectors before disconnecting to ensure correct
installation.
4. Remove the boot (4), and slide it back over the wire,
and disconnect connector (5) from solenoid coil.
5. Remove nut (6), and remove the solenoid coil (7)
from the valve (8).
Installation Notes
• Clean cartridge of any debris or surface rust and
apply dielectric grease (Jacobsen part number
365422) to cartridge before installation.
• Install the solenoid coils by reversing the order of
removal.
• Tighten nut (6) to 7-10 lb-in. (0.7-0.10 N·m).
Fuel Solenoid
Removal and Installation
See Figure 4-73.
1. Park the mower safely. (See “Park Mower Safely” on
page 1-5.)
2. Raise the hood.
3. Disconnect the negative (–) battery cable at the
battery.
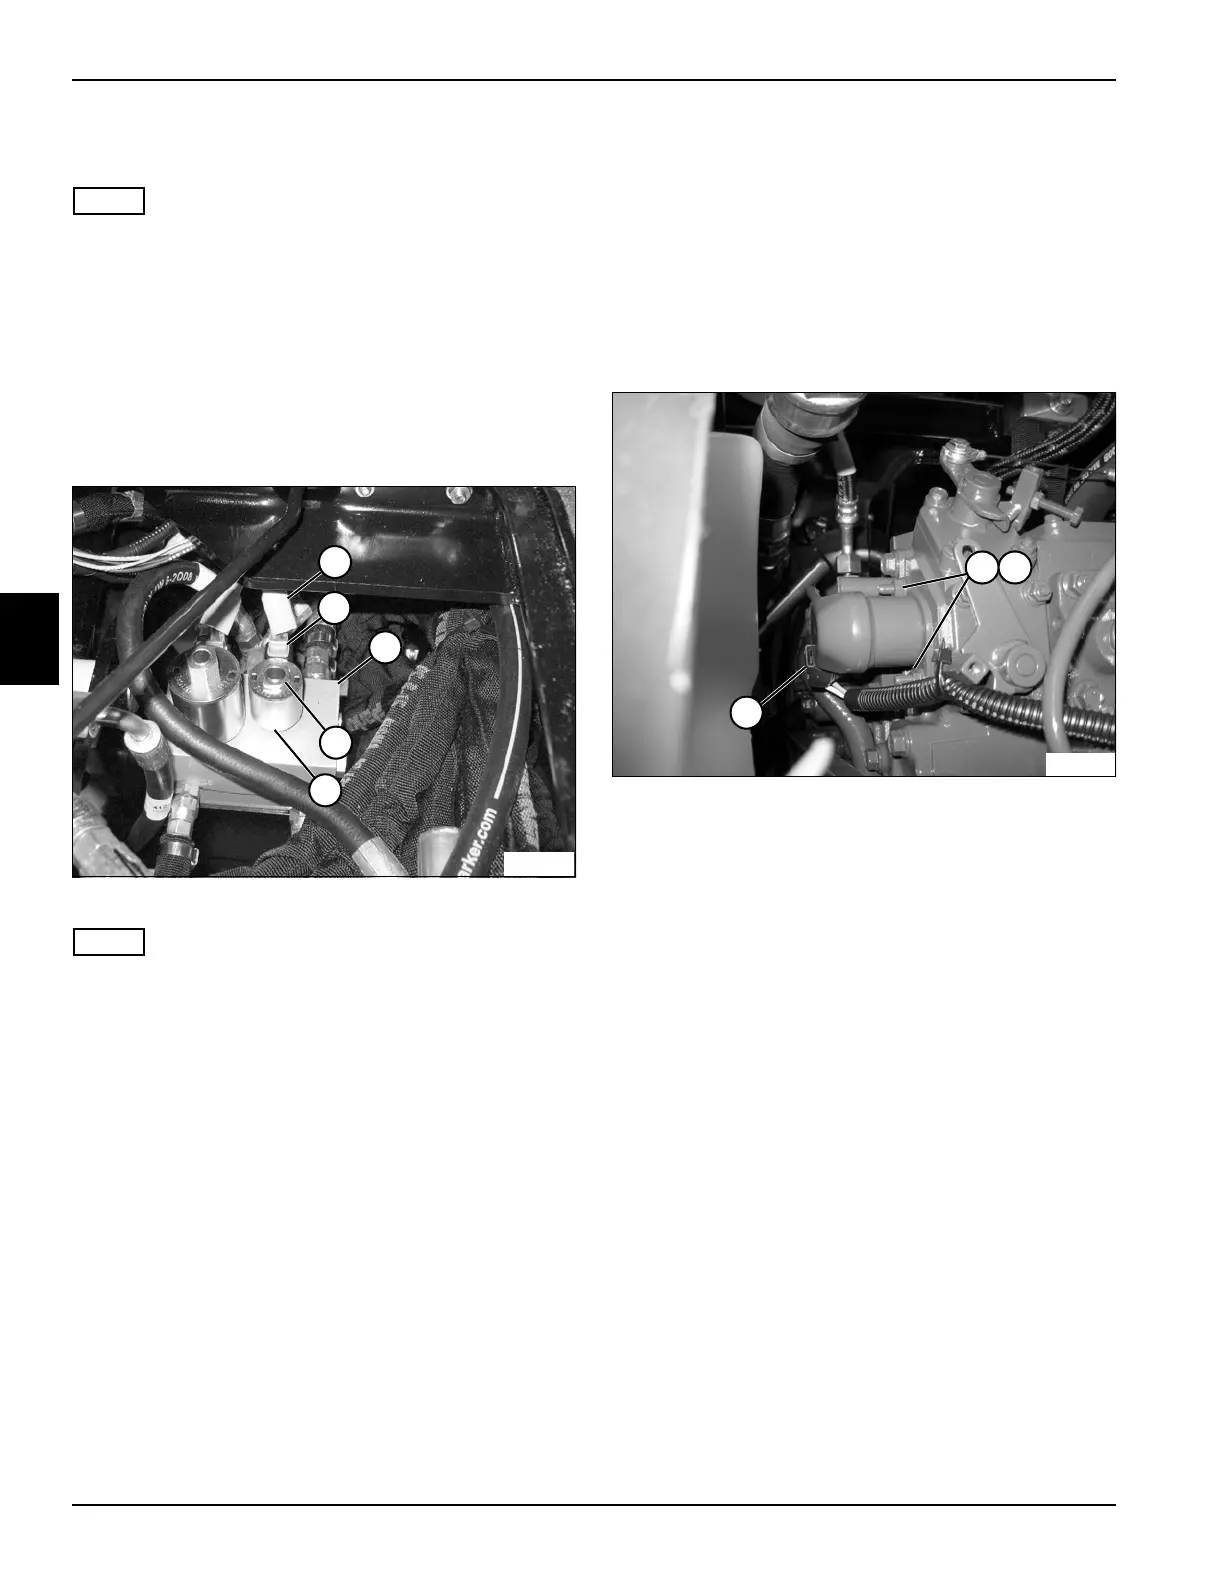
Figure 4-73
4. Disconnect the solenoid electrical connector (3).
5. Remove two nuts (1) and washers (2).
6. Remove solenoid.
Installation Note
Install the fuel shutoff solenoid by reversing the order of
removal.
TN1407
4
6
7
5
8
TN1500
3
1 2
 Loading...


