ENGINE
4181383 First Edition 3-7
3
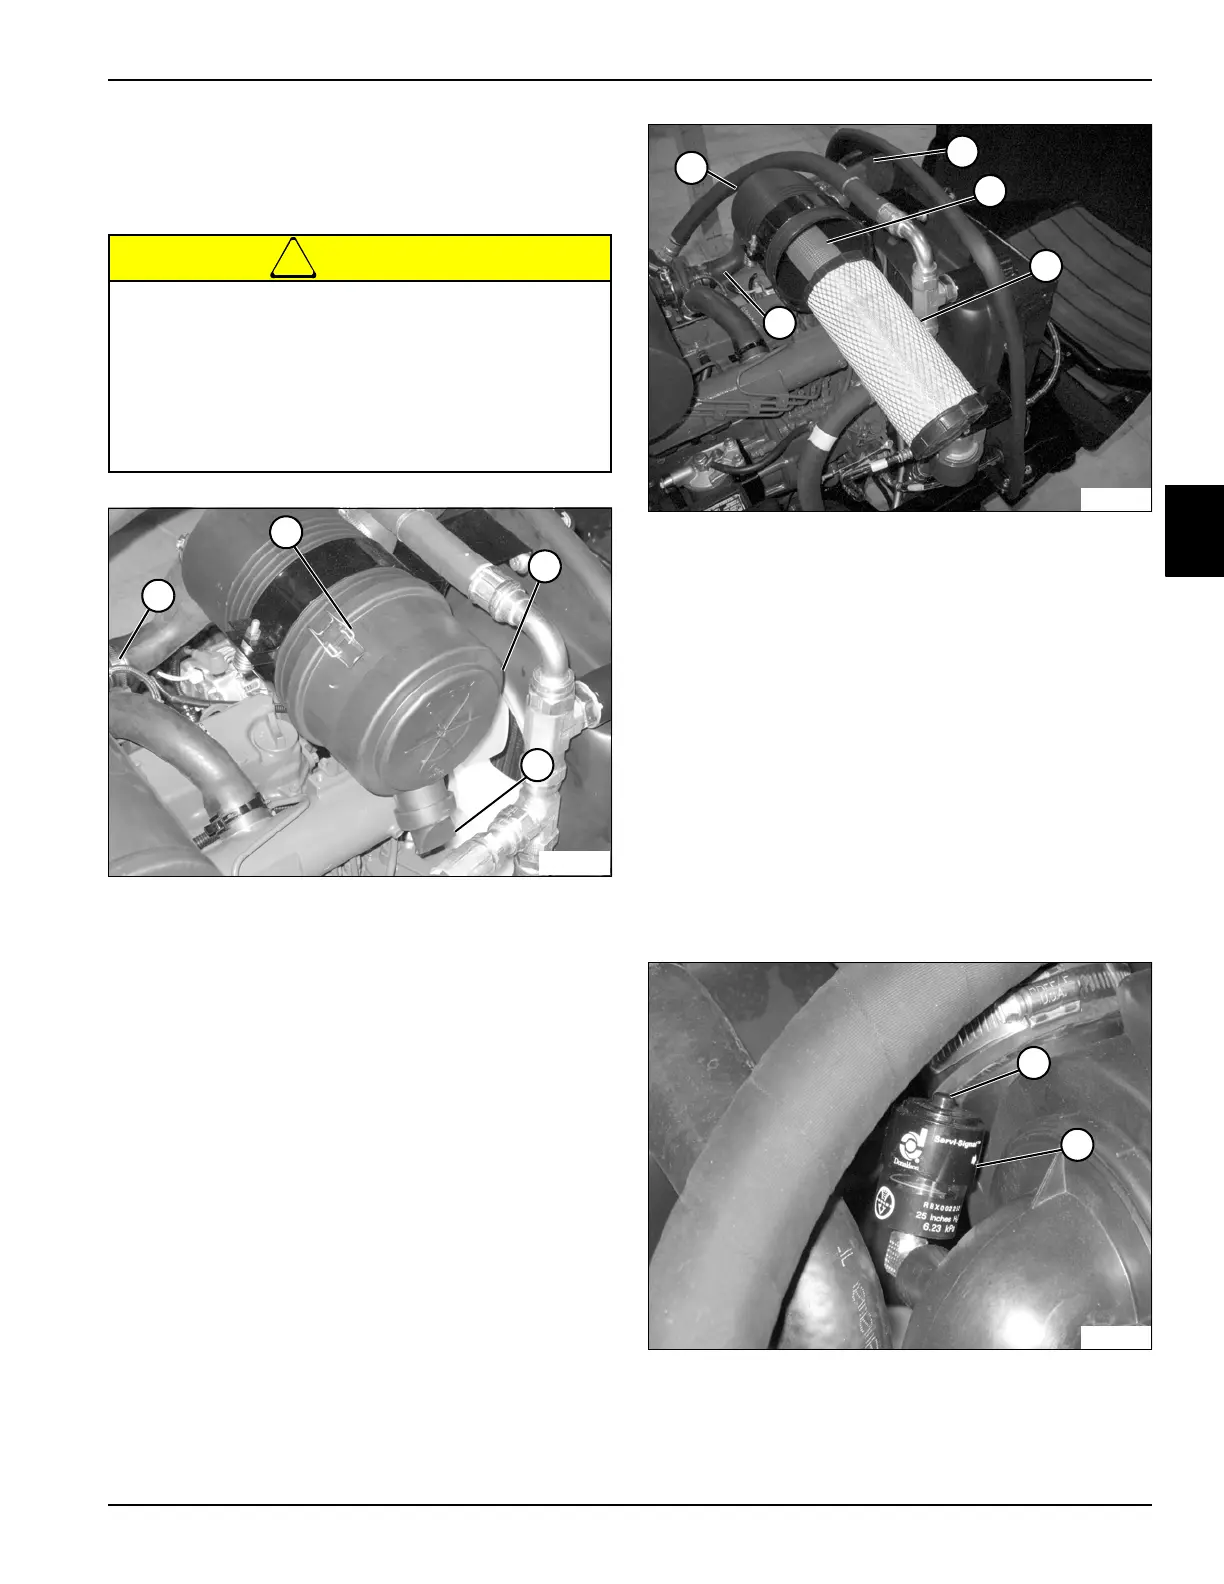
Air Cleaner Assembly
Removal and Installation
See Figures 3-8 through 3-10.
!
CAUTION
Figure 3-8
1. Park the mower safely. (See “Park Mower Safely” on
page 1-5.)
2. Stop the engine and remove the ignition key.
3. Release the spring clips (1) and remove the air
cleaner end cover (2).
4. Using damp lint-free cloths, thoroughly clean the
inside of the end cover including the dust evacuator
(3).
Figure 3-9
5. Pull the primary (8) and secondary (7) air filter
elements free of the housing (5). Using damp lint-free
cloths, clean the inside of the filter housing.
6. Inspect the air inlet and intake hoses (6) for wear,
damage, and cracks. Replace all damaged hoses. Be
sure the hose clamps (4) secure the hoses without
leaks.
7. Inspect the new filter elements. Do not use a
damaged element.
8. Install the new primary and secondary filter
elements, making sure they are properly seated in
the housing.
9. Install the end cover with the dust evacuator (3)
located at the bottom of the assembly. Secure with
spring clips.
Figure 3-10
10. Reset the air filter restriction gauge by pressing the
button (9) on the end of the indicator (10).
• Do not open the air cleaner assembly for
inspection and cleaning until the air filter
restriction gauge indicates air filter
restriction. Removing the air filter increases
the possibility of dust, dirt, and contaminants
entering the engine.
• Do not remove air filter with engine running.
TN1432
1
2
3
4
TN1434
7
8
5
6
6
9
10
TN1433
 Loading...


