4
© 2011 - 2015 TOSHIBA TEC CORPORATION All rights reserved e-STUDIO5540C/6540C/6550C/5560C/6560C/6570C
DISASSEMBLY and REPLACEMENT
4 - 27
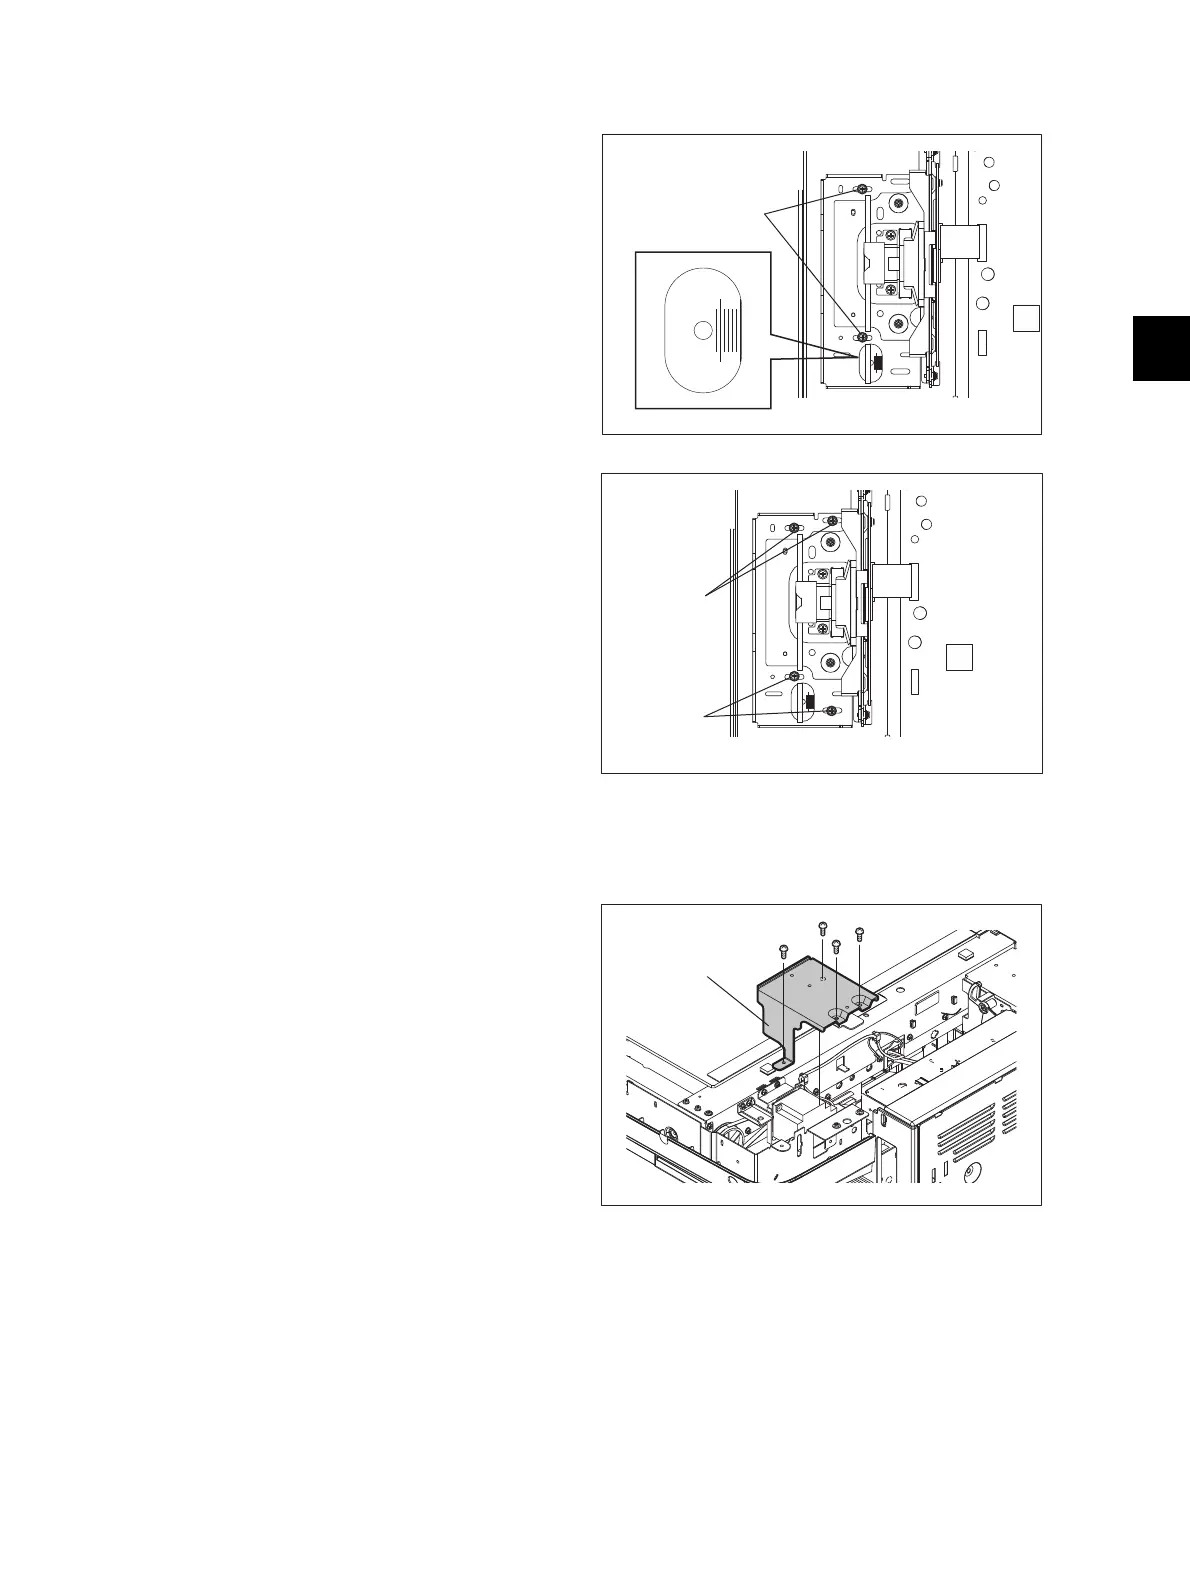
[B] Installation of lens unit
4.3.12 Scan motor (M1)
(1) Attach the lens unit and fix it temporarily with
2 screws.
(2) Match the center scale of the plate in which
the unit is to be installed and the rightmost
scale of the adjusting hole on the lens unit
plate.
Fig. 4-72
(3) Tighten 4 screws securely to fix the lens unit
while pushing it to the rear side.
Fig. 4-73
(1) Remove the RADF.
(2) Take off the top rear cover.
P. 4-7"4.1.20 Top rear cover"
(3) Remove 4 screws and take off the bracket.
Fig. 4-74
 Loading...