e-STUDIO5540C/6540C/6550C/5560C/6560C/6570C © 2011 - 2015 TOSHIBA TEC CORPORATION All rights reserved
DISASSEMBLY and REPLACEMENT
4 - 222
4.10.18 Bridge unit transport roller-2
(1) Take off the reverse roller.
P. 4-225"4.10.20 Reverse roller"
(2) Take off transport path switching solenoid-1.
P. 4-227"4.10.23 Transport path switching
solenoid-1 (SOL1)"
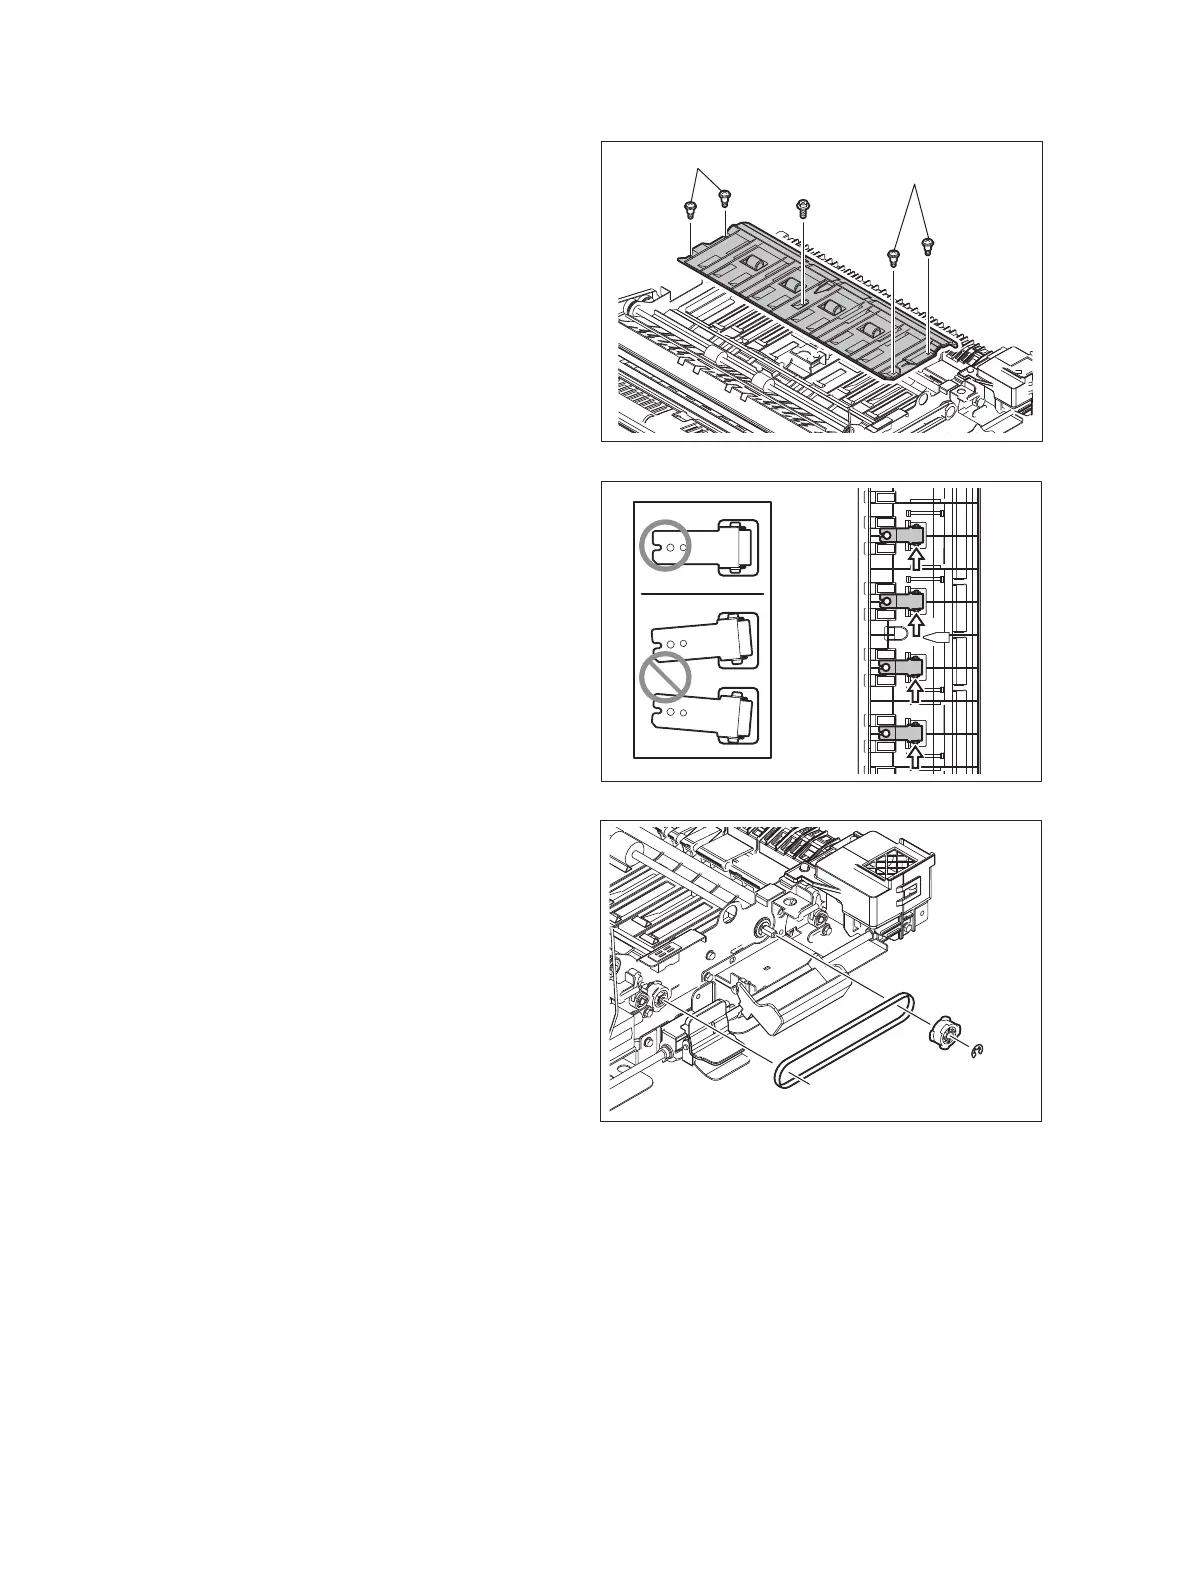
(3) Take off transport guide-2 by removing 5
screws.
Notes:
The type of the screw differs depending on
the installation position.
Fig. 4-644
Notes:
The leaf springs with the idling rollers are
usually not needed to be disassembled,
however, if they are removed and installed,
fix the screws while pushing the rollers in the
direction of the arrow in the figure to prevent
the exit paper side deviation.
After the rollers are installed, check that the
rollers are parallel to the installation holes.
Fig. 4-645
(4) Remove 1 E-ring, the gear and the belt.
Fig. 4-646
Shoulder screw
Shoulder screw
 Loading...