240
Model Code Page
51. Brake system
1. 9. 2002
6000--8950 511 2
8. 11. 1990
12. Fit the support and tighten it to 80 Nm
(8350---8950Hi, L32106---: 45 Nm).
11. Fit t he final drives (see Op. 451 1E) and adjust brakes
(see next instr. B).
B. Adjusting foot brakes
Note! The pedal free travel should be 70---80 mm with the
pedals latched together. Adjust as follows:
1. Fit blocks in front of the front wheels to prevent the trac-
tor from moving. When adjusting the service brakes, the
parking brake must not be engaged. In HiTech ---models the
engine must be in running and the shuttle lever must not
be in the P---position.
1
1
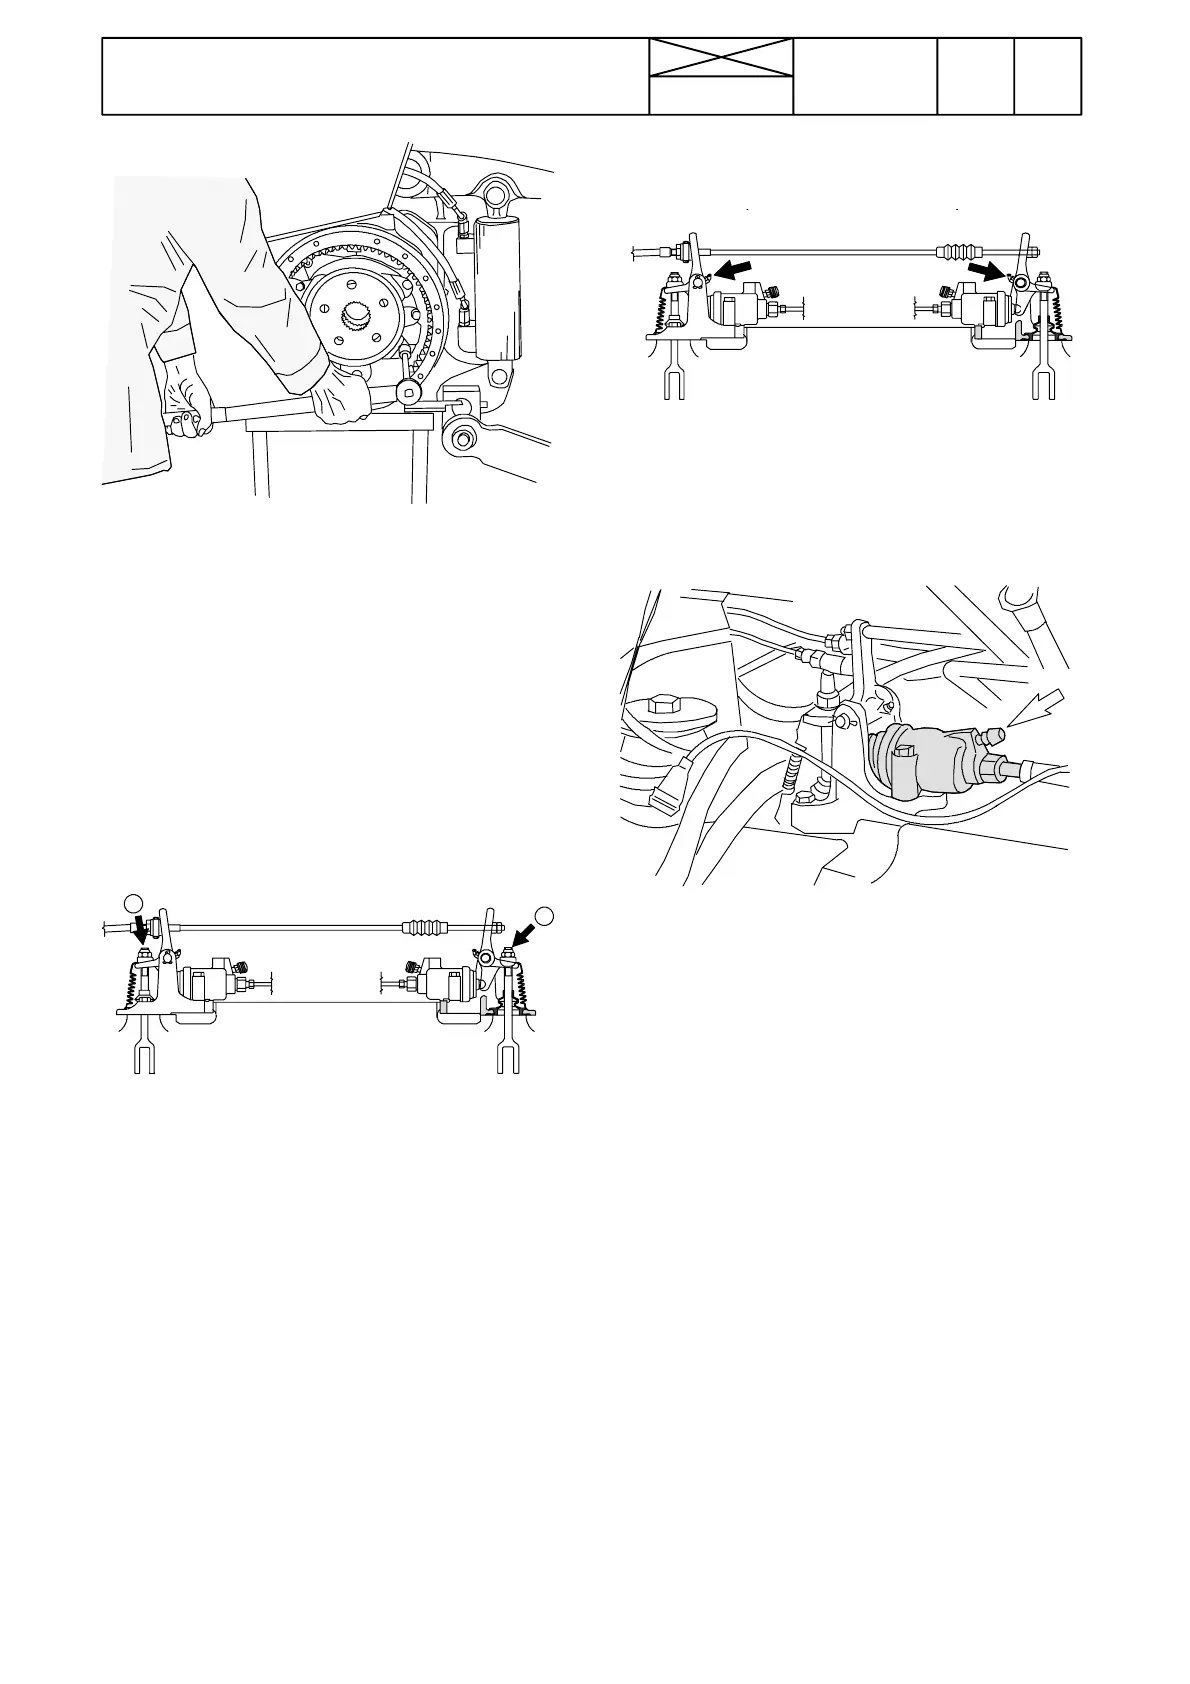
Final drives 300, 450 and 650:
2a. Raise the rear wheels off the ground and adjust both
brakes separately with adjusting nuts (1) until the wheels
cannot be turned by hand any further.
Slacken the adjusting nuts two turns and check that the
wheels can rotate freely.
Final drives 700 (8350---8950Hi, L32106 ---):
2b. Tighten the adjusting nuts (1) to 15 Nm and unscrew
them one and a half turn.
3. Check that the brake action is the same on both wheels
while driving with the pedals latched together. Adjust if
necessary.
5. Check the pedal free travel.
Note! Tractors equipped with the reverse drive controls:
Adjust first the front pedals according to the instruction
above. After this is adjusted the rear br ake pedal by adjust-
ing the lenght of the cable so that the rear brake pedal free
travel becomes 20 mm, see instruction on page 511/3.
Maintenance
Note! Grease brake lever nipples (see arrows) weekly (or
every 50 running hours). It is recommended, that the brake
fluid is changed every other year.
C. Bleeding brake system
Note! Bot h brake cylinders have a bleeding nipple (see
arrow). Bleed both brakes individually (pedals not latched to-
gether).
1. Chec k thet the brake fluid reservo i r is full.
2. Pump several times with the pedal in order to built up the
pressure in the system.
3. Depress one of the brake pedals and at the same time open
the bleed nipple on the br ake which is being actuated by the
pedal. Close the nipple and slo wly let the brake pedal up
again.
4. Repeat the pumping action with the brake pedal until the
brake fluid which runs out at the bleeding nipple is completely
free of air.
5. The procedure for bleeding the brakes is the same on both
sides.