Inserting and removing the DI probe 7-7
Tip: The instrument has a microswitch to prevent the probe heater being
activated if the probe is not fully inserted.
Inserting the DI probe:
4. Connect the cooling water tubes to the water chiller or other suitable
water cooling system. Connectors are available for use with common
water chillers or mains water.
5. Connect the probe’s lead to the probe connector on the instrument’s side
panel.
6. Press the VAC button on the instrument’s side panel.
Tip: In the MassLynx Tune window, click Vacuum > Monitor to display
the vacuum levels. You should see the backing pressure rise and then
fall into the green region as the probe insertion lock is pumped out
(evacuated).
Caution: To avoid damage to the instrument, do not apply more
than 40 psi to the water connection.
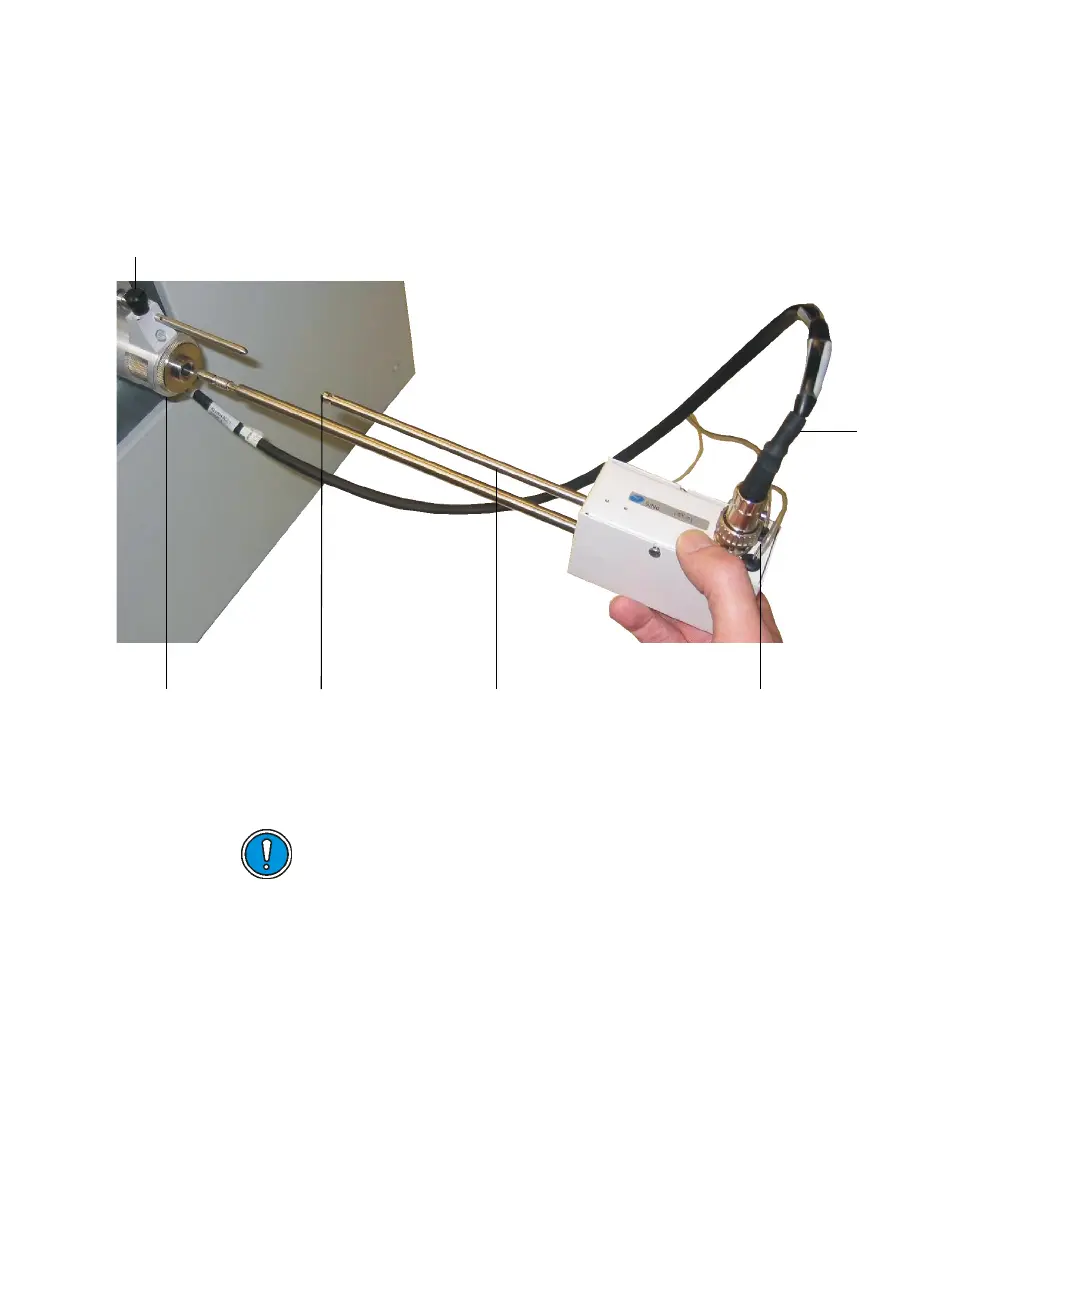
Cooling water tubesGuide rodFirst stopInsertion lock
Probe cable
Probe retaining knob