GENERAL
M6060, M7060, WSM
G-49
Replacing Light Bulb
• Be careful not to drop the bulb, hit anything against the
lamp, apply excess force, and get the lamp scratched. If
broken, glass may cause injury. Pay more attention to
halogen lamps in particular, which have high pressure
inside.
• Before replacing the lamp, be sure to turn off the light and
wait until the bulb cools down, otherwise, you may get
burned.
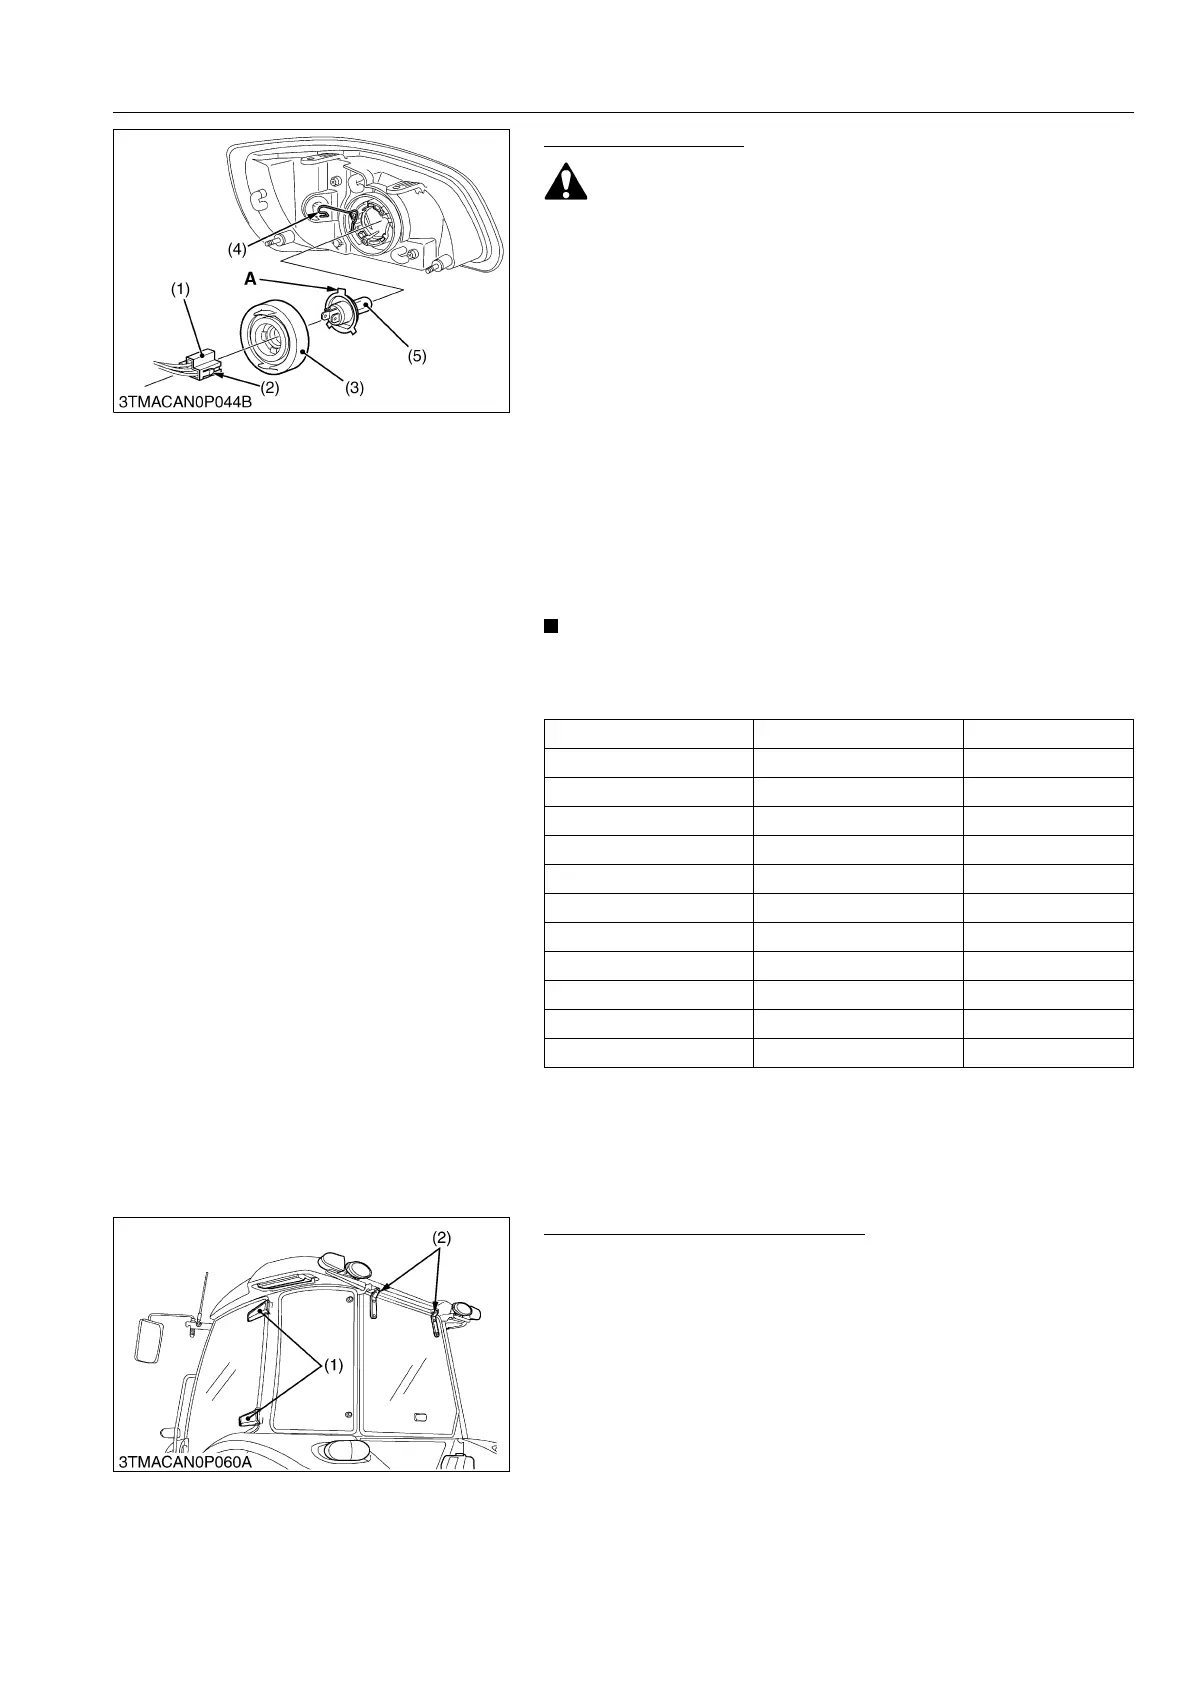
Head lights
1. While pushing the right and left lock buttons (2), pull and remove
the electrical connector (1).
2. Remove the rubber boot (3).
3. Remove the clamping fixture (4) and the bulb (5).
4. Replace with a new bulb and reinstall the head lamp assembly
in the reverse order.
Other lights
1. Remove the lens and replace the bulb.
• Be sure to use a new bulb of the specified wattage.
• Never touch the bulb surface (glass) with bare hands.
Fingerprints, for example, may break the bulb.
9Y1210828GEG0077US0
Lubricating Points (CABIN Model)
9Y1210828GEG0078US0
Light Capacity Remark
Head lights 12V , 55 / 60 W (H4)
Hazard lights (ROPS) 12 V, 23 W
Hazard lights (CABIN) 12 V, 21 W
Turn signal 12 V, 21 W
Brake stop light / Tail light 12 V, 5 W
Work light (if equipped) 12 V, 35 W
Front work light 12 V, 21 W
Work light (for outer roof) 12 V, 55 W CABIN Model
Dome light (Room lamp) 12 V, 5 W CABIN Model
Front position light 12 V, 10 W
License plate light 12 V, 10 W
(1) Electrical Connector
(2) Lock Button
(3) Rubber Boot
(4) Clamping Fixture
(5) Bulb
(A) Base's wider projection to face
upward
(1) Door Hinge (2) Rear Window Hinge