Page 148 160337-000 Rev D, 30 September, 2013 Xiotech—Proprietary
ISE User Guide FRU Replacement
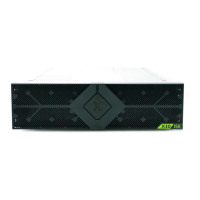
Power Supply
Prior to changing a power supply, check the power supply cables at the power supply connector and the AC
receptacle to be sure they are properly and securely seated. Then use the techniques in Step 1 below to verify
that the power supply needs to be replaced. If replacement is required, then steps 2 through 16 below should
be used in replacing the failing power supply.
Note. The cooling design of the ISE requires that all FRUs be present. Operating the ISE without all
FRUs in the bays has a detrimental effect on system cooling. The ISE should not be operated with the
power supply uninstalled for longer than necessary while installing the new unit.
1. Ensure that the FRU to be replaced has a status of Critical or Non-Operational as follows:
• From the Web-Mgt, select the
Environment
>>
Power Supply Information
view or click the link in the left
navigation pane.
• From the CLI, enter show ps.
2. Identify the unit to be replaced by locating the power supply with its amber LED
ON and green LED OFF.
3. Press the switch on the power supply to the
OFF position.
4. Remove the power cord from the power supply.
5. Using a Phillips screwdriver, loosen the two captive screws securing the latch handle.
6. Open the latch handle fully to unseat the power supply.
7. Pull the power supply out of the chassis by its latch handle.
8. Check the replacement power supply to be sure that the switch is in the
OFF position.
9. Loosen the two captive screws on the latch handle of the replacement power supply, if necessary, and
open the latch handle.
10. Insert the replacement power supply fully into the chassis, closing its latch handle to seat and secure it.
11. Gently tighten the latch handle captive screws (not to exceed 3 inch-pounds), taking care not to over-
tighten them.
12. Plug the power cord into the power supply.
13. Press the switch on the power supply to the
ON position.
14. Verify that the green LED is
ON and the amber LED is OFF.
15. Check for system detection of the power supply insertion as described in “Seating FRUs” on page 147.
16. Ensure that the status of the new power supply is operational as follows:
• From the Web-Mgt, select the
Environment
>>
Power Supply Information
view or click the link in the left
navigation pane.
• From the CLI, enter show ps.
ISE Supercapacitor Unit
Typically, only a failed supercapacitor unit (amber LED on) should be replaced. A supercapacitor can be
replaced while the system is actively performing data I/O. Prior to changing a supercapacitor, check the state of
both supercapacitors. Use the techniques in Step 1 below to verify a supercapacitor replacement is required.
Then follow Step 2 through Step 11 (below) to replace any failing supercapacitor unit.
Note. The cooling design of the ISE requires that all FRUs be present in each FRU bay. Operating the
ISE without all FRUs in the bays has a detrimental effect on system cooling. Do not operate the ISE with the
supercapacitor unit uninstalled for longer than necessary to install the new supercapacitor unit.
Note. The supercapacitor unit contains no lithium ion batteries.
 Loading...