Page 58 160337-000 Rev D, 30 September, 2013 Xiotech—Proprietary
ISE User Guide Initialize and Configure
Creating Volumes
This section details the steps to create volumes using the Web-Mgt and the CLI.
Orchestrator
To create volumes using the Orchestrator, select
All Devices
>>
ise_name
>>
Storage View
>>
Volumes
then
click
A
DD
V
OLUME. (See the Orchestrator User Guide.)
Web-Mgt
To create volumes using the Web-Mgt, follow the steps below.
Note. Cache policy, volume-host mapping, LUN number, and volume size can be modified after the
volume is created.
1. Place the pointer over the
Storage
tab on any Web-Mgt panel and the Storage drop-down menu appears.
2. Select
create volume
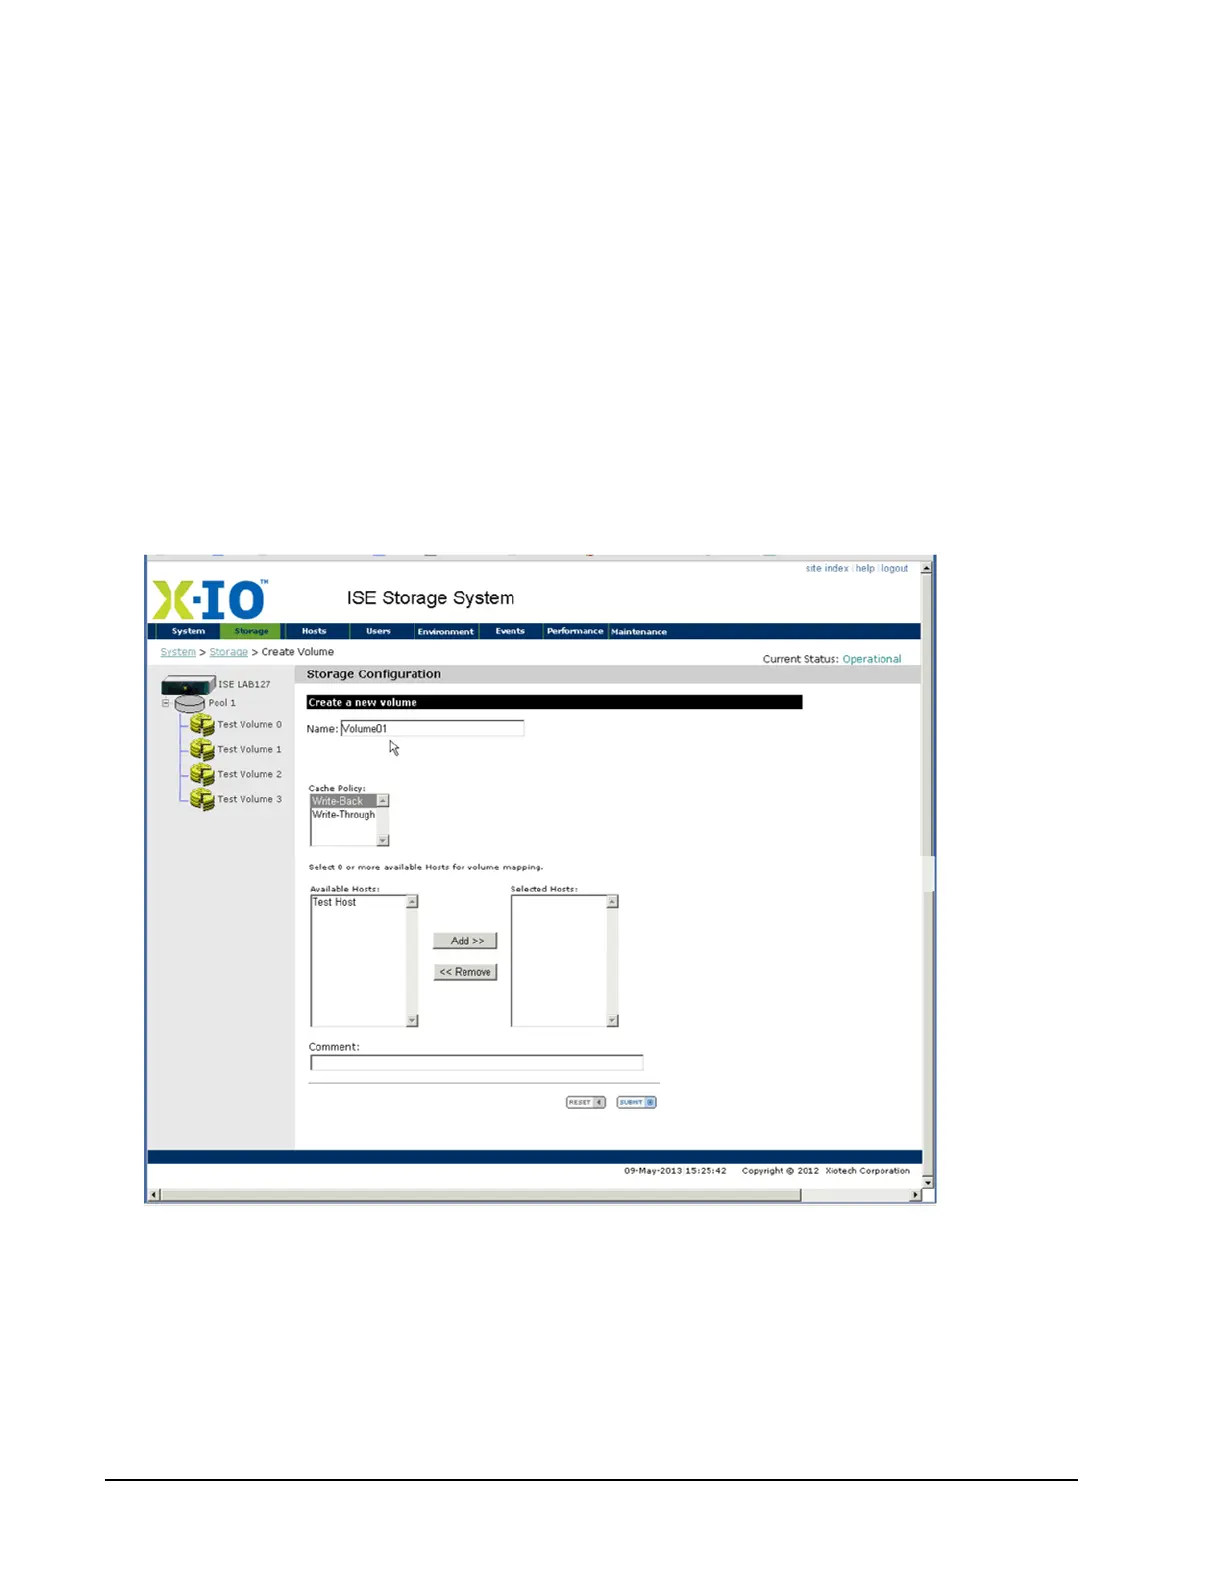
from the menu options to change to the Storage Configuration view as shown below
(Figure 40).
Figure 40. Web-Mgt—Storage Configuration
3. Enter an alphanumeric string of up to thirty-two characters for the volume being created in the Name field.
The name cannot begin with a numeric character and may contain special characters except those listed in
“Command Line Interface (CLI)” on page 45.
4. Select the cache policy (
Write-Back
or
Write-Through
) for this volume.
5. From the available pools, select the RAID level and size, where the remaining capacity is included with the
RAID type. A selected RAID level’s remaining capacity is displayed in the
Capacity in Gigabytes
field.
 Loading...