Page 12 160337-000 Rev D, 30 September, 2013 Xiotech—Proprietary
ISE User Guide Installation
Rack ISE Chassis
The ISE chassis should be installed using the supplied rail kit into a rack before inserting the DataPacs as
described here.
Install Rail Kit
Before an ISE Storage Blade can be installed in a rack, the custom rails must be installed. The custom rail kit
mounts easily into both round-holed and square-holed racks.
Round–Holed Rack Mounting
To install the adjustable rail kit into a round–holed rack, do the following:
1. Remove the rail kit with anchoring screws from its packaging.
2. Install both rails, as labeled, into the server rack by placing the front rail bracket over the three mounting
holes and inserting at least one rack screw, anchoring the rail front to the rack (Figure 7).
3. Extend the rear slider until the rear mount aligns on the rack’s back mounting face, securing it with two of
the supplied rack screws (Figure 7).
4. Secure the rail, at the front, with three of the rack screws supplied in the rail kit.
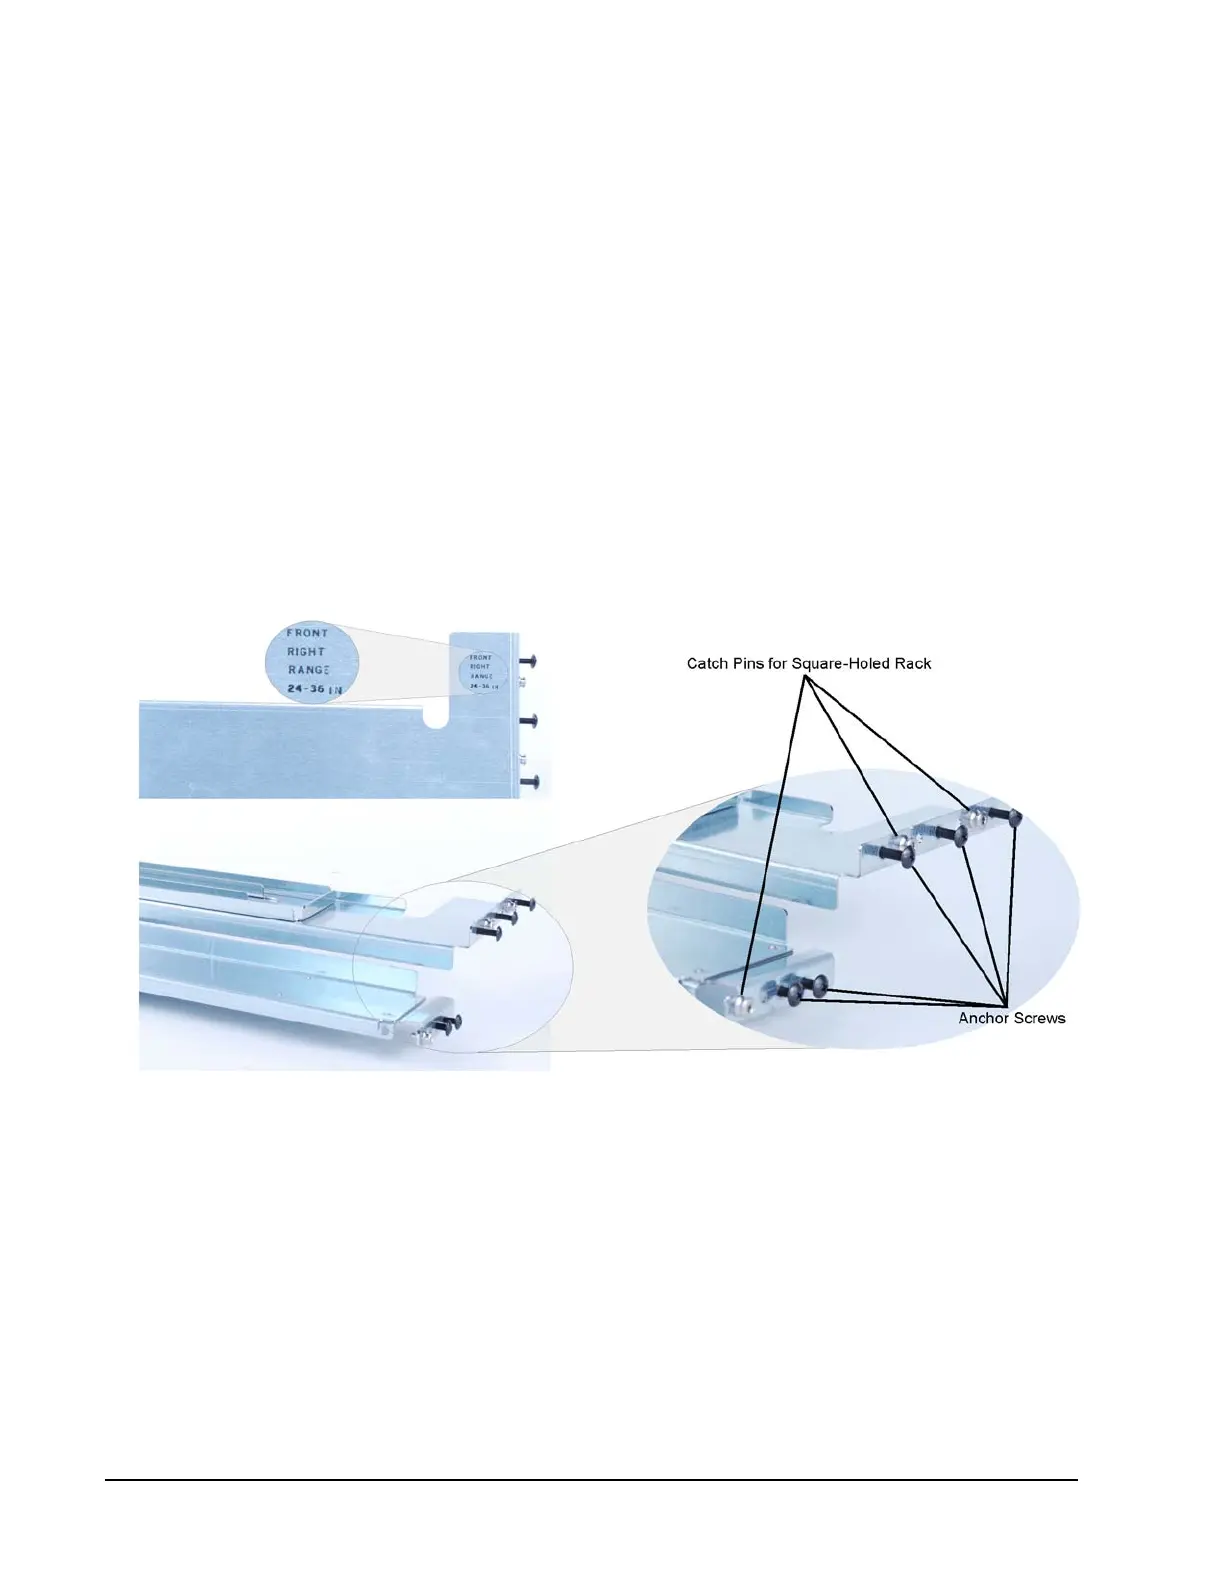
Figure 6. Adjustable Rail Kit
 Loading...