5-99
E
POWR
CONNECTING RODS AND PISTONS
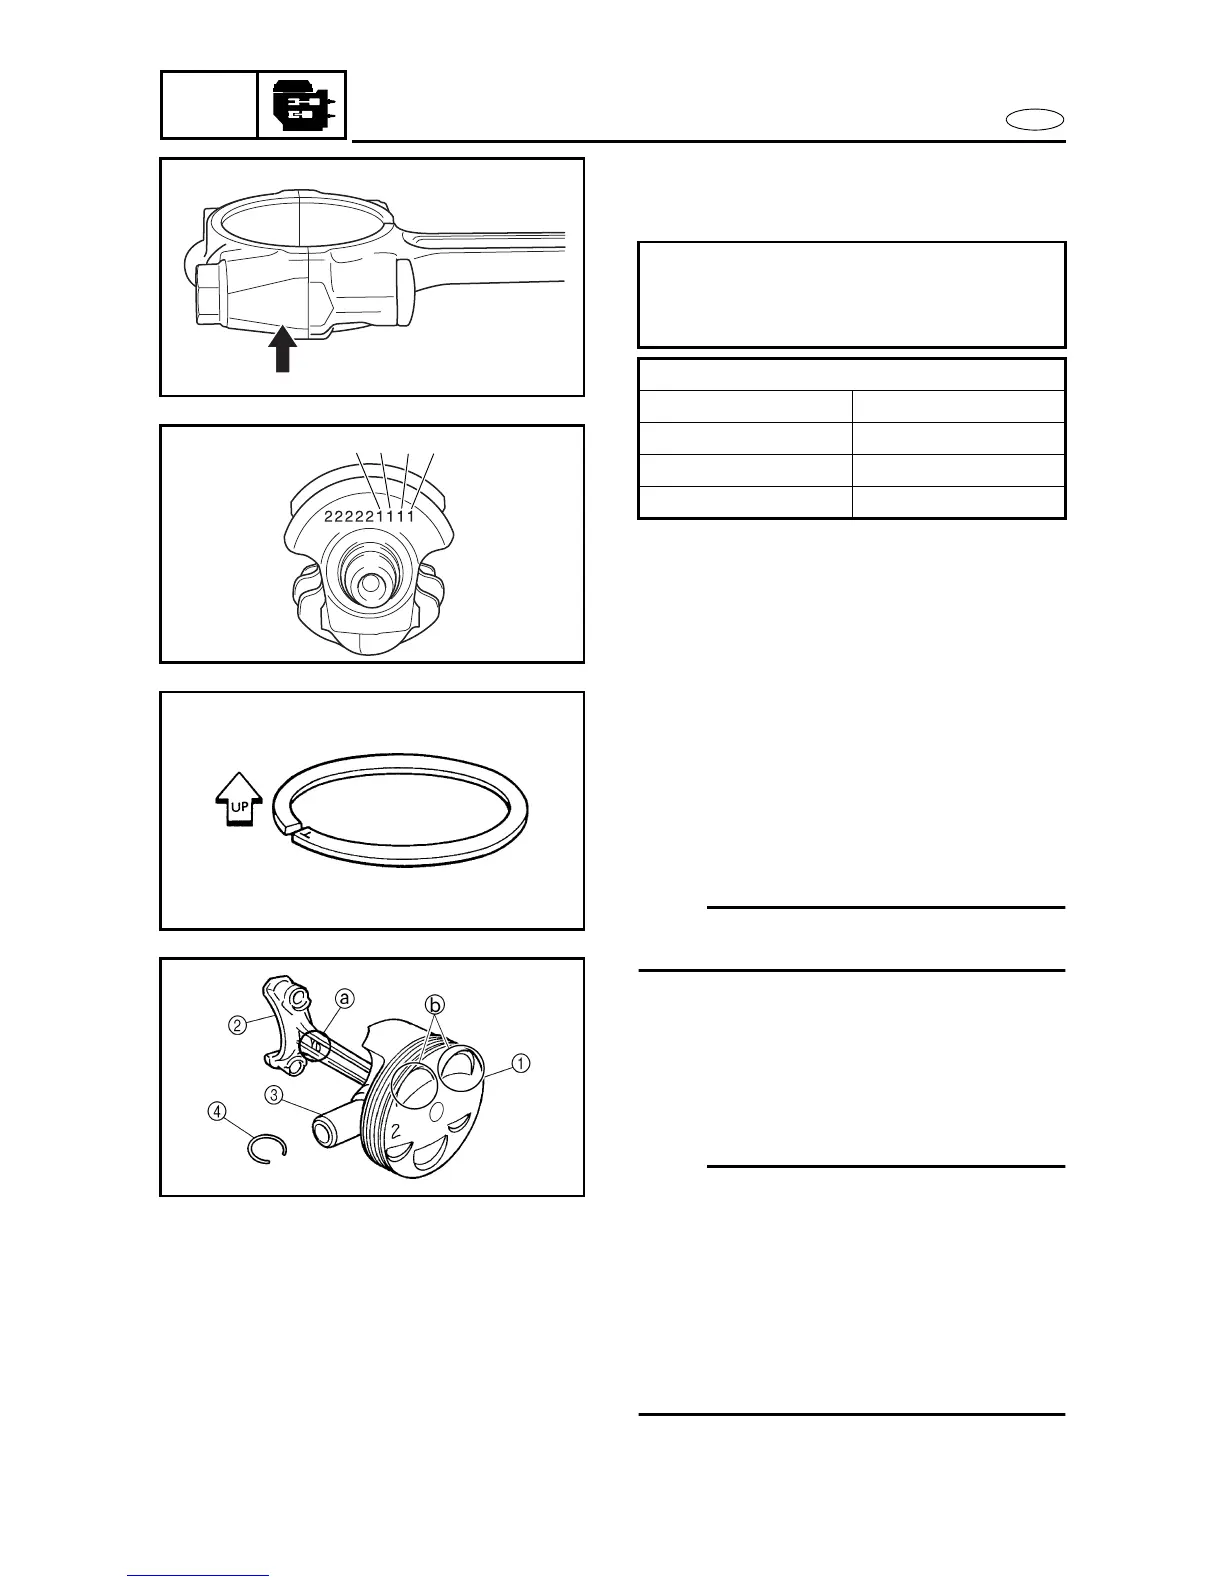
For example, if the connecting rod “P
1
” and the
crankshaft web “P
1
” numbers are “5” and “1”
respectively, then the bearing size for “P
1
” is:
Bearing size of P
1
:
“P
1
” (connecting rod) –
“P
1
” (crankshaft web)
5 – 1 = 4 (green)
BEARING COLOR CODE
1brown
2 black
3blue
4 green
5 G
P4
P3P2
P1
Connecting rod and piston installation
The following procedure applies to all of the
pistons and connecting rods.
1. Install:
• Oil ring
• 2nd ring
• Top ring
NOTE:
Be sure to install the piston rings so that the
manufacturer’s marks or numbers face up.
2. Install:
• Piston
1
• Connecting rod
2
• Piston pin
3
• Piston pin clips
4
NOTE:
• Apply engine oil onto the piston pin.
• When installing the connecting rod to the pis-
ton, make sure that the “Y” mark
a
on the
connecting rod faces towards the left when
the exhaust valve recesses
b
on the piston
face upward. Refer to the illustration.
• Reinstall each piston into its original cylinder
(numbering order starting from the front: #1
to #4).



 To Next Page