12-13
IM 701240-01E
Printing the Screen Image
12
Explanation
You can print the screen image to a USB printer via the USB PERIPHERAL interface.
USB PERIPHERAL Connector
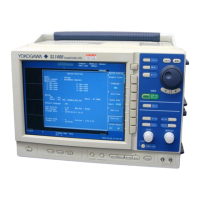
To connect a USB printer to the SL1400, connect a USB cable to the USB PERIPHERAL
connector. There are two USB PERIPHERAL connectors (ports).
Port 1
USB PERIPHERAL
1
2
3
4
Port 2
Pin No. Signal Name
1 VBUS: +5 V
2 D–: –Data
3 D+: +Data
4 GND: Ground
Printers That Can Be Used
USB printers conforming to USB Printer Class Ver. 1.1 that support the following print
formats can be used.
Note
• Connect only the printers that are allowed.
• For details on USB printers that have been tested for compatibility, contact your nearest
YOKOGAWA dealer.
Connection Procedure
When connecting a USB printer, directly connect the keyboard to the SL1400 using a
USB cable as shown below. You can connect the USB cable regardless of the power
ON/OFF state of the SL1400 (supports hot-plug). Connect the type A connector of the
USB cable to the SL1400; connect the type B connector to the printer. When the power
switch is ON, the printer is detected and enabled approximately 6 s after it is connected.
USB connection
USB printer
SL1400
Note
• Connect the printer directly without going through a hub.
• Do not connect USB devices other than USB keyboard, USB mouse, USB printer, and
USB storage device that can be used to the USB PERIPHERAL connector.
• Do not connect multiple printers to the USB PERIPHERAL connector.
• Never turn OFF the printer or remove the USB cable while the printer is printing.
• Do not connect or disconnect the USB cable after the power is turned ON until key
operation is ready (approximately 20 to 30 s).
12.2 Printing on a USB Printer
 Loading...


