Appendix E - Upgrading/Downgrading the System
261
Enova Digital Media Switchers - Hardware Reference Manual
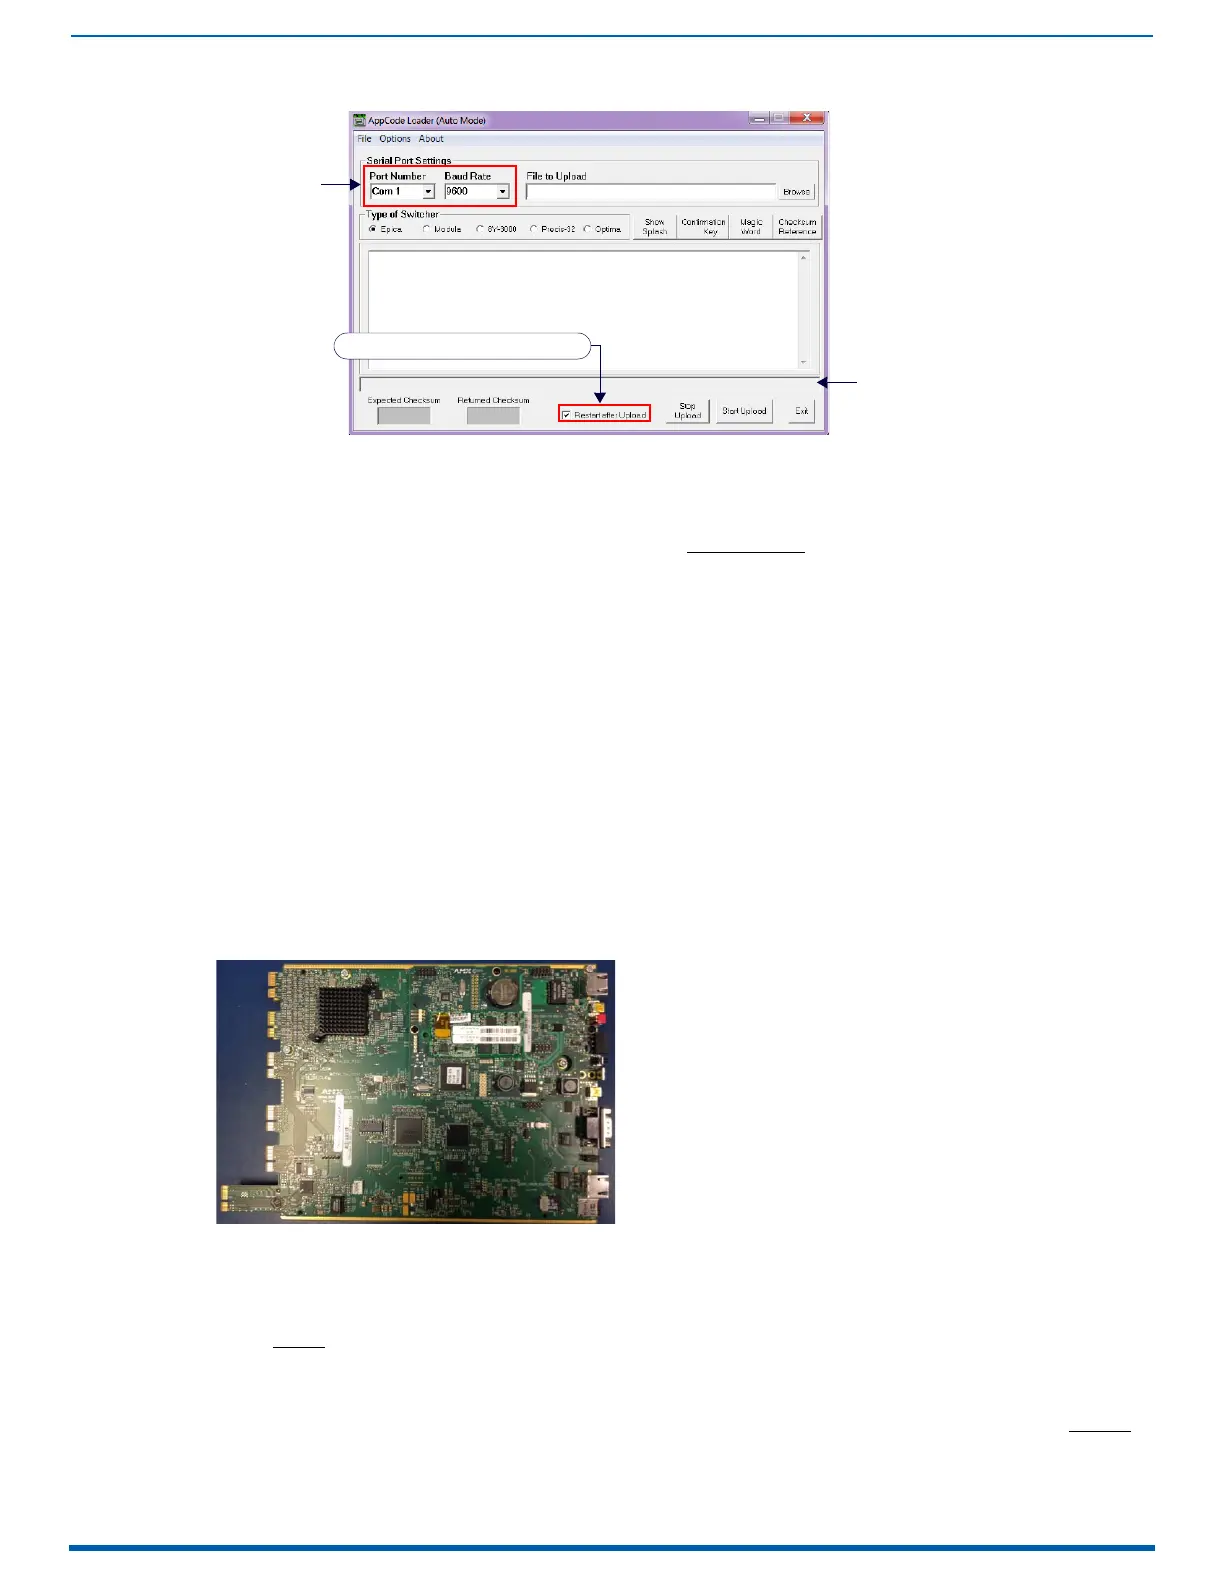
9. Set Serial Port Settings for your system:
a. Set Baud Rate to 9600
b. Set Com port per your system’s requirements (1-9 are available options)
10. Browse for the "image-v2.x.x.enc" file (downloaded from www.amx.com
) to upload. The "Restart after Upload" check
box must be selected.
11. Click the "Start Upload" button and wait for the upload to finish. The [Expected Checksum] and [Returned Checksum]
will match when the upload is complete (update takes about 3 minutes and says "Upload Successful!" when
complete).
NOTE:
If the Appcode Loader fails to start the upload, check your Com port and cable connection and click Start Upload again.
NOTE:
After "Start Upload" the program changes the baud rate to 57600 and puts the front panel in IOS mode indicated in the
text in the app window, and also on the front panel itself. The front panel LCD shows "IOS Mode Contact Tech Support."
12. Click Exit.
13. Turn off AC power to the enclosure. Make sure none of the power supply LEDs are illuminated.
14. Replace control panel and tighten the four captive screws.
15. Apply power to the enclosure.
16. Required – Complete the directions on the following pages to upgrade the CPU, then the enclosure.
TIP: The system’s IP address will be available for 100 Series CPU boards though the control panel’s LCD menu: Function/Setup
Options/Master Info/IP Address. Enter the system’s IP address into a browser on a PC or other device on the same network as the
switcher to launch the System Configuration interface (see page 74).
Removing Current CPU Board and Installing 100 Series CPU Board
CAUTION:
Do not remove CPU board until you are ready to install the replacement, unless directed to do so by technical
support.
Important Information for CPU Upgrade from 8/16/32/64 to 100 Series
Do not transfer SD cards from the currently installed CPU into the 100 Series CPU. SD cards from Enova DGX 8/16/
32/64 CPUs and 100 Series CPUs have different functions.
CPU upgrade status will not show on the control panel unless the control panel has been upgraded prior to the
CPU upgrade (see page 260).
Epica DGX SC Optical Boards are not supported within the 100 Series platform; therefore, these boards must be
removed prior to using the new CPU.
FIG. 144
AppCode Loader
FIG. 145 Enova DGX 100 Series CPU board (top view)
Default Serial
Port Settings
Select Restart after Upload option
Progress bar

 Loading...


