Installation and Setup
56
Enova Digital Media Switchers - Hardware Reference Manual
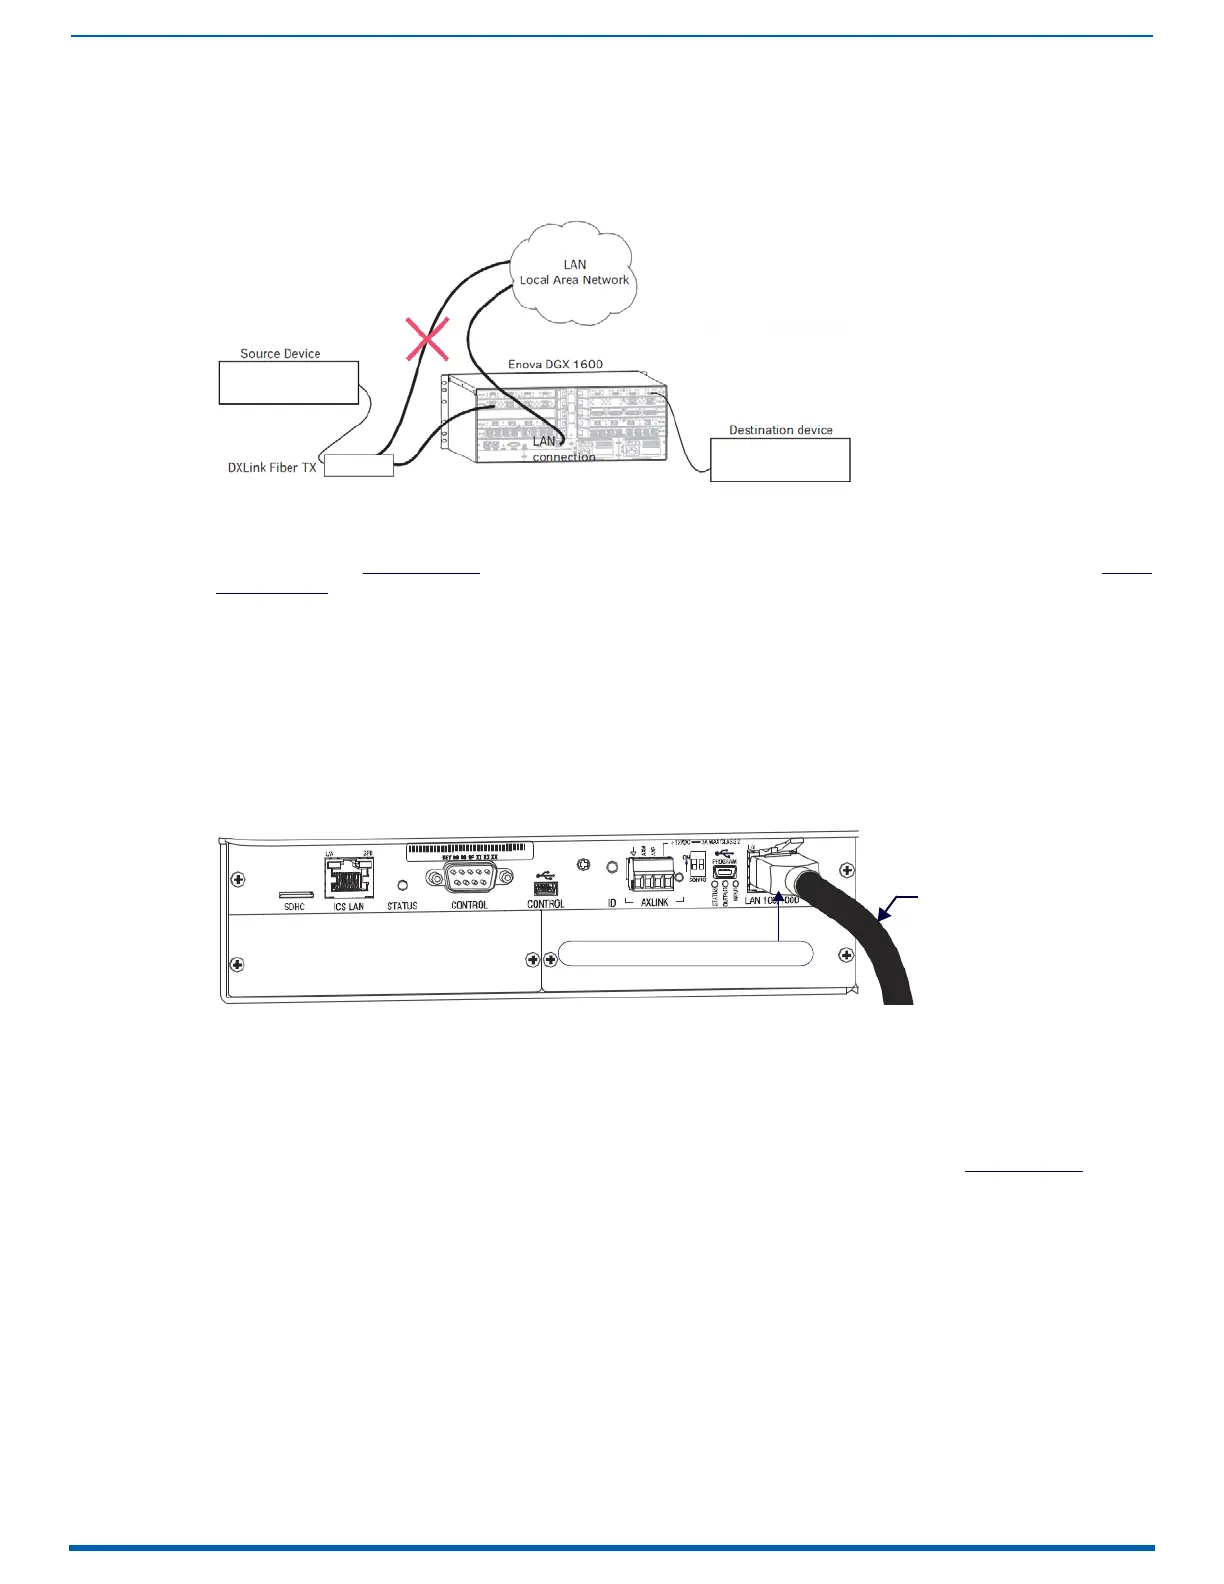
FIG. 24 indicates a network loop created when an Enova DGX 1600 was connected to a Public LAN and one of its DXLink
Fiber, Duplex Transmitters in Bidirectional Mode was connected to the same Public LAN as the Enova DGX. In this case, the
DXLink Fiber, Duplex Transmitter needs to be disconnected from the LAN.
The same problem would also occur if an enclosure and one (or more) of its DXLink Fiber, Duplex Receivers were
connected to a common Public LAN.
IMPORTANT: For Duplex hardware in Bidirectional Mode connected to an Enova Digital Media Switcher, we recommend
connecting the switcher to the network for all network connection needs. Network connections via the switcher are faster
and more reliable. Never connect
both a TX and RX, a TX and switcher, or a switcher and RX to the same network: Avoid
network loops.
CAUTION:
If you have questions or concerns about network setup, consult with your network administrator about avoiding
network loops before connecting units.
Connecting an Enova DGX to a Public LAN via the LAN 100/1000 Port
IMPORTANT: In order to use the on-board System Configuration interface, the Enova DGX Switcher must establish an
active connection to a public LAN. Do not connect the LAN 100/1000 port on the Enova DGX Switcher to a PC; it will not
work.
1. Insert one end of the RJ-45 link cable into the LAN 100/1000 port on the enclosure.
2. Connect the other end of the RJ-45 link cable to a LAN hub or switch. The network automatically assigns a DHCP IP
address (the assigned IP address can be changed to a static IP address).
3. Check the indicator LEDs for the LAN 100/1000 connector (see page 53).
NOTE: When the connection is made, the DHCP server on the network will automatically assign an IP address. If you power
down and power back up, the DHCP server will reassign the IP address, which may or may not be the same address it
assigned before. To prevent the possibility of the IP address changing at power up, you can change the DHCP address to
a static IP address (see the NetLinx NX Central Controllers WebConsole & Programming Guide at www.amx.com
). The
integrated Master’s IP address is available via the control panel at Setup Options/Master Info/IP Address.
Confirming Board Versions
Enova DGX enclosures and boards typically ship with the latest firmware available. If the firmware on any board installed
in the enclosure does not match the firmware version the enclosure expects, a firmware mismatch occurs. To resolve a
firmware mismatch, the latest available firmware .kit file (which contains firmware for both boards and enclosure) must be
sent to the enclosure.
1. Launch NetLinx Studio and connect to the DGX Master.
2. Open the OnLine Tree tab, right-click in the Workspace Bar field and select Refresh System Online Tree.
3. Expand the 5002 device and confirm compatible board versions (or mismatch).
4. If a mismatch is present, send the latest firmware .kit file to the enclosure.
NOTE: Instructions for sending a .kit file are located on page 203.
FIG. 24
Avoid network loops
FIG. 25 RJ-45 link cable connected to LAN 100/1000 port
Cable to LAN hub or switch
LAN 100/1000 (RJ-45) connector

 Loading...


