Working With Buttons
91
PDesign4 Touch Panel Design Program
Alignment & Sizing Tool
The Alignment & Sizing dialog offers additional design tools. To access this dialog, you must have
more than one button selected (in a Design View window). Use the options in this dialog to align
and/or resize the selected buttons. The options in this dialog include:
Alignment
These options allow you to align the selected buttons horizontally, vertically (or both) along either
the centers of the buttons, or along any edge (top, bottom, left or right). Note that the order in which
the buttons are selected in the Design View window controls how several of these options work.
Horizontal - select the type of horizontal alignment to apply to the selected buttons:
none: No alignment (default setting).
left edges: Aligns the left edges of all selected buttons.
centers: Aligns the centers of all selected buttons.
right edges: Aligns the right edges of all selected buttons.
left edges to right: Aligns the left edges of selected buttons to the right edge of the
button that was selected first.
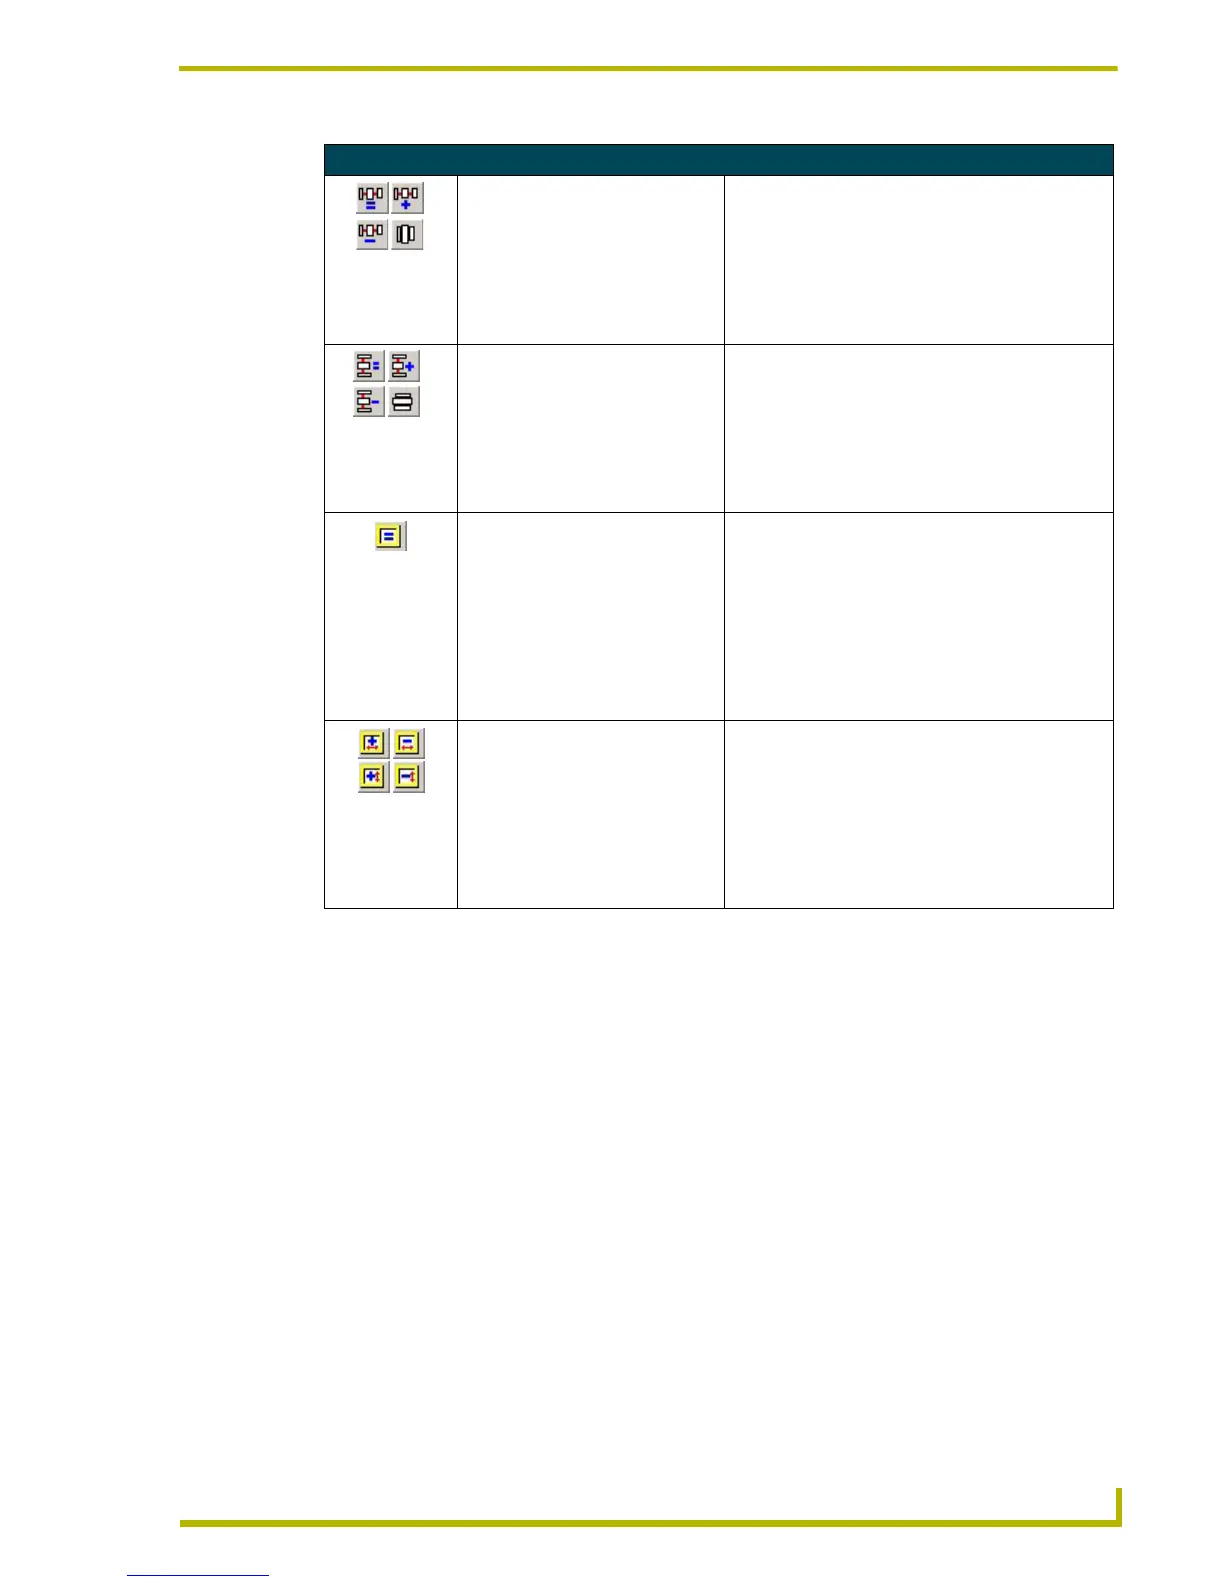
Drawing Assist Tool Toolbar (Cont.)
Horizontal Spacing (Equal,
Increase, Decrease, Remove)
Use these commands to control the horizontal spac-
ing between selected buttons. To distribute buttons
evenly on the page, select equal spacing, then
increase or decrease spacing as necessary. You must
have at least three buttons selected to enable these
options, and note that the first button you select
becomes the controlling button (all other buttons are
moved to align with the controlling button).
Vertical Spacing (Equal, Increase,
Decrease, Remove)
Use these commands to control the vertical spacing
between selected buttons. To distribute buttons
evenly on the page, select equal spacing, then
increase or decrease spacing as necessary. You must
have at least three buttons selected to enable these
options, and note that the first button you select
becomes the controlling button (all other buttons are
moved to align with the controlling button).
Make Ideal For Border This command automatically resizes the selected but-
ton(s) to the smallest size possible that still accom-
modates the selected border. This option is typically
for use with the Circle, Oval and Diamond border
types. For example, if you create a button with the
border "Circle 150", and draw a circle that is smaller
than 150 pixels in diameter (or not perfectly round),
the resulting button will not appear as a perfect circle.
Click this command to resize the button to become a
perfect circle.
Increase/Decrease Width/Height
For Border
These commands are like nudge controls for button
width and height. Click these buttons to adjust the
button width/height in increments specific to the
selected border. Note that since all measurements in
TPDesign4 are zero-based, the Increase/Decrease
Width commands will always adjust the width on the
right side of the selected button(s), and the Increase/
Decrease Height command will always adjust the
height on the bottom side of the selected button(s).