Working With Palettes and Colors
145
PDesign4 Touch Panel Design Program
When creating an image to be used as a chameleon image, keep in mind that the Red and
Green color channels will be replaced by the colors specified as the Fill and Border colors in
TPD4 for each state of the button. The Blue color channel is not used for chameleon buttons.
2. Export the image as a PNG file. The exported file must be 32-bit RGB Color (8 Bits/Channel)
in order to be interpreted correctly by TPD4 as a chameleon image.
3. Import the image file into TPD4 (via the Import button on the Images tab of the Resource
Manager dialog).
4. In a Design View window, create or select a button to apply the chameleon image to. Keep in
mind that the Chameleon Image state property is not available for Text Input, Computer
Control or TakeNote button types.
5. In the States tab of the Properties Control window, set the button's Border Name to None. Note
that at this point, the Chameleon Image property becomes available (directly beneath Border
Name).
6. In the Chameleon Image property, click the browse button (...) to access the Resource Manager
dialog. Select the chameleon image (in the Image tab) and click OK to apply it to the selected
button.
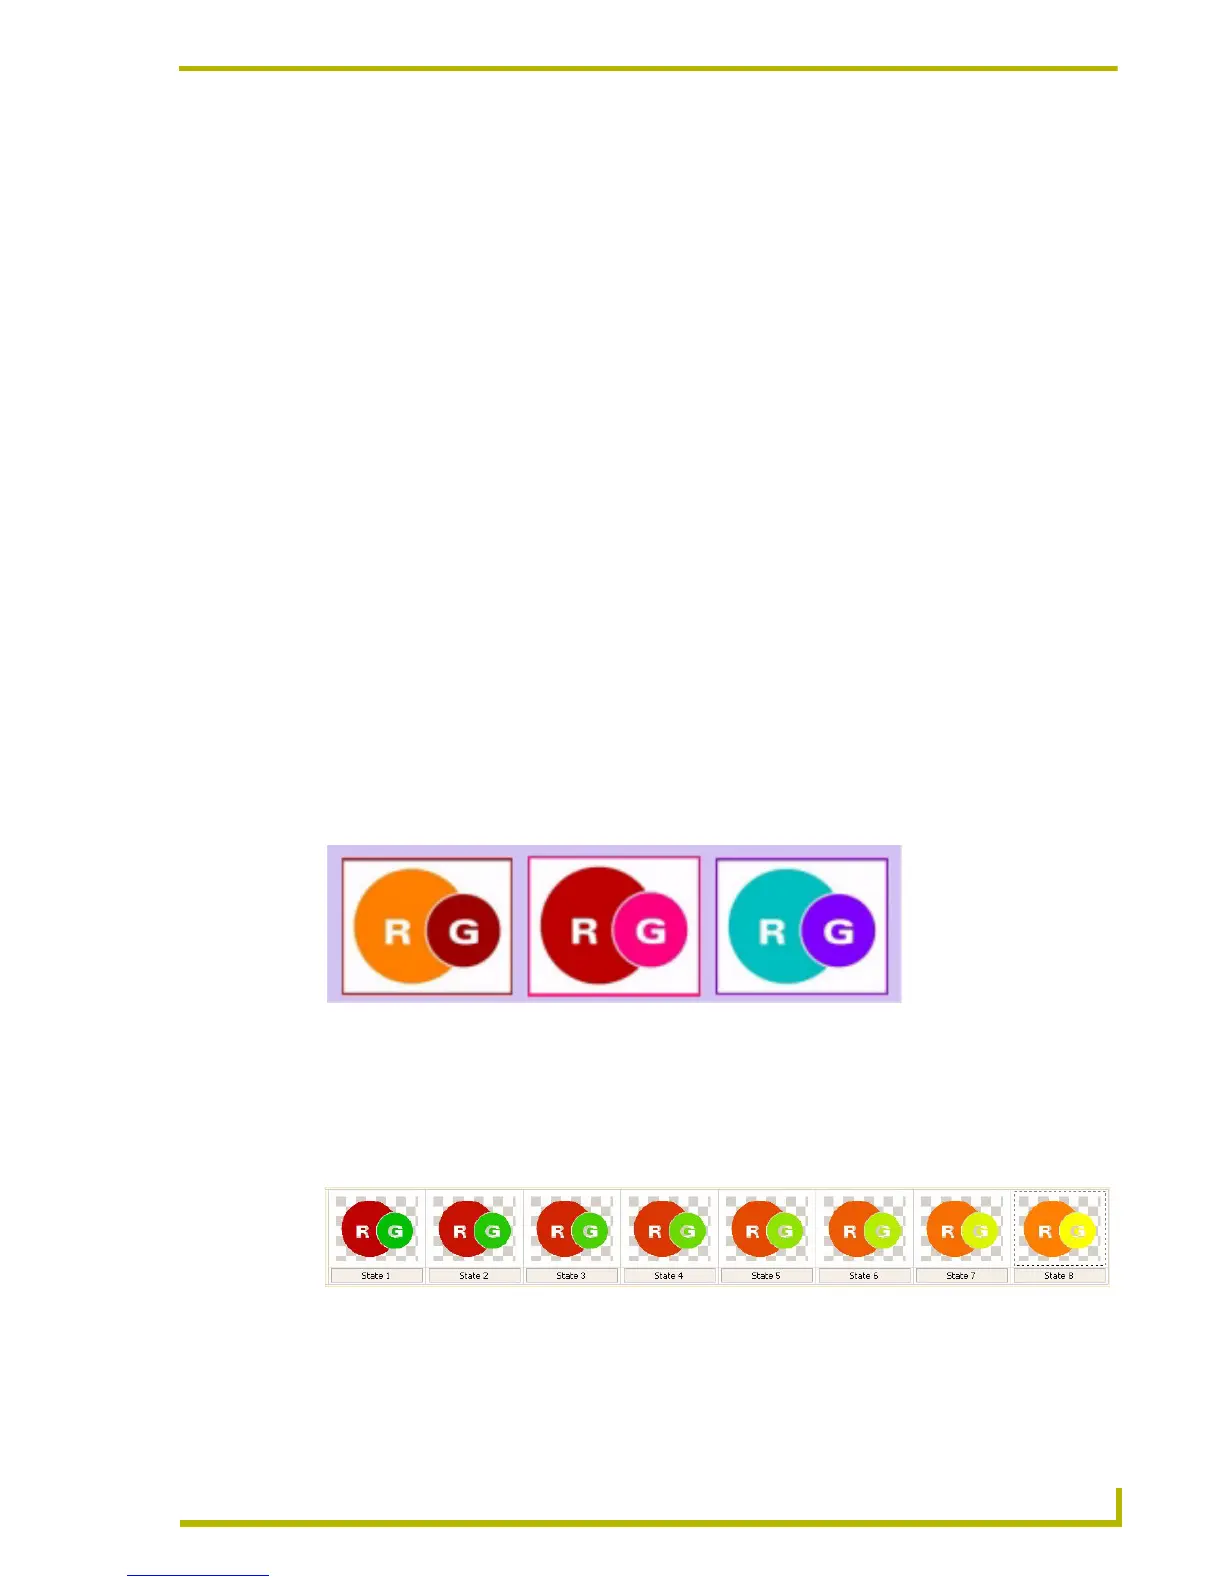
Now that the image has been applied as a chameleon image, note that any portion of the image that
exists on the Red color channel now matches the color specified in the Fill Color state property.
Similarly, any portion of the image that exists on the Green color channel now matches the color
specified in the Border Color state property.
FIG. 33 shows a few examples of color changes resulting from changing the Fill and Border colors
for the button/state with the chameleon image:
Since chameleon buttons rely on the Border and Fill color settings, you can use the Fill Color and
Border Color Tweening tools to quickly create color transition effects for each of the color channels
(FIG. 34):
In fact, the Chameleon images can by used in conjunction with any of the other Tweening tools,
depending on what elements (Bitmaps, Icons, Text) make up your button.
FIG. 33 Changing the Fill and Border colors for the button/state with the chameleon image
FIG. 34 Chameleon image tweening