Install and Administer Trunks
Add TN1654 DS1 Converter (r only)
SI Installation and Upgrades 683
June 2004
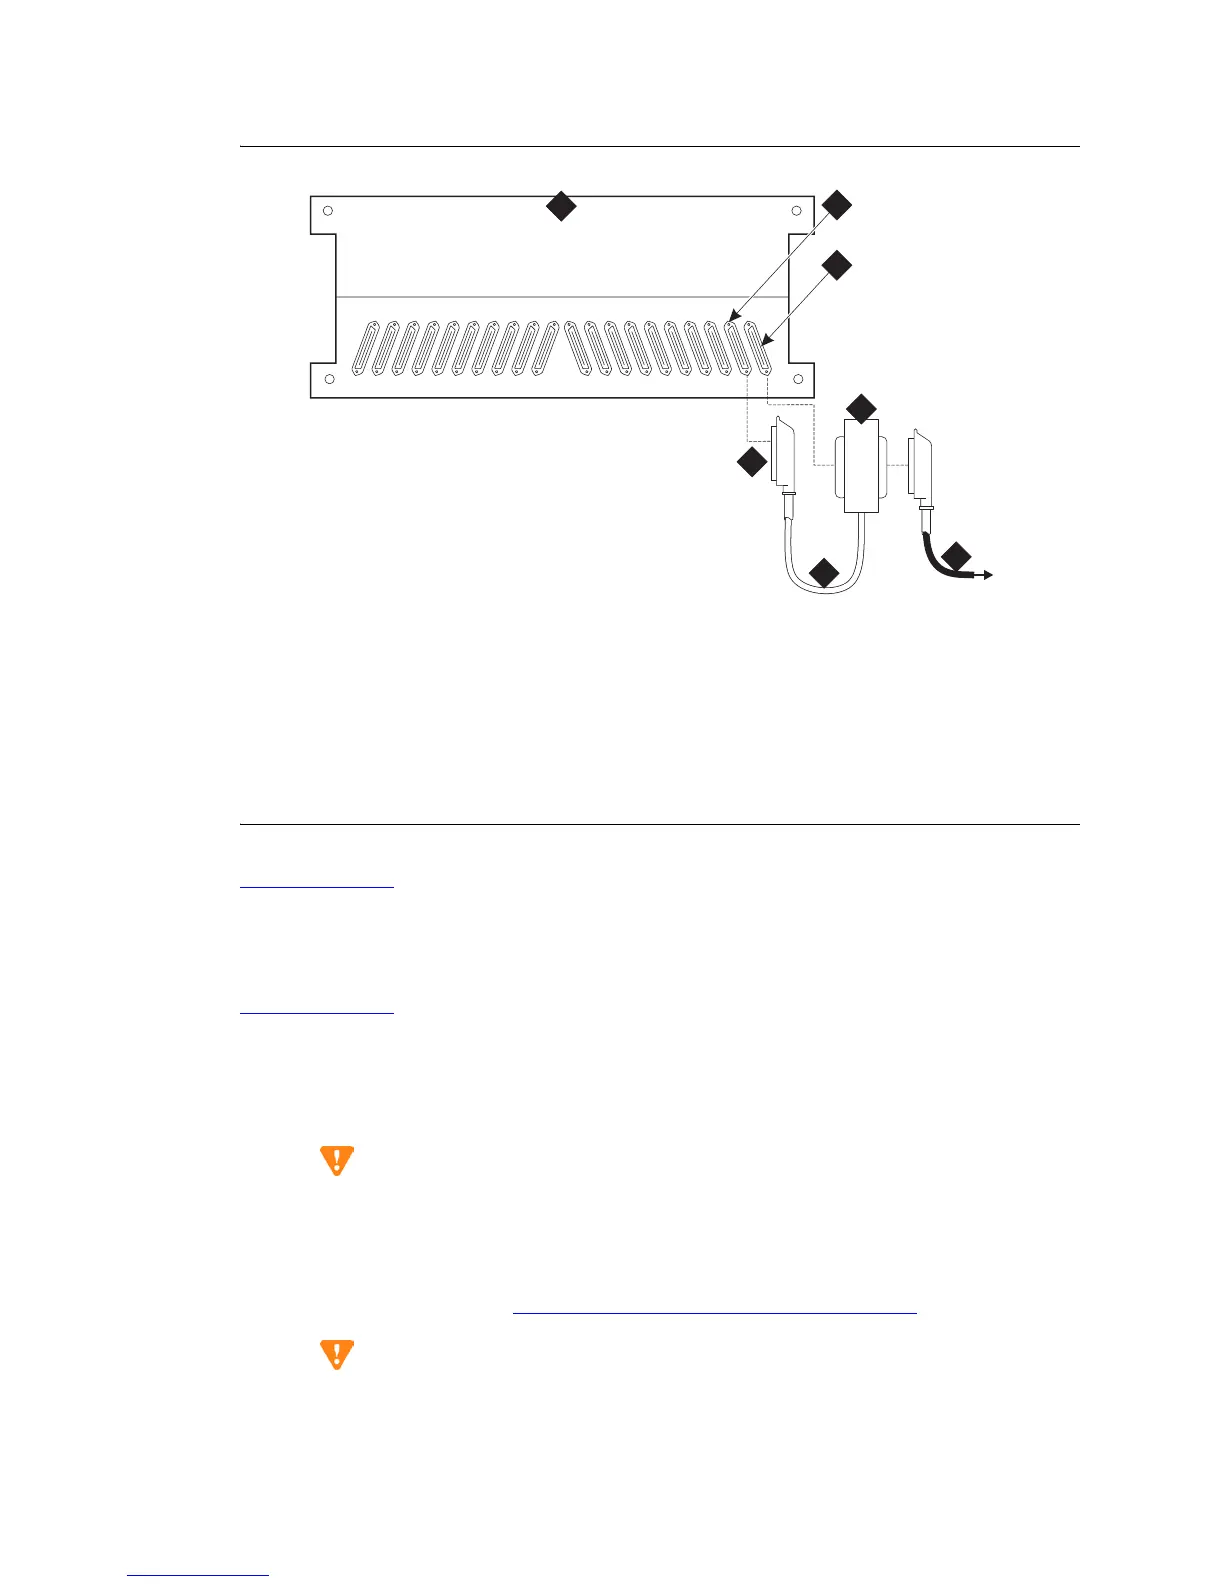
Figure 276: DS1 Converter Connections — Part 1
Return to Task List
Installing TN1654s in a Switch Node Carrier
Return to Task List
You can install up to 2 TN1654 circuit packs in a Switch Node Carrier.
1 Install the TN1654 circuit pack in either slot 1 or 21 of the Switch Node Carrier close to a
TN573B SNI circuit pack.
CAUTION:
Install the TN1654 circuit pack in either slot 1 or slot 21. Installing it in any other slots can
damage the circuit pack and the system. Do not do it.
2 On the backplane, connect a 14-inch (35.56 cm) Y cable from the TN1654 circuit pack to the
TN573B circuit pack. See Figure 277, DS1 Converter Connections — Part 1,
on page 684.
CAUTION:
The Y cable used with the TN1654 circuit pack is different than the Y cable used with the
TN574 circuit pack. These cables are NOT interchangeable.
Figure notes
1 Port cabinet
2 Backplane connector for TN570D EI
3 Backplane connector for TN1654 DS1
Converter
4 50-pair female connector to EI
connector
5 14-in. (35.6 cm) Y cable
6 50-pin male/50-pin female double-
headed connector
7 H600-348 Quad Cable (with 50-pin
male connector), which connects the Y
cable to the 4 CSUs.
cydf010 KLC 091399
20
19
161718 15 14 13 12 11
10
09 08 07 06 05 04 03 02 01
1
4
5
6
7
A
2
3
 Loading...


