Adjuncts and Peripherals
.Install ISDN converters and adapters
SI Installation and Upgrades 829
June 2004
1 Plug the PC into the RS-232 connector on the front of the PRI converter circuit pack.
2 Connect the coaxial Y-cable from the TN464GP to the PRI converter circuit pack.
3 Connect the opposite end of the Y-cable to the 888B coaxial converter.
PRI-to-BRI converter
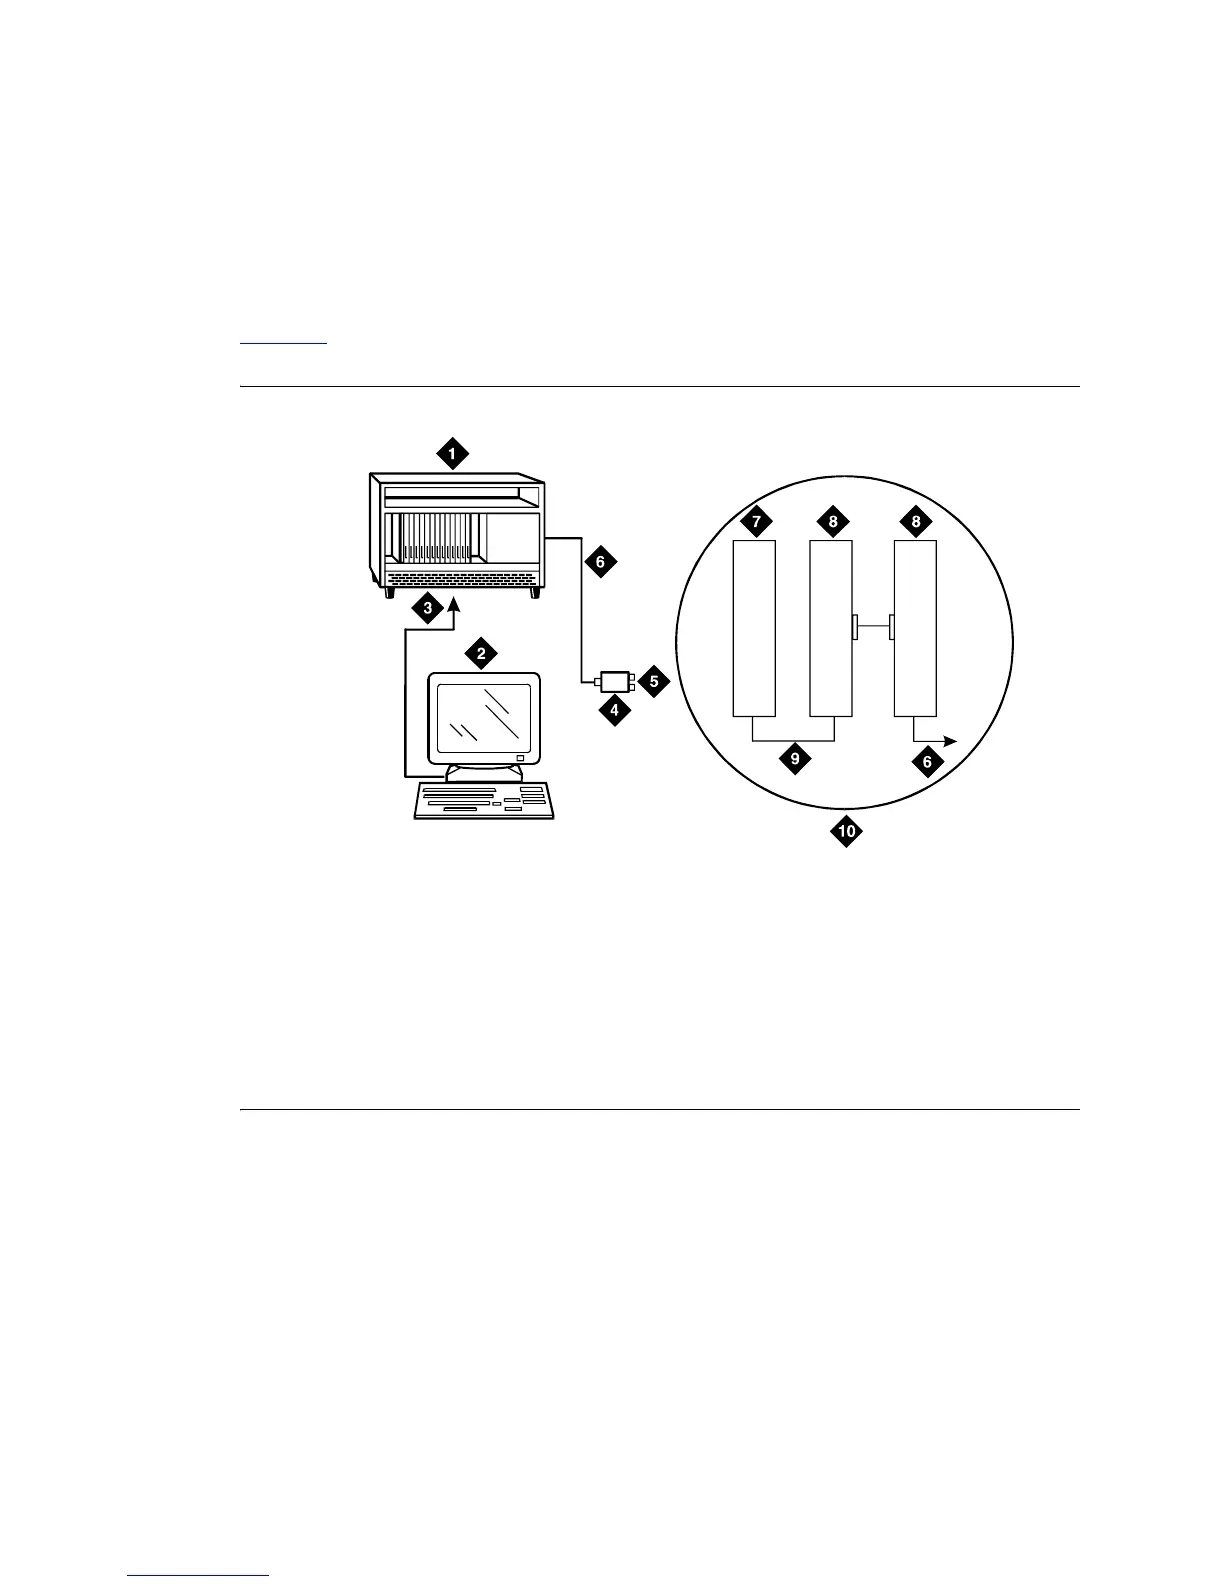
Figure 321 shows typical connections from the PRI-to-BRI converter to the coaxial facility.
Figure 321: Typical PRI to BRI converter cabling
NOTE:
The inset shows details of the cable connections between the circuit packs. Connect the
Communication Manager administration PC to the RS-232 connector on the front of the
PRI converter circuit pack.
Figure notes
1 To TN464GP DS1 circuit pack and
PRI-to-BRI converter circuit pack
2 Communication Manager administration PC
3 RS-232 cable to front of converter circuit pack
4 888B coaxial converter
5 Coaxial connection to 2-Mbps facility
6 Coaxial cable from PRI converter
circuit pack to coaxial converter
7 TN464GP circuit pack
8 PRI-to-BRI converter circuit pack
9 Jumper coaxial cable
10 Inset showing connections on rear
of carrier
0007_0 RBP 051396
7
(2B+D)
1
(2B+D)
8
(2B+D)