Confidential
3-47
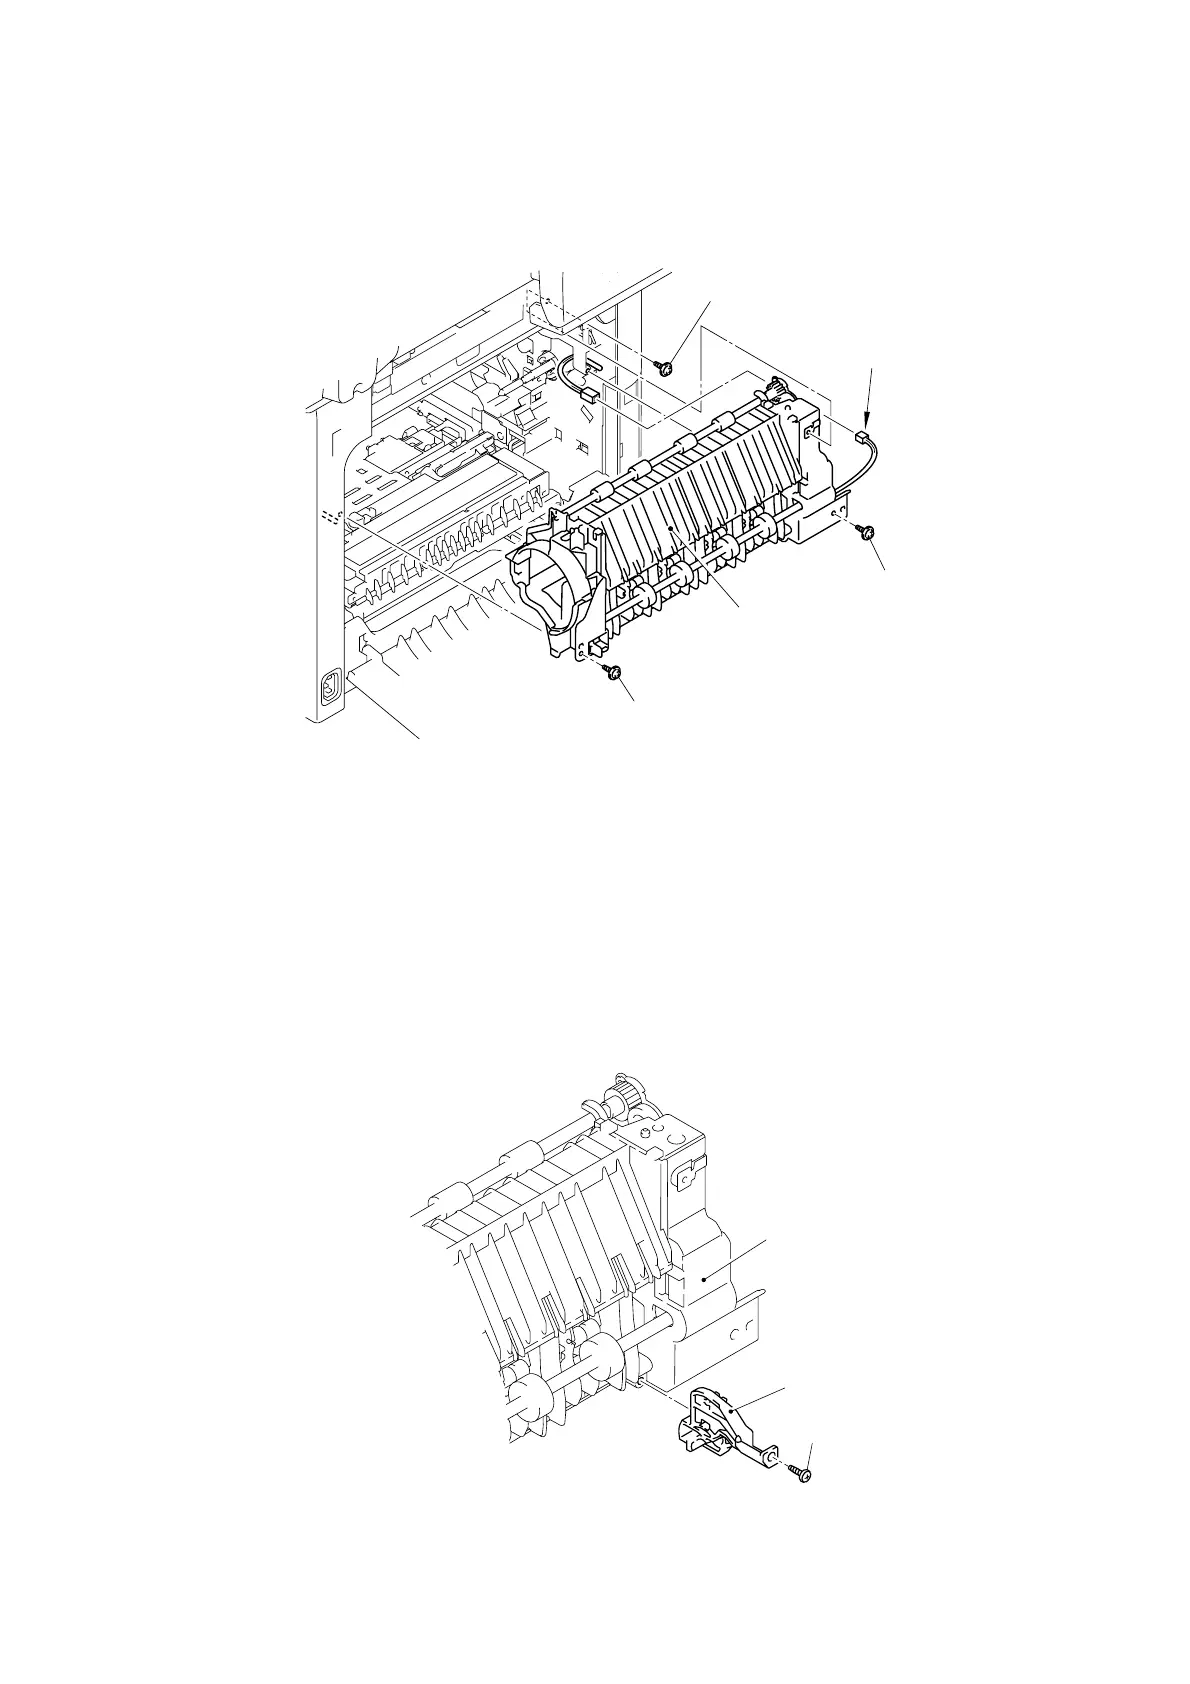
(3) Remove the two cup B M4x12 Taptite screws and cup S M3x6 Taptite screw.
(4) Disconnect the Connector.
(5) Remove the Paper eject ASSY DX.
Fig. 3-24
*1
Tightening Note:
When tightening the screw, slowly turn it counterclockwise (in the direction to loosen the
screw) with your hand until you feel that the screw is a little dropped in the hole. Then,
slightly turn it clockwise (in the direction to tighten the screw) with your hand and tighten
it according to the specified torque with a screwdriver.
Parts Replacement Note:
The Paper eject ASSY DX is supplied with the Drive shaft holder already fitted. When
replacing the Paper eject ASSY DX, remove the Drive shaft holder from the supplied
Paper eject ASSY DX first, then assemble the Paper eject ASSY DX.
Fig. 3-25
Taptite, cup S M3x6
Taptite, cup B M4x12
(Tightening torque: 1.20 ±0.1 N m) *1
Taptite, cup B M4x12
(Tightening torque: 1.20 ±0.1 N m) *1
Paper eject ASSY DX
Drive shaft holder
Taptite, bind B M3x10
Paper eject ASSY DX
<Back side>
Connector

 Loading...