MVX250i E, MVX200i E, MVX200 E
DISASSEMBLING
15
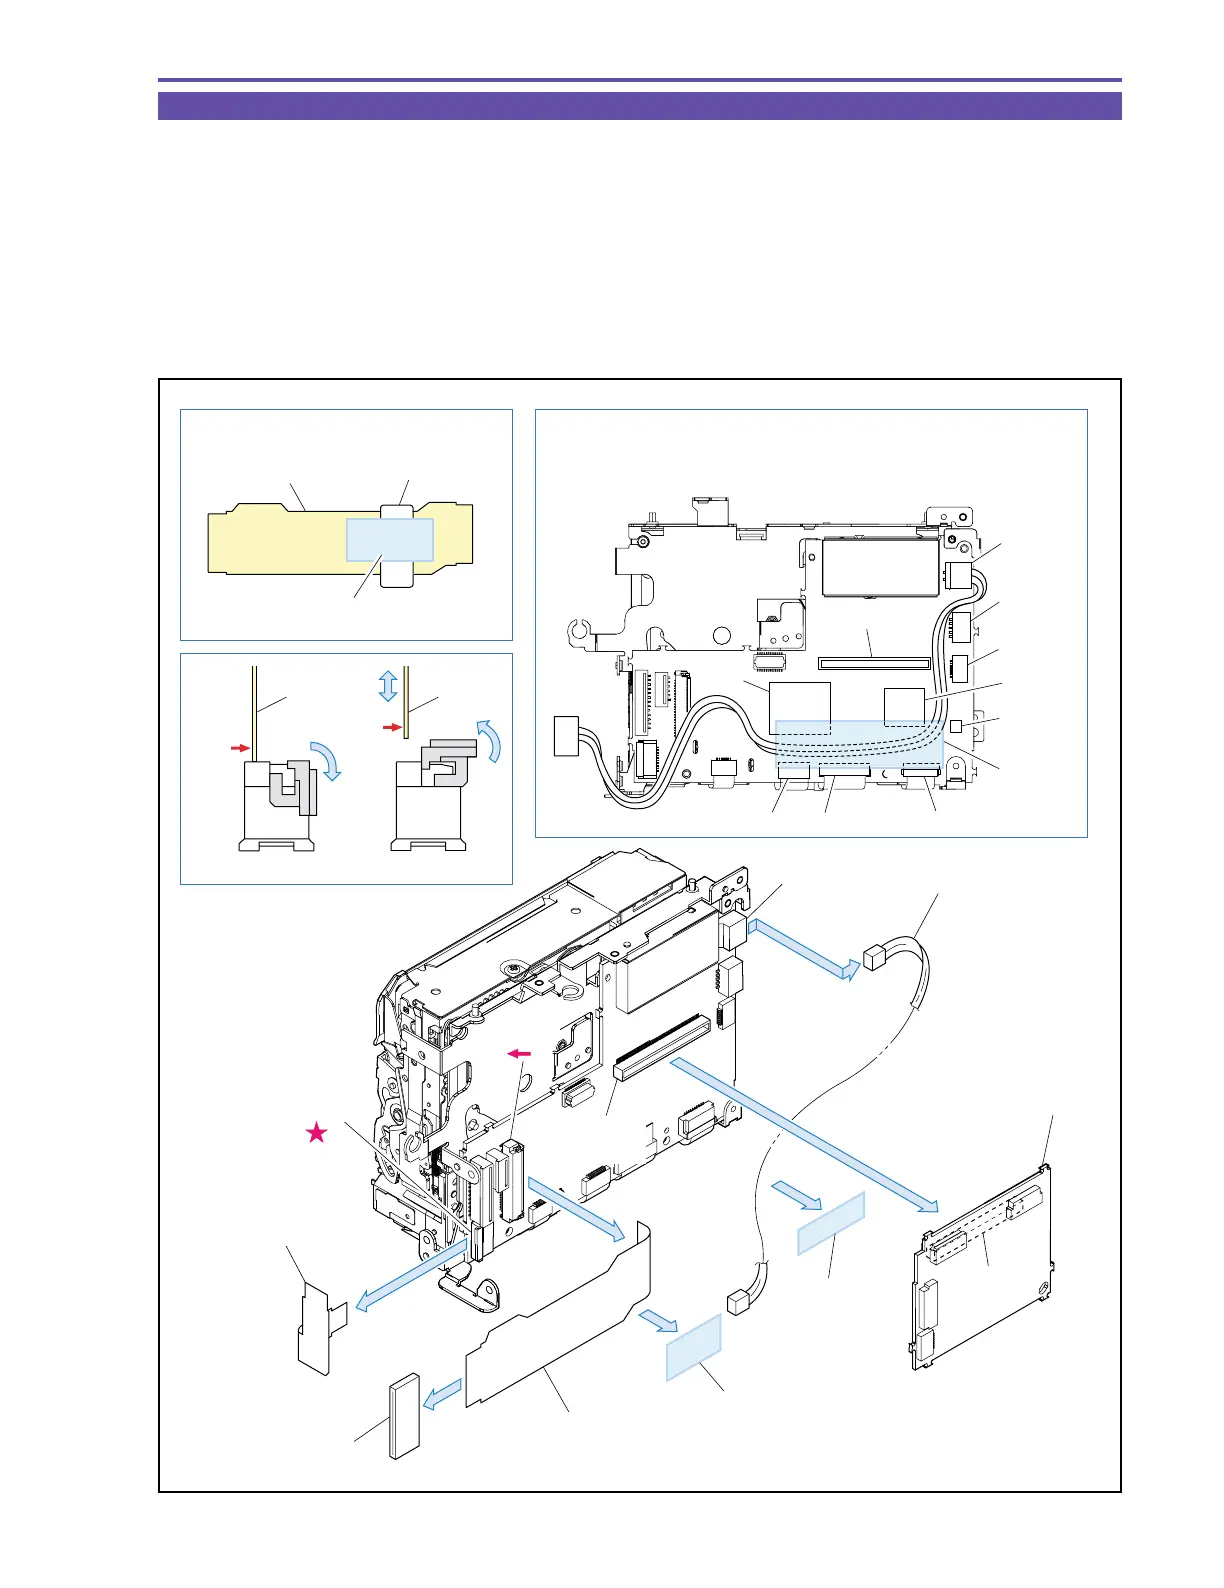
1-12 Separation of CAV P.C.B.
(1) Disconnect the CN1001 and CN1100 (B to B), and then detach the CAV P.C.B.
(2) Disconnect the CN3201, remove the UL Tape, and detach the MAIN-JACK1 Cable.
(3) Disconnect the CN102 and CN2102, and then detach the MAIN-KEY FPC and MAIN-JACK2 FPC.
Note : Use the CN102 (MAIN P.C.B.) as illustrated below.
(4) Remove the UL Tape from the MAIN-KEY FPC, and detach the Ferrite Core.
<Note on Reassembling>
(1) With the UL Tape, secure the Ferrite Core to the position indicated in the figure below so that it will not be dislocated.
(2) Attach the MAIN-JACK1 Cable as illustrated below, and then secure it with the UL Tape.
Fig. 12
Note
Note on Reassembling (1)
Note on Reassembling (2)
CAV P.C.B.
MAIN - JACK1 Cable
MAIN - JACK2 FPC
MAIN - KEY FPC
MAIN-KEY FPC
UL Tape (13 × 21)
UL Tape (13 × 21)
Ferrite Core
Ferrite Core
(1)
(2)
(2)
(4)
(3)
(3)
(4)
CN3201
CN1001
(B to B)
CN1100
(B to B)
CN2102
CN102
UL Tape
(9 × 36)
Run the cable through a clearance between the ICs and
the connectors so that it is not pinched between them.
FPC
FPC
Locked
Unlocked
CN100
CN1100
CN302
CN3201
CN3202
CN101
IC301
IC300
IC100
CN303
UL Tape
(9 × 36)
Contact
Contact