MVX250i E, MVX200i E, MVX200 E
DISASSEMBLING
34
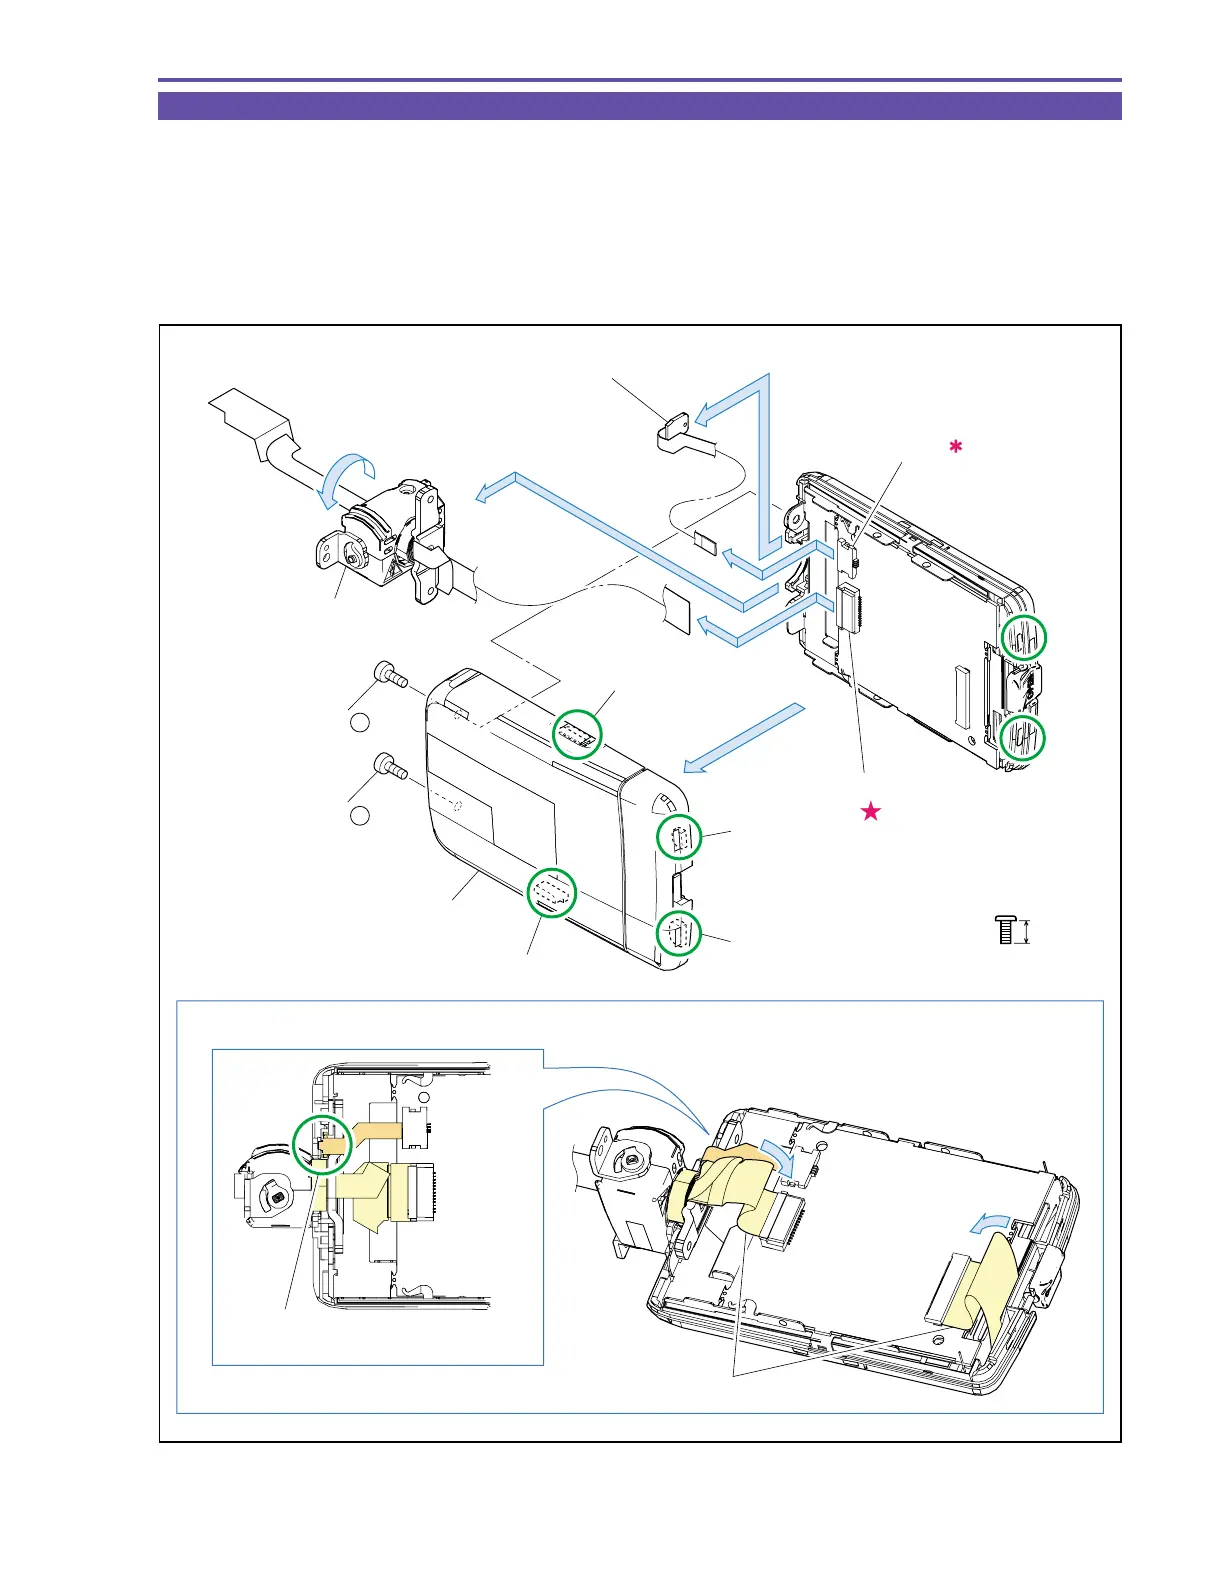
1-25 Disassembly of LCD Unit - 1
(1) Turn the LCD Hinge Unit through an angle of 90º, and remove two screws (g × 2).
(2) Disengage the claws A, B, C and D in that order, and detach the LCD Top Cover.
Note : Take care not to damage the claw hooking parts E and F of the LCD Bottom Cover.
(3) Disconnect the CN901 and CN903, and then detach the LCD Hinge Unit and the LCD DETECT FPC.
<Note on Reassembling>
(1) Attach the LCD Top Cover as illustrated below.
Fig. 31
g
4mm
Metal
M1.7
Note on Reassembling (1)
(1)
Claw A
Claw C
Claw D
Claw B
Insert the IC part of the DETECT FPC
into the groove.
Fold a surplus part of the flexible cable inside.
(2)
E
F
(3)
(3)
(3)
(3)
CN903
CN901
LCD Hinge Unit
LCD Top Cover
LCD DETECT FPC
(1) - g
(1) - g