Do you have a question about the Canon MVX200 E and is the answer not in the manual?
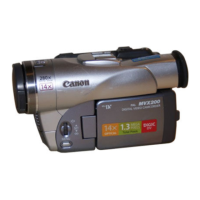
Covers the primary functionalities and highlights of the camcorder.
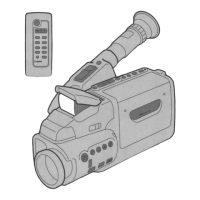
Describes the peer-to-peer communication software for video and message exchange.
Details and compares technical specifications across different camcorder models.
Lists the various functions and performance aspects of the camcorder.
Explains the design concepts and aesthetic features of the camcorder.
Details the features and technologies of the 18x zoom lens system.
Describes the functionality and usage of the Easy Direct Button for printing and file transfer.
Explains the various displays and indicators shown in camera mode.
Details the displays and indicators relevant to VCR playback operations.
Describes displays and indicators when operating in Card or Camera modes.
Covers displays and indicators specific to playing back content from memory cards.
Outlines the structure and options available within the camcorder's menu system.
Illustrates various screens related to memory card operations like slideshows and indexing.
Details the screens and settings involved in direct printing from the camcorder.
Explains how to set print orders and designations for images.
Lists and explains various warning messages the camcorder may display.
Presents a flowchart to guide the disassembly and reassembly process.
Details the procedure for removing the accessory shoe and battery holder.
Explains how to detach the top cover assembly of the camcorder.
Provides steps to separate the right-side LCD unit from the camcorder.
Details the process for removing the rear cover unit.
Explains how to detach the front cover unit of the camcorder.
Provides instructions for separating the left cover unit.
Details the procedure for removing various shield components.
Explains how to detach the CVF (Color Viewfinder) unit.
Details the steps for removing the JACK 2 Printed Circuit Board.
Explains the steps for disassembling the camera unit assembly.
Details the procedure for removing the CAV Printed Circuit Board.
Explains how to detach the MAIN Printed Circuit Board.
Details the process for removing the recorder holder assembly.
Provides the first part of the disassembly procedure for the front cover.
Continues the front cover disassembly with the second part of the procedure.
Completes the front cover disassembly with the third part of the procedure.
Details the first part of the disassembly procedure for the left cover unit.
Continues the left cover disassembly with the second part of the procedure.
Completes the left cover disassembly with the third part of the procedure.
Provides the first part of the disassembly procedure for the right LCD unit.
Continues the right LCD unit disassembly with the second part of the procedure.
Completes the right LCD unit disassembly with the third part of the procedure.
Details the steps for disassembling the right cover unit.
Provides the first part of the disassembly procedure for the LCD unit.
Continues the LCD unit disassembly with the second part of the procedure.
Details the steps for disassembling the LCD hinge unit.
Provides the first part of the disassembly procedure for the rear cover unit.
Continues the rear cover disassembly with the second part of the procedure.
Details the first part of the disassembly procedure for the CVF unit.
Continues the CVF unit disassembly with the second part of the procedure.
Details the third part of the disassembly procedure for the CVF unit.
Provides the fourth part of the disassembly procedure for the CVF unit.
Completes the CVF unit disassembly with the fifth part of the procedure.
Explains the steps for disassembling the camera unit.
Details the procedure for disassembling the lens unit.
Lists all screws used in the disassembly process with their specifications.
Provides visual references of the disassembled parts of the camcorder.
Lists specialized tools required for maintenance and adjustment procedures.
Explains the initial setup procedures and system adjustments.
Introduces the service modes and their basic operation principles.
Details specific service modes, including error rate checks and mechanical error indications.
Guides through various adjustment procedures required after part replacement.
Provides general hints and information regarding service and maintenance.
Illustrates the physical layout and arrangement of the camcorder's circuit boards.
Identifies the locations of key electronic components on the main printed circuit boards.
Details how to check the current consumption of the camcorder in various operating states.
Provides guidance on diagnosing and resolving common operational problems.
Offers hints and check points for troubleshooting power supply issues.
Guides on troubleshooting common faults related to the camera picture output.
Provides steps for diagnosing and resolving issues with playback picture quality.
Explains how to set or restore startup images and settings.
Details how to access and use the shortcut demonstration mode for sales purposes.