MVX250i E, MVX200i E, MVX200 E
DISASSEMBLING
23
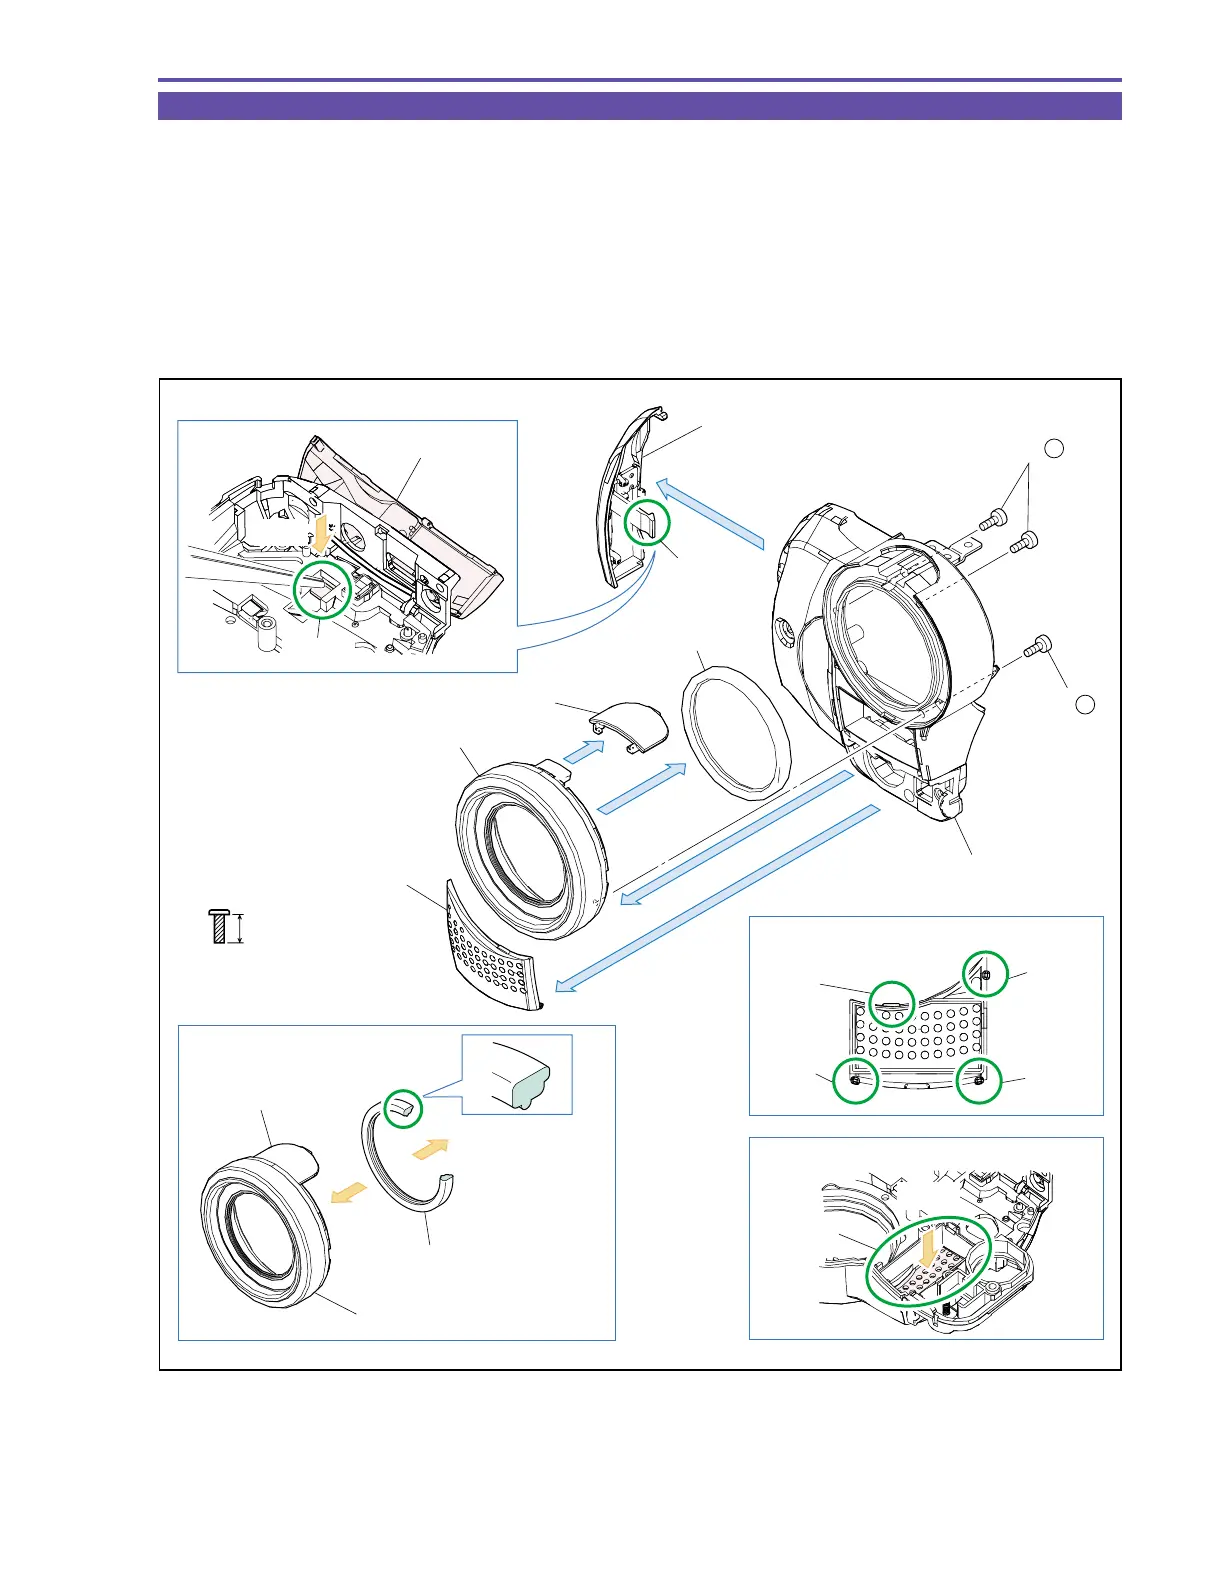
1-17 Disassembly of Front Cover Unit - 3
(1) Remove three screws (f × 3), and detach the Lens Ring Ass’y, MEGA PIXEL Plate, and Lens Rubber.
(2) Using tweezers or the like, push the claw A to remove the Jack1 Cover.
(3) Detach the Front Panel.
Note : When detaching the Front Panel, push part B from the back side.
<Note on Reassembling>
(1) When attaching the Front Panel, engage the claws C, D, E, F in that order.
(2) Attach the MEGA PIXEL Plate to the Lens Ring Ass’y, and insert the Lens Rubber in the orientation indicated in the figure below
for attachment to the Front Cover Ass’y.
f
5mm
Metal
M1.7
(self tap)
Note
Note on Reassembling (1)
Note on Reassembling (2)
Jack1 Cover
Jack1 Cover
Front Panel
Lens Ring Ass'y
Lens Ring Ass'y
Front Cover Ass'y
Lens Rubber
Lens Rubber
MEGA PIXEL Plate
MEGA PIXEL Plate
Front Cover Ass'y
(2)
(3)
Claw A
Claw A
Part B
Push
Push
(1)
(1)
(1)
Claw D
Claw F
Claw E
Claw C
(1) - f
(1) - f
Fig. 20