MVX250i E, MVX200i E, MVX200 E
DISASSEMBLING
22
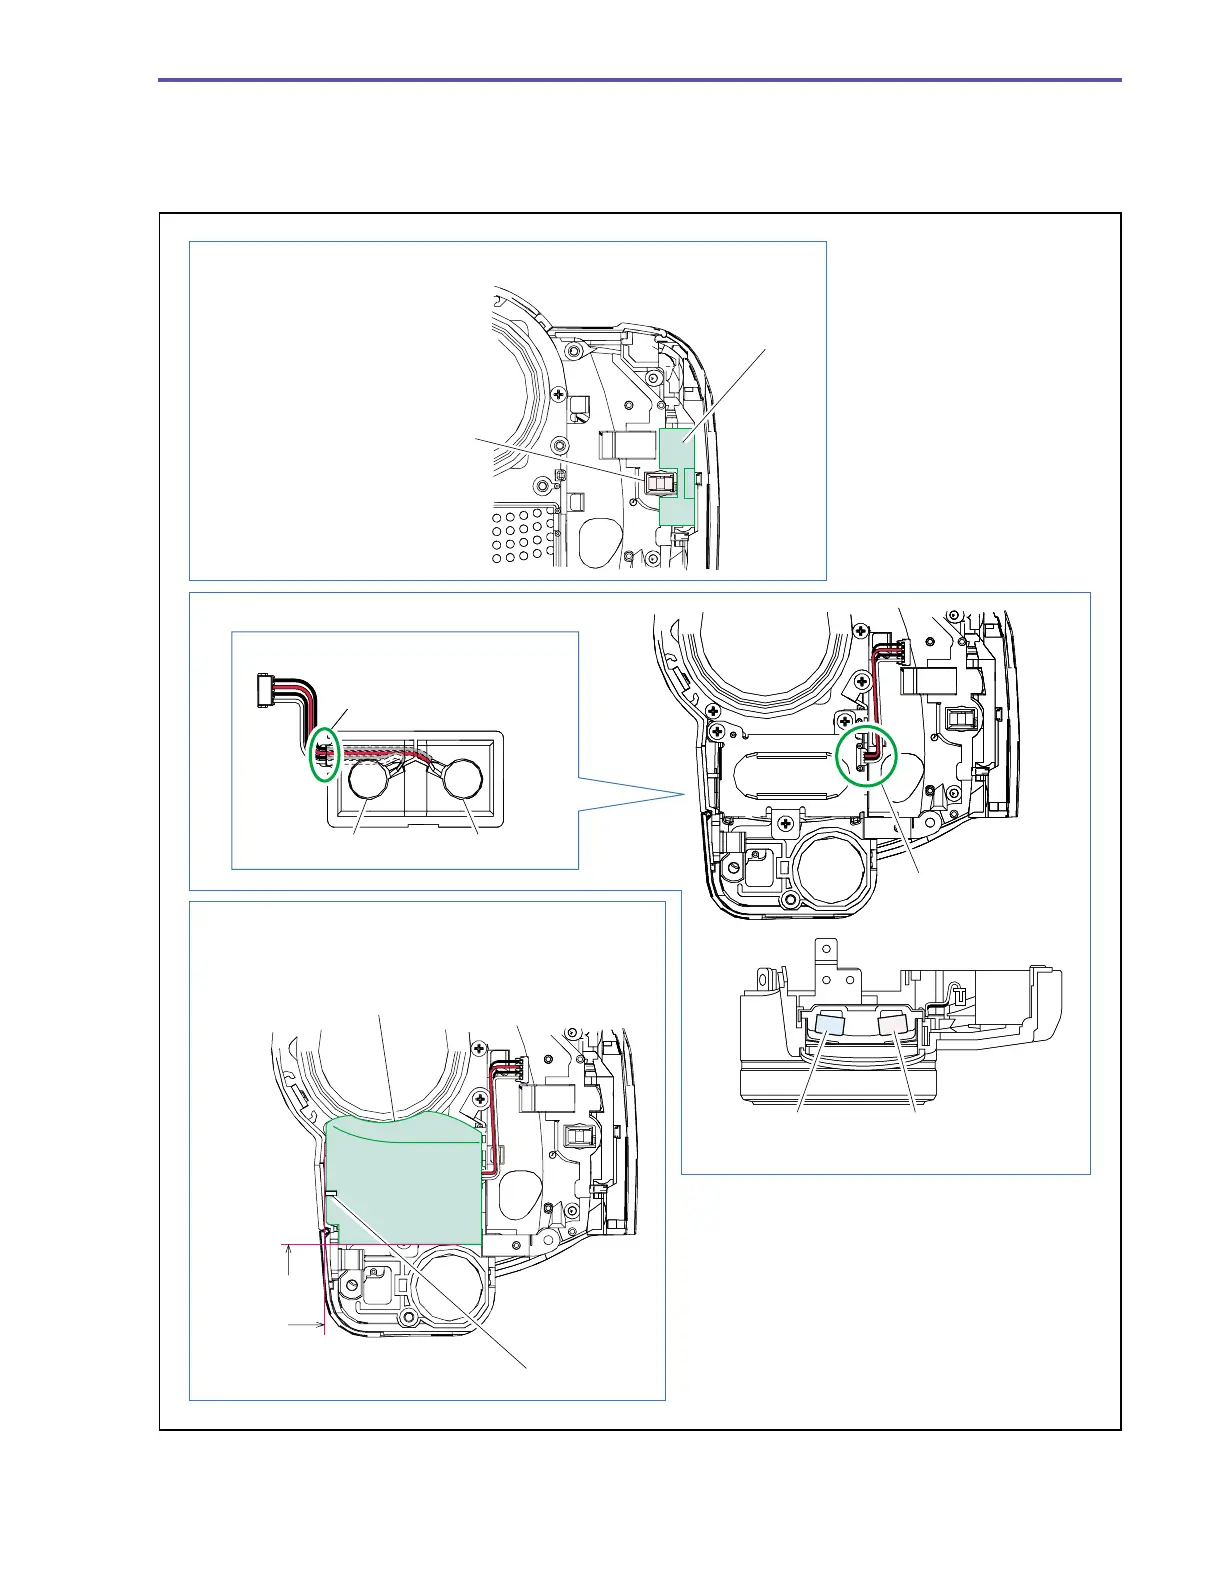
<Note on Reassembling>
(1) Attach the Cushion to the position indicated in the figure below. (MVX250i E only)
(2) Carry out wiring for the MIC Ass’y Cable as illustrated below.
(3) Attach the Front Cushion to the position indicated in the figure below.
Fig. 19
Note on Reassembling (1)
Note on Reassembling (2)
Note on Reassembling (3)
Cushion
Align the LED window with the dent
part of the Cushion.
(Attach the Cushion so that it will not
protrude onto the LED window.)
Arrange the four cable wires
in parallel so that they are not
crossed over each other.
Red / Black White / Black
Arrange the four cable
wires in parallel, and
run them between
the dowels.
L side
White / Black
R side
Red / Black
MVX250i E
only
Attachment
reference
for Front
Cushion
Align the slit and the rib.
The top part of the F Cover shall be turned onto
the cylindrical wall.