SUMMARY STEPS
1.
configure
2.
snmp-server mib bulkstat object-list list-name
3.
add {oid | object-name}
4.
commit
DETAILED STEPS
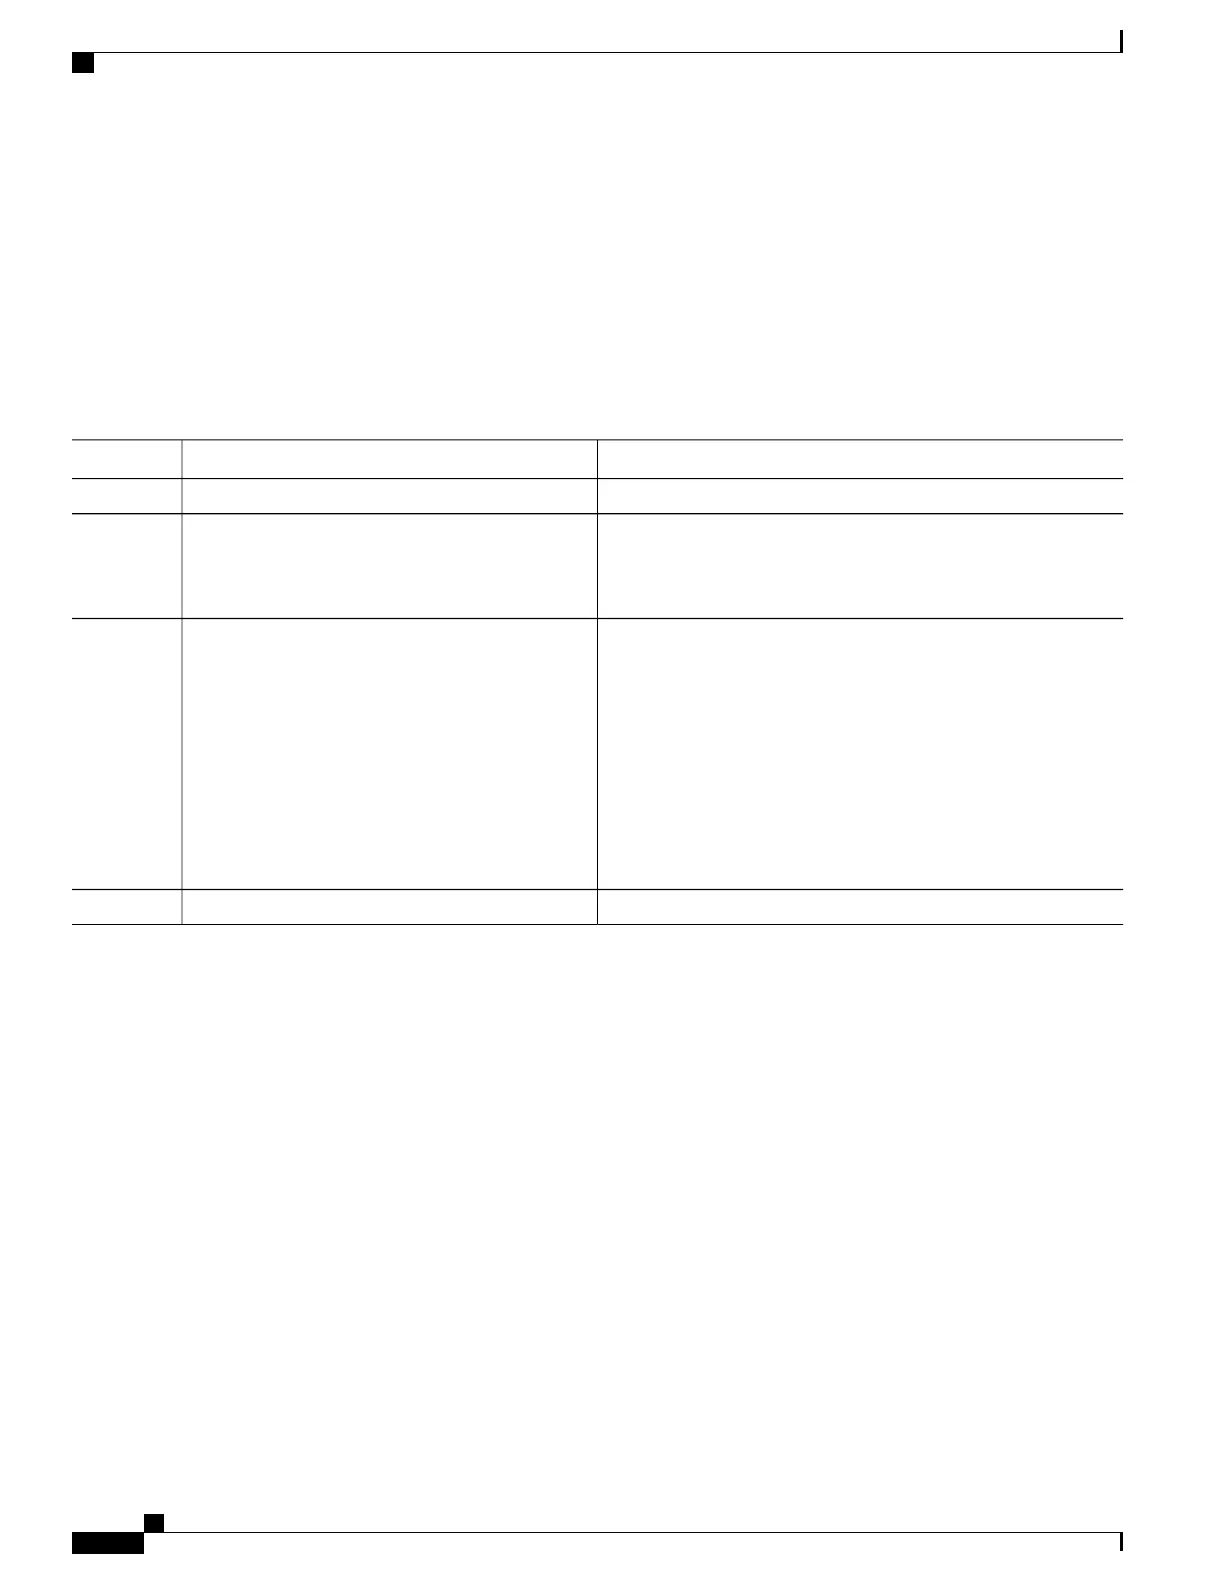
PurposeCommand or Action
configure
Step 1
Defines an SNMP bulk statistics object list and enters bulk statistics
object list configuration mode.
snmp-server mib bulkstat object-list list-name
Example:
snmp-server mib bulkstat object-list ifMib
Step 2
Adds a MIB object to the bulk statistics object list. Repeat as
desired until all objects to be monitored in this list are added.
add {oid | object-name}
Example:
RP/0/RSP0/CPU0:router(config-bulk-objects)#
Step 3
All the objects in a bulk statistics object list have to be
indexed by the same MIB index. However, the objects in
the object list do not need to belong to the same MIB or
MIB table.
When specifying an object name instead of an OID (using
the add command), only object names with mappings
shown in the show snmp mib object command output
can be used.
Note
add 1.3.6.1.2.1.2.2.1.11
RP/0/RSP0/CPU0:router(config-bulk-objects)#
add ifAdminStatus
RP/0/RSP0/CPU0:router(config-bulk-objects)#
add ifDescr
commit
Step 4
What to Do Next
Configure a bulk statistics schema.
Configuring a Bulk Statistics Schema
The second step in configuring periodic MIB data collection and transfer is to configure one or more schemas.
Before You Begin
The bulk statistics object list to be used in the schema must be defined.
Cisco ASR 9000 Series Aggregation Services Router System Management Configuration Guide, Release 5.1.x
386
Configuring Periodic MIB Data Collection and Transfer
Configuring a Bulk Statistics Schema

 Loading...


