NOTE: Factory settings have groups of
lamps activate sequentially up to 100 times
or until manually stopped.
13.2
Press either the LIGHT TEST switch or
Lamp Check button to begin the pretrip
light inspection. If equipped, groups of
lamps will cycle on and off in the following
sequence:
•
Group 1: Always ON: marker lamps,
clearance lamps, tail lamps, licence
plate lamp
•
Group 2: Low beam headlamps
•
Group 3: High beam headlamps and
stop lamps
•
Group 4: Backup lamps and daytime
running lamps
•
Group 5: Front and rear fog lamps
•
Group 6: Turn signals and utility
lamps
NOTE: LED accent lighting turns off when
the high beam headlamps turn on.
13.3
Walk around the truck and check that the
lamps are working properly.
13.4
Verify that all exterior lights and reflectors
are clean and intact.
13.5
The pretrip light inspection can be stopped
by:
•
releasing the parking brake;
•
Pressing either the LIGHT TEST
switch on the dash or the Lamp
Check button on the key fob.
14.
Inspect the seat belts and tether belts.
WARNING
Inspect and maintain seat belts. When any part of
a seat belt system needs replacement, the entire
seat belt must be replaced, both retractor and
buckle side. Any time a vehicle is involved in an
accident, and the seat belt system was in use,
the entire vehicle seat belt system must be re-
placed before operating the vehicle. Do not at-
tempt to modify the seat belt system; doing so
could change the effectiveness of the system.
Failure to replace worn or damaged seat belts, or
making any modifications to the system, may re-
sult in personal injury or death.
14.1
Check the web for fraying, cuts, extreme
dirt and dust, or for severe fading from
exposure to sunlight, especially near the
buckle latch plate and in the D-loop guide
area.
14.2
Check operation of the buckle, latch, Kom-
fort Latch or Sliding Komfort Latch (if
equipped), web retractor, and upper seat
belt mount on the door pillar. Check all
visible components for wear or damage.
14.3
Check the seat belt and tether belt con-
nection points and tighten any that are
loose.
f61143608/04/2016
LIGHT
TEST
Fig. 25.8, Pretrip Light Test Switch
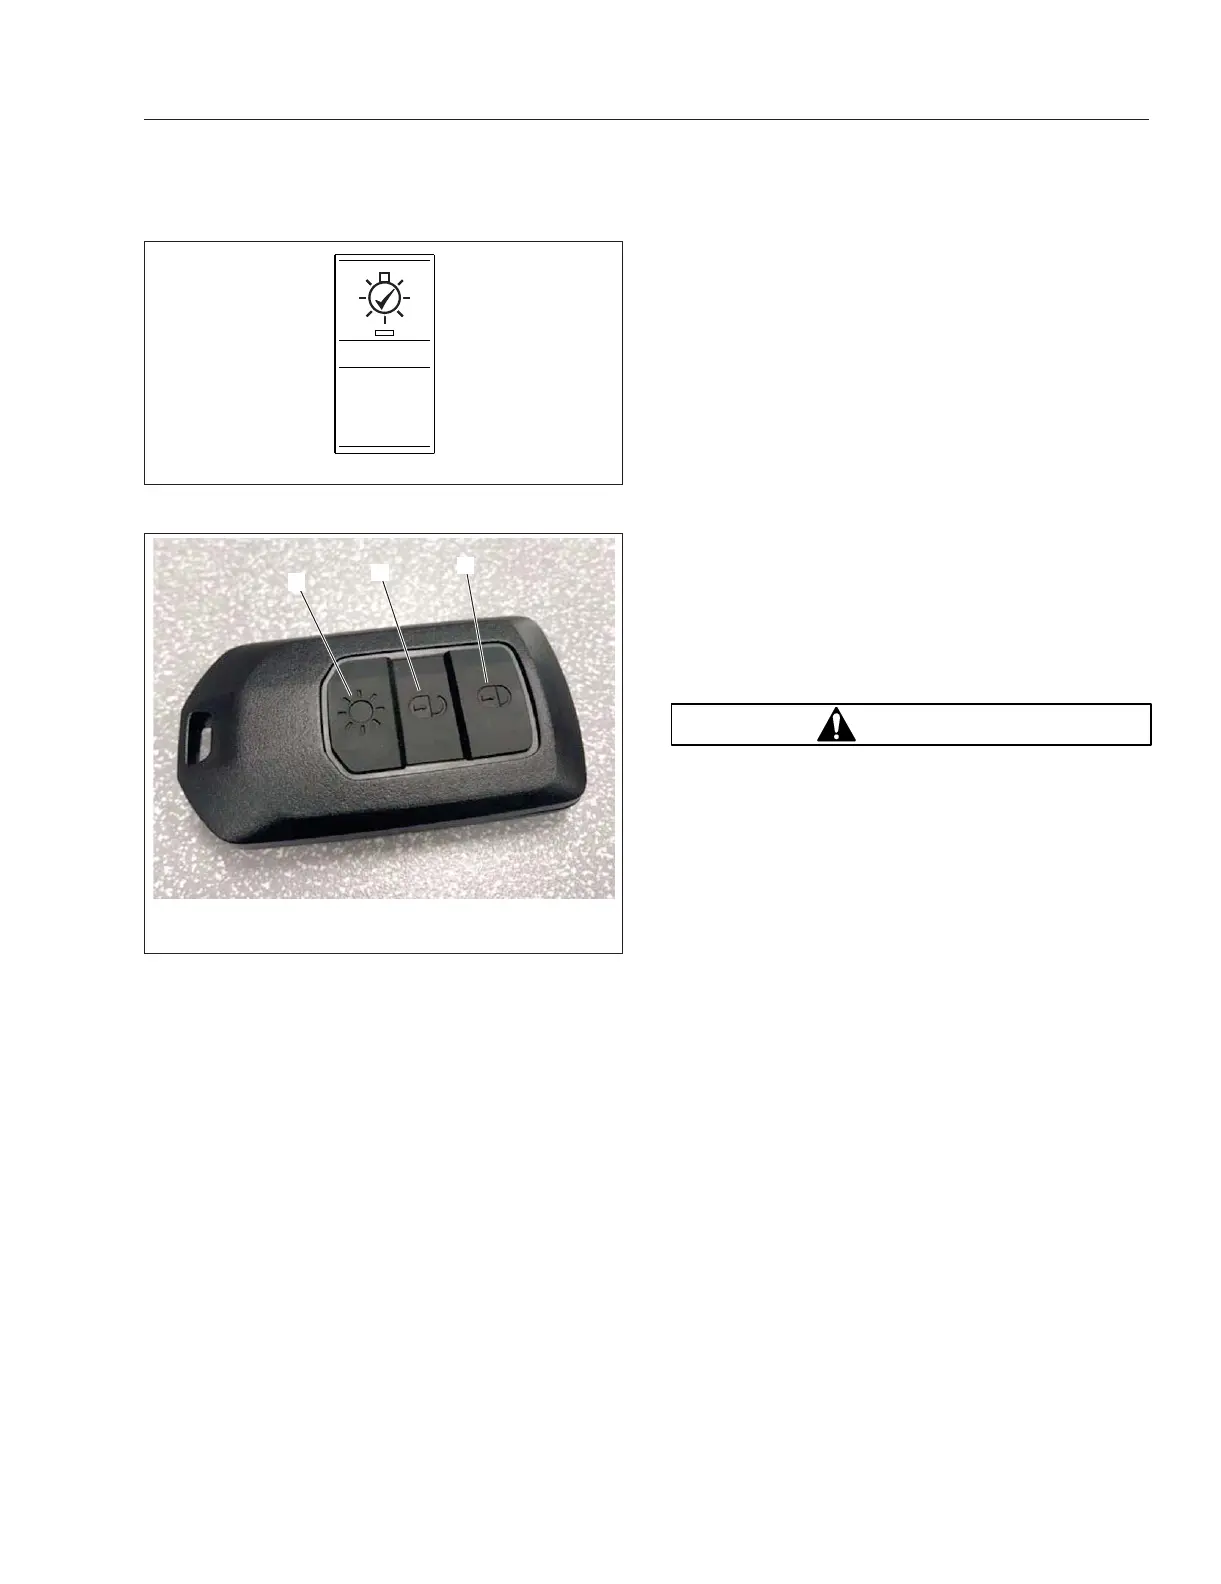
f546880a10/23/2019
3
2
1
1. Door Lock 2. Door Unlock 3. Lamp Check
Fig. 25.9, Key Fob
Pre- and Post-Trip Inspections and Maintenance
25.8