Setup
Operating Instructions 867 - 04.0 - 03/2018 121
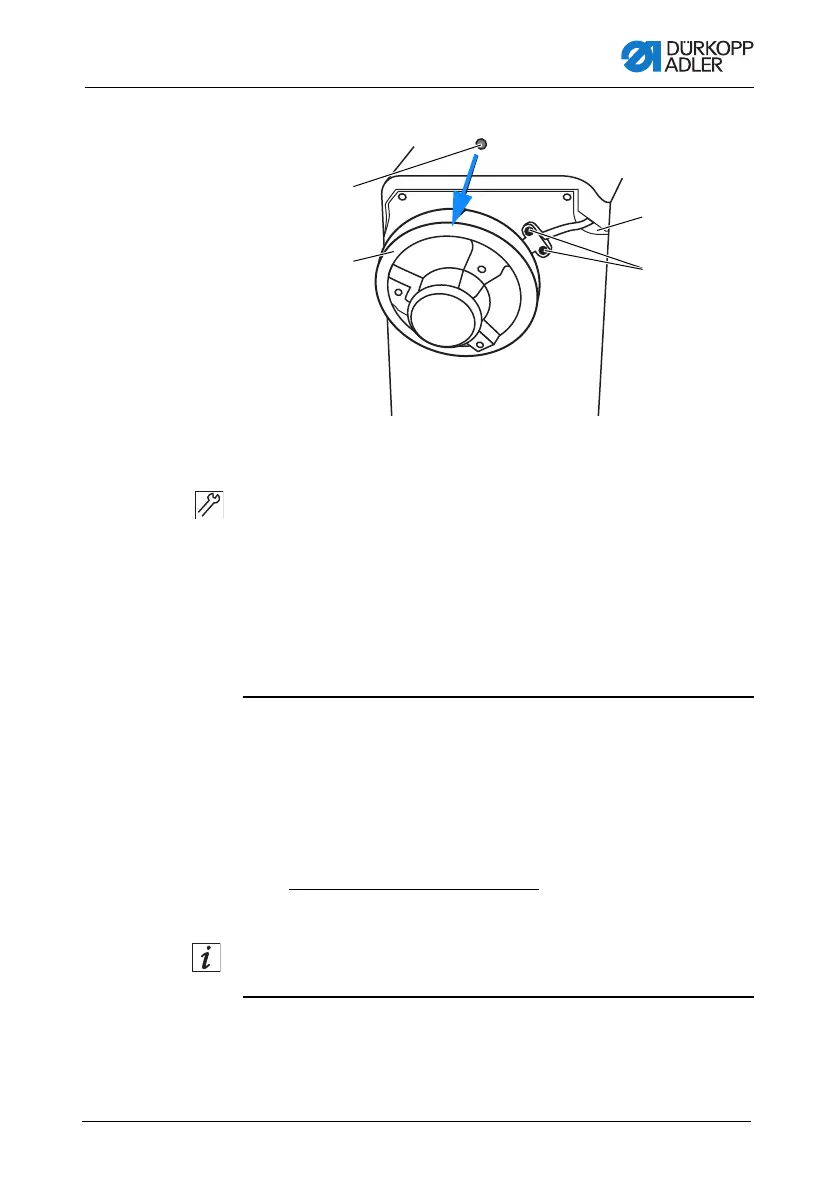
Fig. 72: Assembling and connecting the Hall sensor
3. Assemble the Hall sensor at the pre-drilled holes (3).
4. Feed the Hall sensor cable through the cable opening (4)
down to the control.
5. Check if a magnet is already fitted on the inside of the pulley
wheel (2). If a magnet is not already fitted:
Insert the magnet (1) provided in the Hall sensor accessory
pack.
6. Insert the Hall sensor plug into socket B18 of the respective
control.
Additional step for Efka control
7. Check and set the following parameters:
• F-290 as per Parameter sheet 9800 331104 PBXX
• F-111 set to 3,000 rpm or less
• F-270 set to 6 (position sensor selection)
• F-272 to be calculated according to the following formula:
With DAC controls the parameters are automatically set via
transfer of the machine ID.
8. Place the valve cover and tighten.
9. Check the setting of the Hall sensor:
(1) - Magnet
(2) - Belt pulley
(3) - Pre-drilled hole
(4) - Cable opening
Motor belt pulley diameter (teeth)
Machine belt pulley diameter (teeth)
x 1000

 Loading...


