Setup
118 Operating Instructions 867 - 04.0 - 03/2018
9. Connect the blue cable to the upper terminal (3) and the brown
cable to the lower terminal (4).
10. Fasten the front panel with the 4 screws.
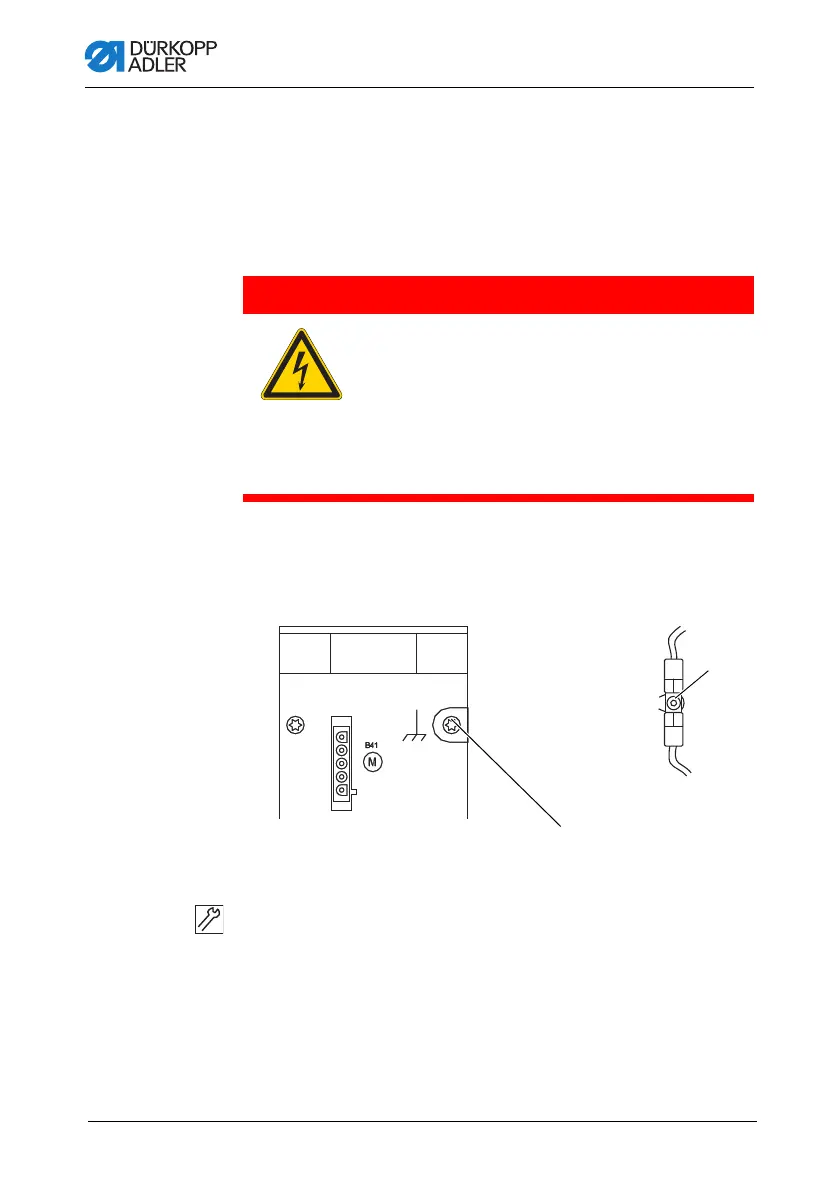
7.12.3 Establishing equipotential bonding
The grounding wire conducts away any static charging of the
machine head.
Fig. 70: Establishing equipotential bonding
To establish equipotential bonding:
1. Tilt the machine head.
2. Feed the protective earth conductor from the connection (1)
on the rear side
Feed the control through the cutout in the tabletop and slip it
onto the tab connector (2) on the base plate.
DANGER
Risk of death from electric shock!
Unprotected contact with electricity can result in
serious injuries or death.
Disconnect the power plug before establishing
equipotential bonding.
Ensure the power plug cannot be unintentionally
reinserted.
(1) - Connection on the control (2) - Tab connector

 Loading...


