EPSON Stylus Pro 9000
Disassembly & Assembly 73
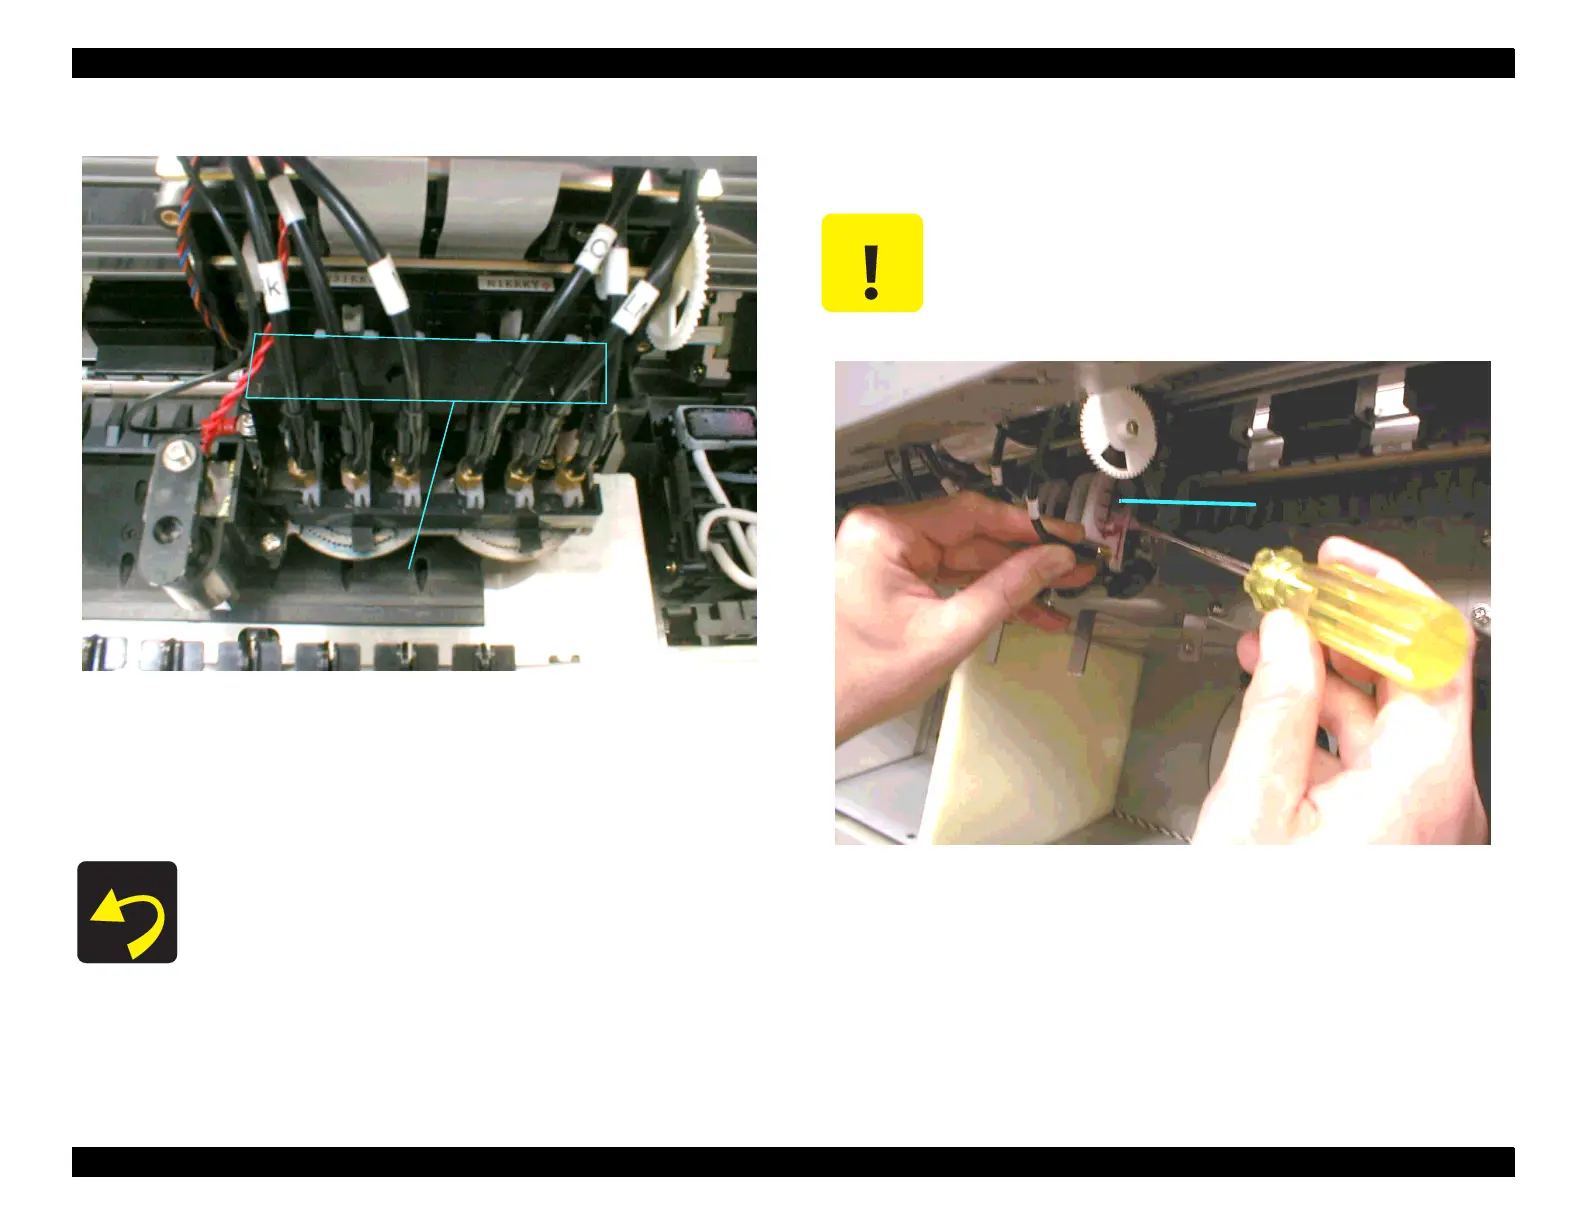
4. Unhook the ink tubes from the damper holder.
Figure 4-26. Damper Holder Removal
5. Remove the screw (CP(W2) M3x6) securing the damper holder and
ground wire. Then remove the Damper Holder by first pulling its left side
out toward you (forward), and then sliding the whole unit out toward the
right.
The ground wire connector attaches to the carriage between
the head of the screw and the plastic Damper Holder.
6. Pull out the dampers. To remove them, place the tip of a flat-head
screwdriver under rear-most (or upper-most) portion of each damper as
shown, and gently pry it out.
Figure 4-27. Damper Removal
Damper Holder
REASSEMBLY
Avoid squeezing the dampers. Handle them only by their
edges. If pressure is applied to the middle of the dampers,
the ink inside will squirt out.
Damper
 Loading...


