-
2. The Login screen appears. For user mode login, enter the Login name as User and
click OK with no password.
3. If the login screen does not appear, check all network connections.
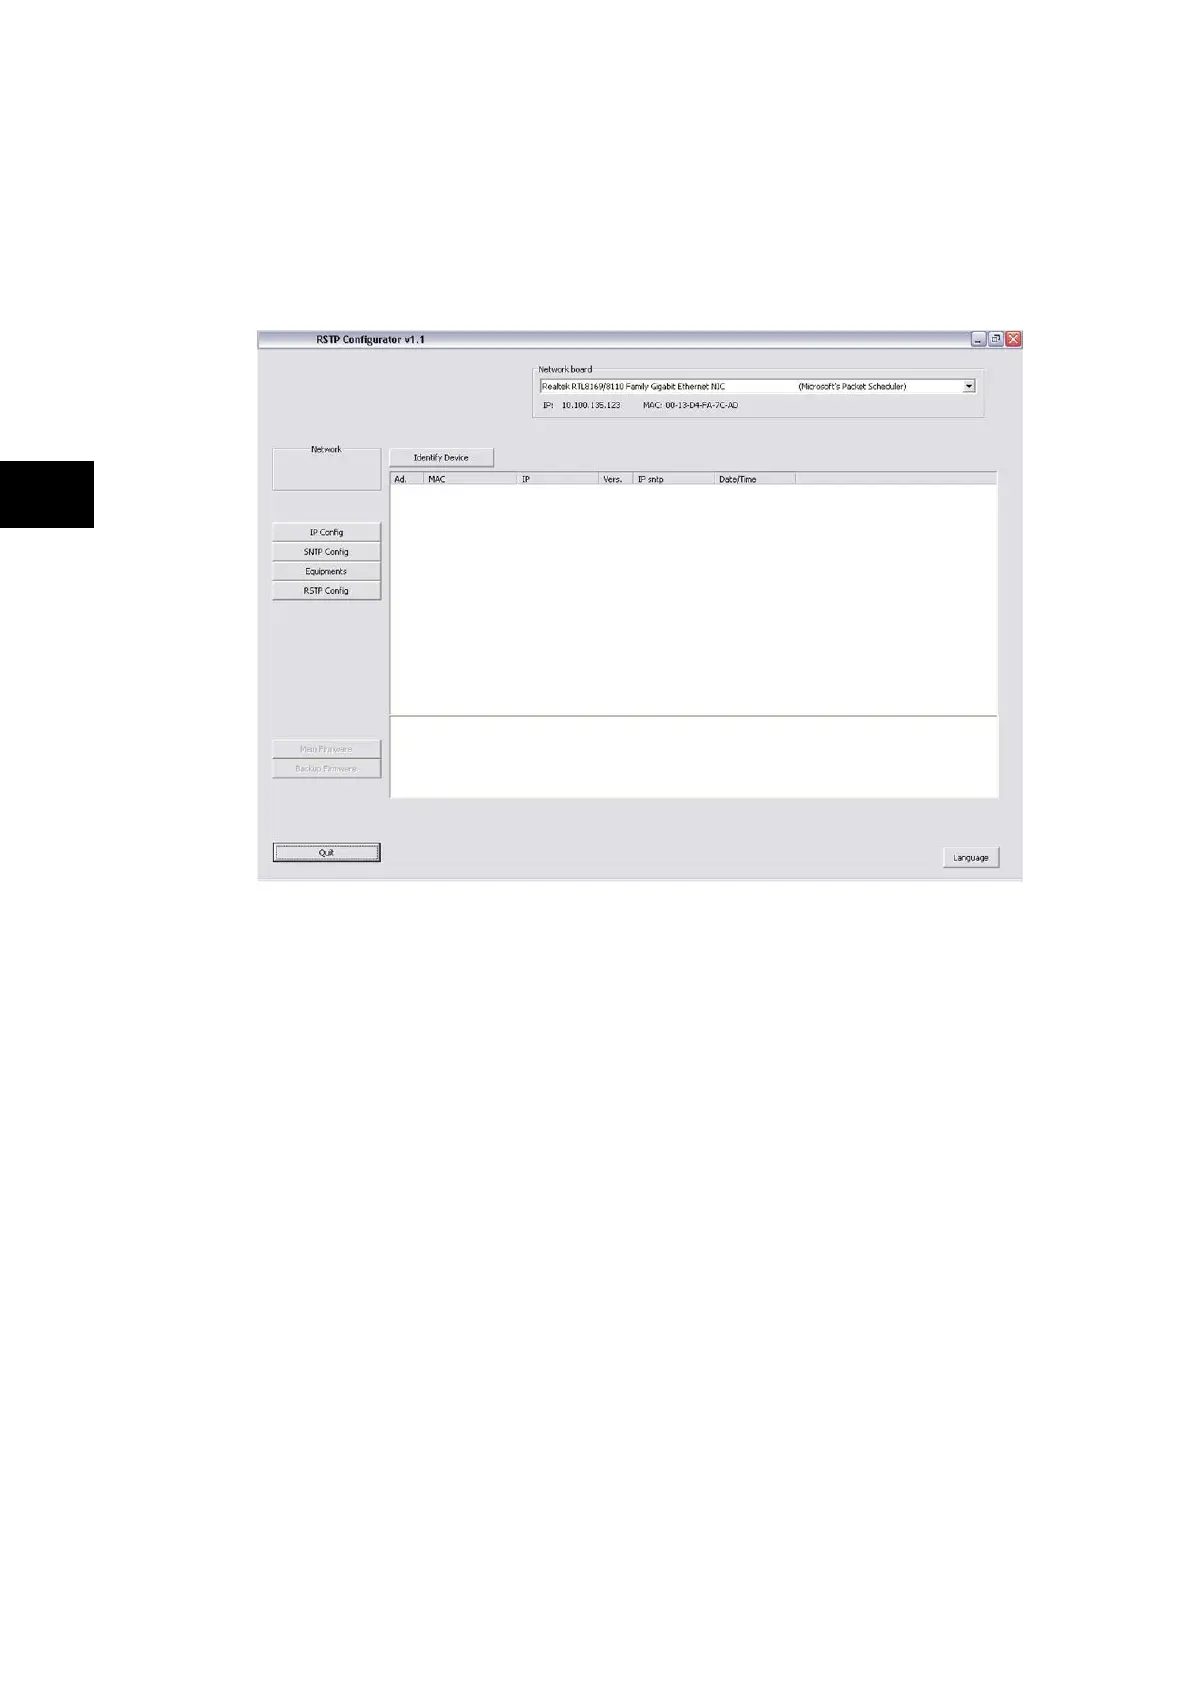
4. The main window of the RSTP Configurator appears. The Network Board drop-down
list shows the Network Board, IP Address and MAC Address of the PC in which the
RSTP Configurator is running.
Device Identification
1. To configure the REB, go to the main window and click Identify Device.
2. The REB connected to the PC is identified and its details are listed as shown below:
• Device address
• MAC address
• Version number of the firmware
• SNTP IP address
• Date & time of the real-time clock, from the board.
Note: Due to the time needed to establish the RSTP protocol, it is necessary to
wait 25 seconds between connecting the PC to the IED and clicking the
Identify Device button.
IP Address Configuration
1. To change the network address component of the IP address, go to the main window
and click the IP Config button. The Device setup screen appears. The first three
octets of the board IP address can be configured.
Note: The last octet is set using the DIP switches (SW2) next to the ribbon
connector.
2. Enter the required board IP address and click OK. The board network address is
updated and displayed in the main window.
SNTP IP Address Configuration
1. To Configure SNTP server IP address, go to the main window and click the SNTP
Config button. The Device setup screen appears.