Section 5 - Remove & Replace
5-7
8.
At the encoder end of the belt, install the tension spring and tensioning nut.
9.
Tighten the tension nut so that the spring is compressed to 7/8”. The bracket cutout can
be used as a measuring guide (the inside of the washer should be flush with the bracket
cut).
10.
Tighten the two mounting bolts holding the tension block.
11.
Perform the MOTOR$TY calibration procedure.
Note:
When starting this procedure, make sure the encoder
is not
clamped to the drive shaft
tubing.
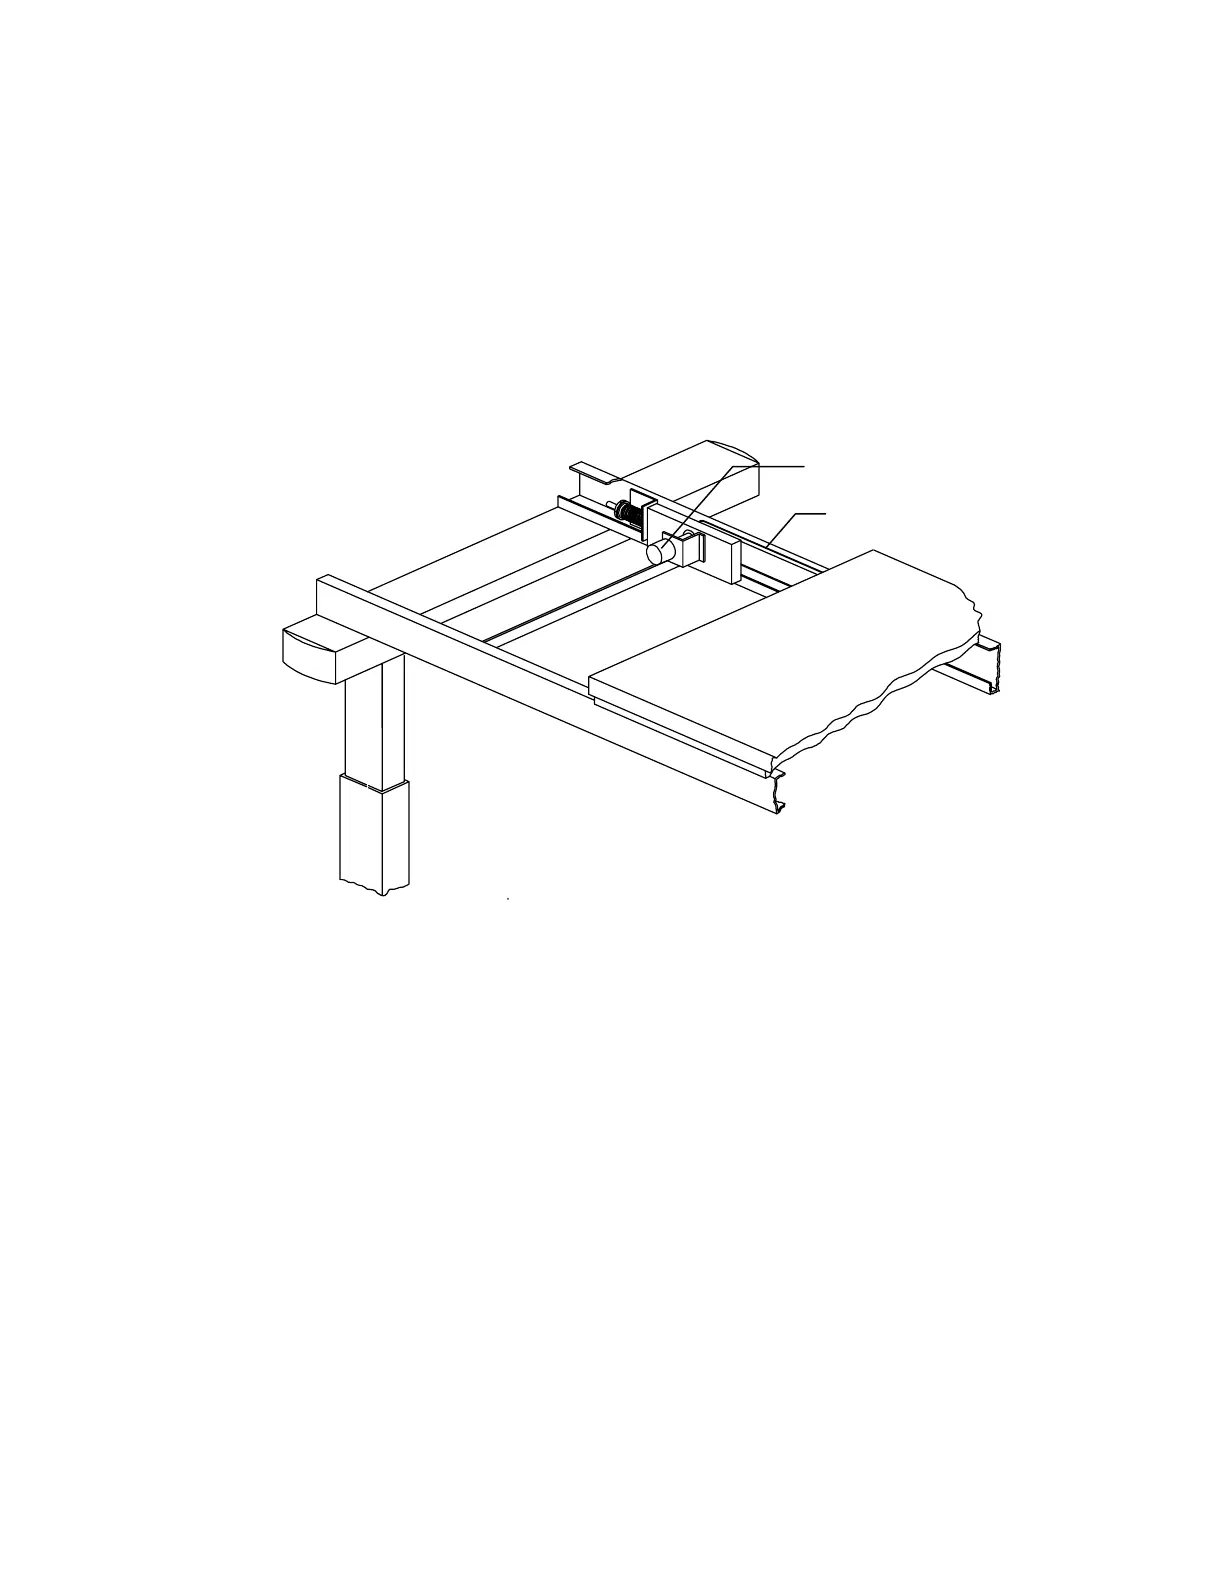
Table Y Encoder
Table Y Belt
Figure 5-3. Left Side Table Y FRUs
Table Y Encoder
To remove and replace the Table Y Encoder refer to Figure 5-2, and Figure 5-3, and follow the
procedure below:
1.
Center the table and remove the two screws that secure the table top in place.
2.
Turn off the QDR 4500 instrument power, computer power, and main circuit breaker.
3.
Pull the table top to the left far enough to remove the right table rail end cover, and
remove the cover. Mark this as the right cover so that it is not confused later with the
left cover (they are not interchangeable).
4.
Pull the table top to the right far enough to remove the left table rail end cover, and
remove the cover. Mark this as the left cover so that it is not confused later with the
right cover (they are not interchangeable).