QDR
4500 Technical Manual
5-14
3.
Remove 6 flat head Phillips screws from the upper pedestal cover and remove the cover.
4.
Remove 5 flat head Phillips screws from the lower pedestal cover and remove the cover.
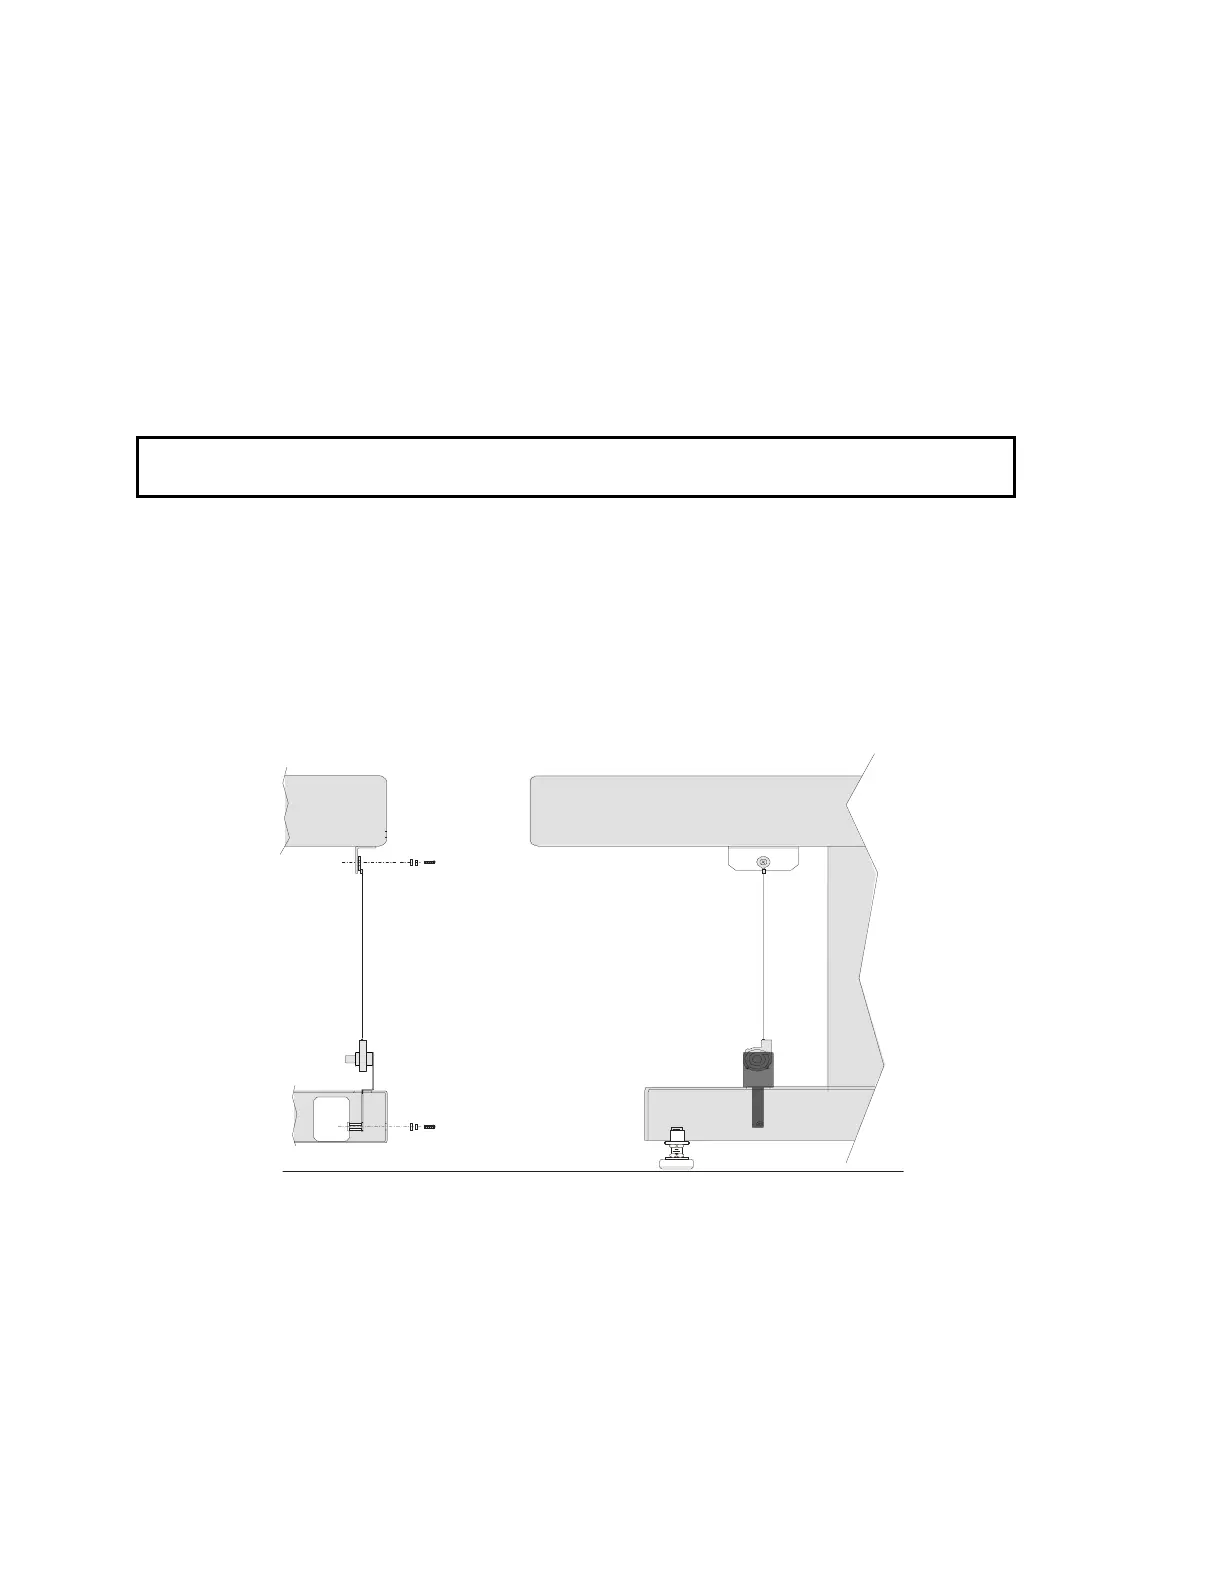
5.
Remove the linear encoder top screw (Phillips).
6.
Remove the linear encoder bottom screw (access to the bottom Phillips screw is through
the frame hole).
7.
Unplug the linear encoder cable from the TZ Drive board and snake the cable out.
Note:
Older versions have a tubular type encoder. The new encoders are mounted on a mounting
bracket and have left and right versions.
CAUTION:
Do not allow the string to snap back into the encoder after being extended. This can
permanently damage the unit.
8.
Route the new encoder cable through the path of the old encoder, and plug it into the TZ
Drive board.
9.
Install the rotary encoder at the bottom using the screw and two washers provided.
The bracket must sit on the top surface of the base frame before tightening.
10.
Replace the linear encoder top screw by extending the string and fastening to the top
using screw and washers provided.
11.
Turn the instrument power on.
Figure 5-6. Installing the Rotary String Encoder
12.
Run QC and recalibrate.