QDR
®
4500 Technical Manual
3-16
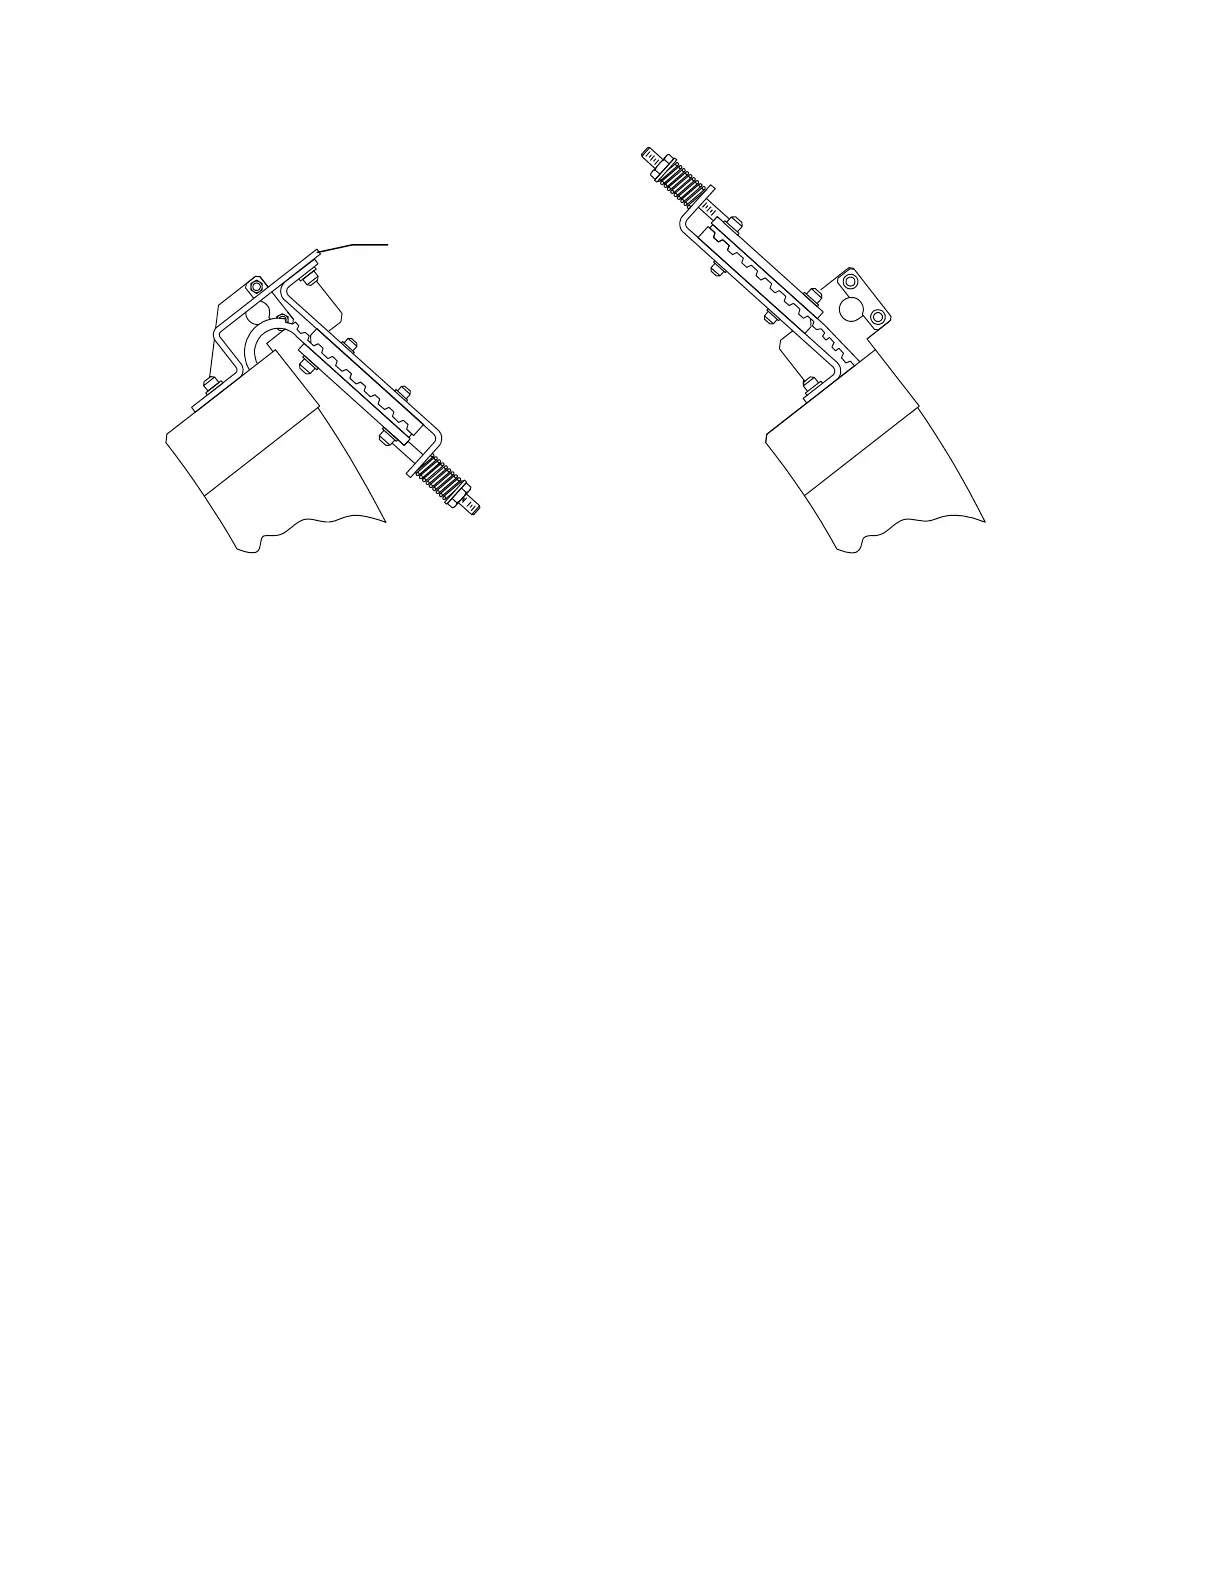
Shipping
Bracket
Shi
in
Location
Installed Location
Figure 3-15. Repositioning the Belt Tensioning Mechanism
9.
Install the two 1/2" bolts.
10.
Remove the C-arm top cover.
11.
Install the counter-weights.
12.
Connect the two cables from the upper C-arm to the lower C-arm.
13.
Install the 1/2" x 13" trim plate that mounts (on the front) between the upper and lower
C-arm (make sure trim plate is aligned to front of C-Arm).
14.
Replace the back C-arm cover.
15.
Remove the four C-arm shipping brackets (see Figure 3-12). Save these brackets, they
are needed if the tank is ever removed.
16.
Measure from the bottom of the C-arm to the top of the tank cover in all four corners.
All measurements should be within 1/8". If not, perform the
C-Arm Parallelism
Adjustment
on page 4-3.
17.
Ensure that the scanner is level.
INSTALL QDR 4500W, OR QDR 4500C, C-ARM
Follow the procedure below to install a QDR 4500W, or QDR 4500C, C-arm assembly:
1.
Carefully place the C-arm on the bottom bolts. Tilt the arm back slightly and slip the
two cables through the openings, then tilt the arm forward until the front bolts are in
place.
2.
Put 7/16" nuts and washers on all 4 bolts and tighten.
3.
Install both cables.