48
Installation
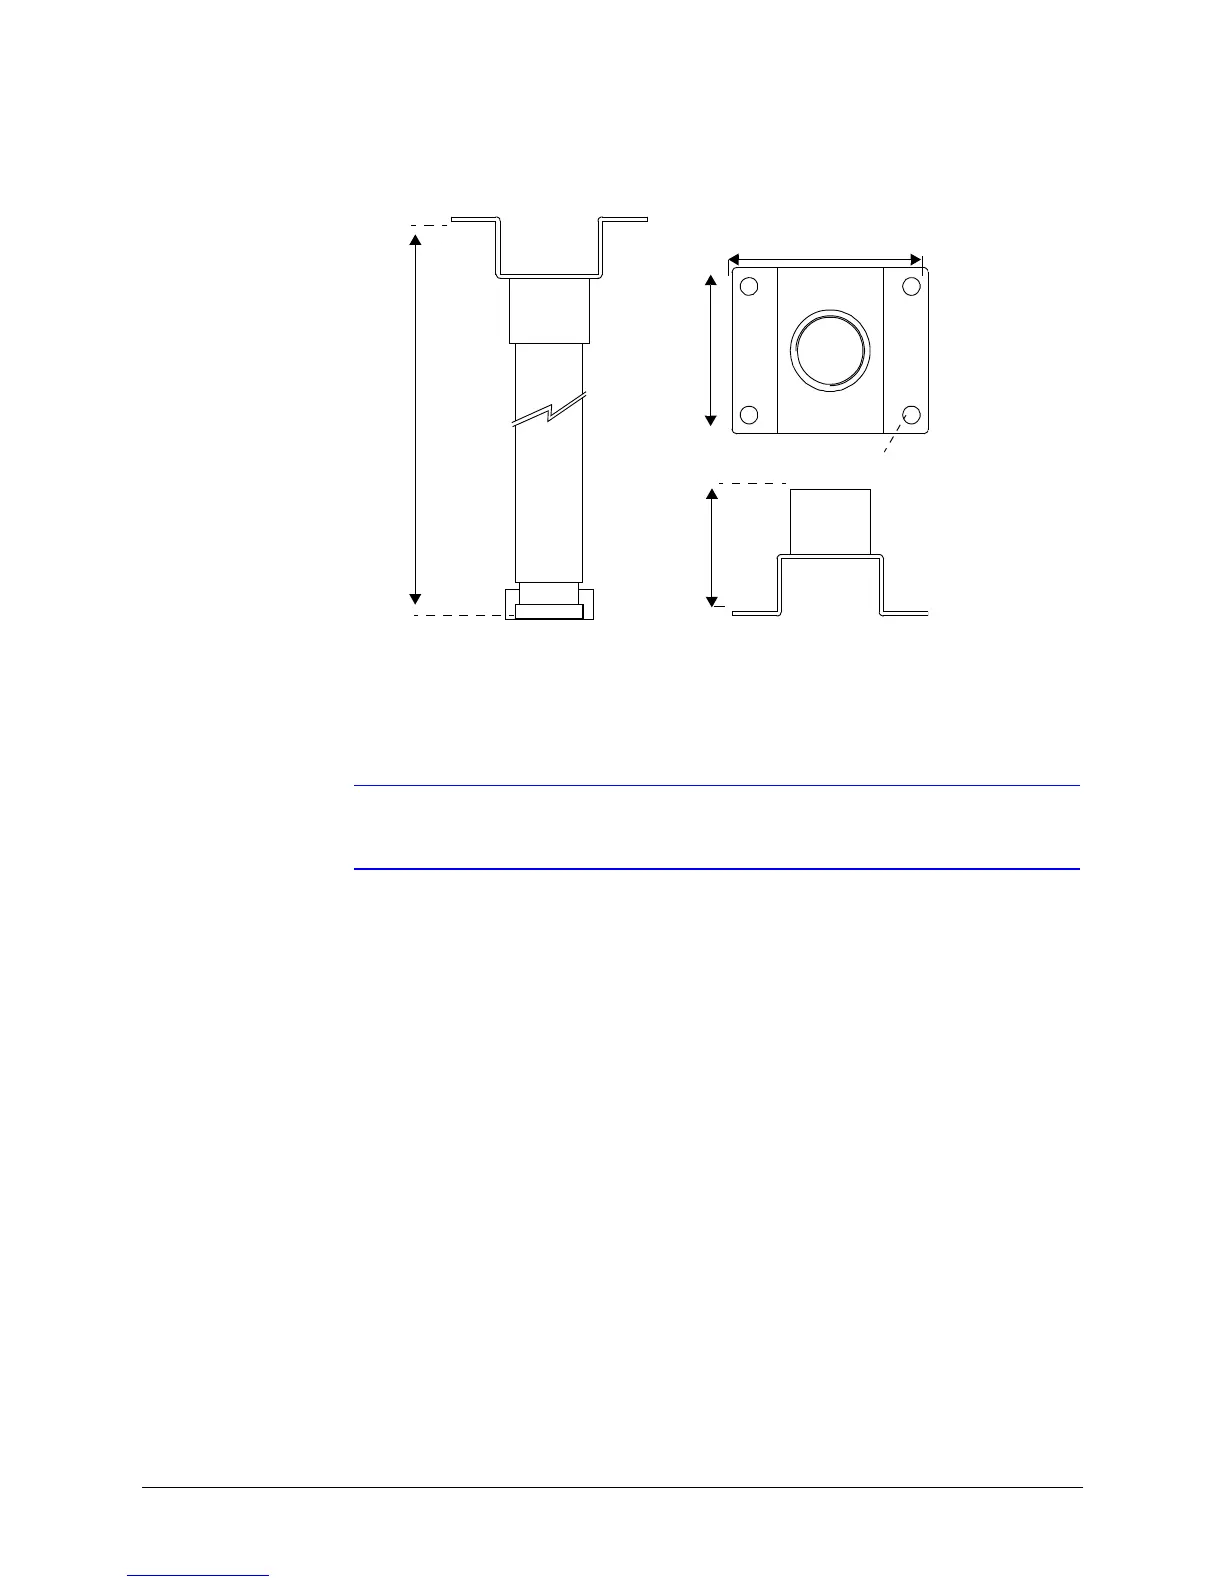
Figure 3-11 Ceiling Mount Dimensions
Installing the Rugged Dome Bracket and Adapters
Note If you are using the optional pole or corner adapters, also see Figures 3-8 and
3-9 respectively.
1. Use the hole pattern on the bracket to drill holes in the wall, ceiling or roof. Use the
appropriate hardware for the mounting surface.
2. (Optional) If you are installing the rugged bracket with a corner adapter (HDXCMA1)
or pole mount adapter (HDXPMA1) then:
Pole Adapter
Secure the pole mounting bracket to the pole using hardware specifically designed
for the surface/material. There are four cutouts (two on each side), 0.24” x 0.75” (6
mm x 19 mm), to accommodate straps to secure the pole mounting bracket to a
pole.
Corner Adapter
Secure the corner bracket using hardware specifically designed for the
surface/material. The bracket has eight 0.39” (10.0 mm) holes; four on each side.
3. (Optional) If you are installing with a corner or pole adapter, line up the hole pattern
on the rugged bracket holes as indicated in Figure 3-13 with the hole pattern on the
corner or pole adapters.
4. Adjust the mounting bracket to any angle from 0° to 90° with respect to the housing.
The housing must be positioned horizontally and parallel to the floor. See
Figure 3-12.
14.76” (375.0 mm)
5.51” (140.0 mm)
PF 1.5”
3.58" (91.0 mm)
4.56” (116.0 mm)
0.47” (12.0 mm) diameter
 Loading...