66
Before You Begin Configuring
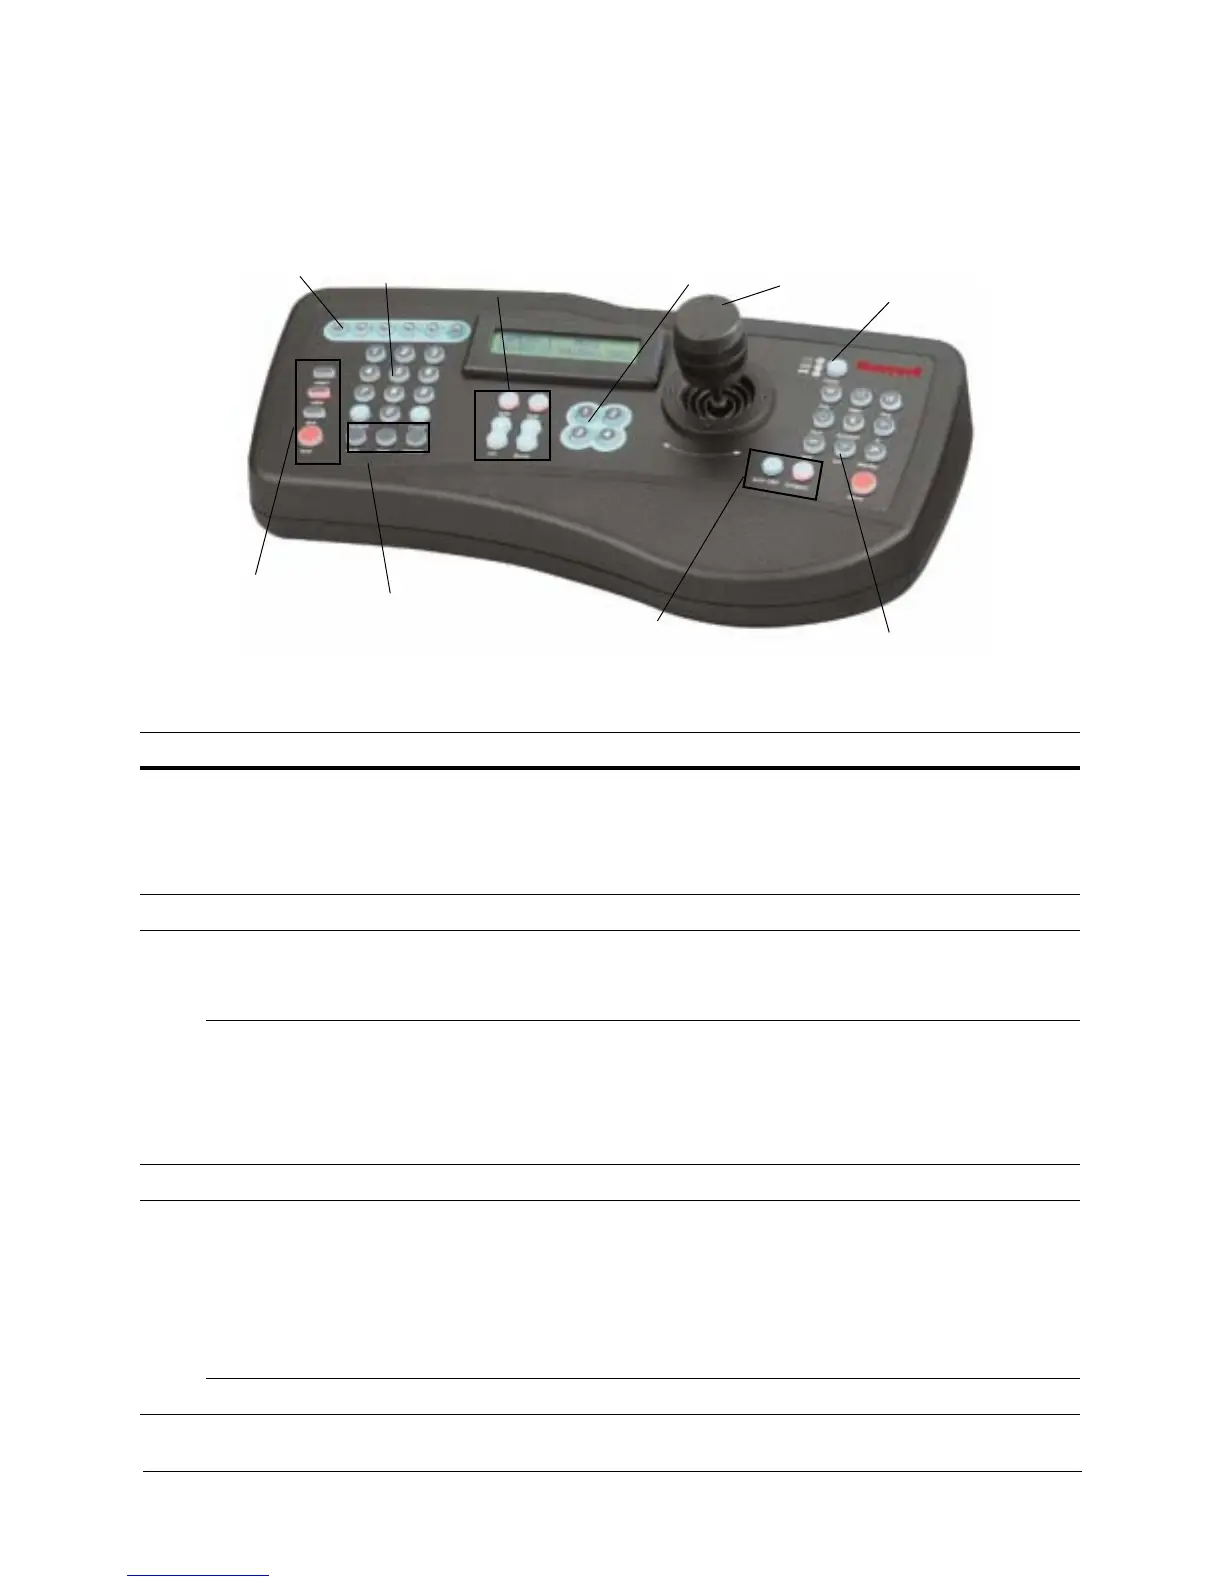
Figure 4-1 HJZTP Controller Layout
Function buttons
Number buttons:
Joystick controller
Iris and focus buttons
Preset buttons
Wash, wipe, aux
and lock
camera, preset, sequence,
monitor
FN
auto 180, autopan
Mode
1
2
3
4
5
6
7
8
9
10
Table 4-2 HJZTP Controller Functions
No. Button Use
1. F1, F2, F3,
F4
F5 (enter)
F6 (menu)
• Move up (F1), down (F2), left (F3)and right (F4)
• Press F5 to enter a menu or item.
• Press F6 to exit the current menu; In MAXPRO-mode/Diamond mode, it sends the
ESC command to the dome.
2. 0 – 9 Press the number corresponding to the submenu or list selection.
3. iris + / -
auto iris
• Press + (Open) or - (Close) to manually change the camera’s iris. The camera
auto-exposure must be off.
• Press auto above the iris control buttons to put the camera in auto-iris mode.
focus + / -
auto focus
• Press + (Far) or - (Near) on the controller to manually focus the camera when you
zoom in and out.
• Use the OSD menus to set auto focus. The auto focus can be set to come on when the
camera is zoomed or when the dome undertakes a pan, tilt or zoom action. When the
zoom is changed it must automatically focus; optionally when pan, tilt or zoom is
changed it must also auto focus.
4. presets 1–4 Press 1 to 4 preset number to go to a programmed location.
5. move
up/down,
left/right
Tilt the joystick up or down.
Move the joystick left and right to pan.
Note If the pan and/or tilt functions of the ACUIX™ are reversed through the on-screen
setup menus (Pan Reverse or Tilt Reverse is enabled), joystick up performs tilt
down, joystick down performs tilt up, joystick left performs pan right and joystick
right performs pan left.
zoom in/out Rotate the top of the joystick clockwise to zoom in and counter-clockwise to zoom out.
 Loading...