82
Configuration
Setting the Exposure Level
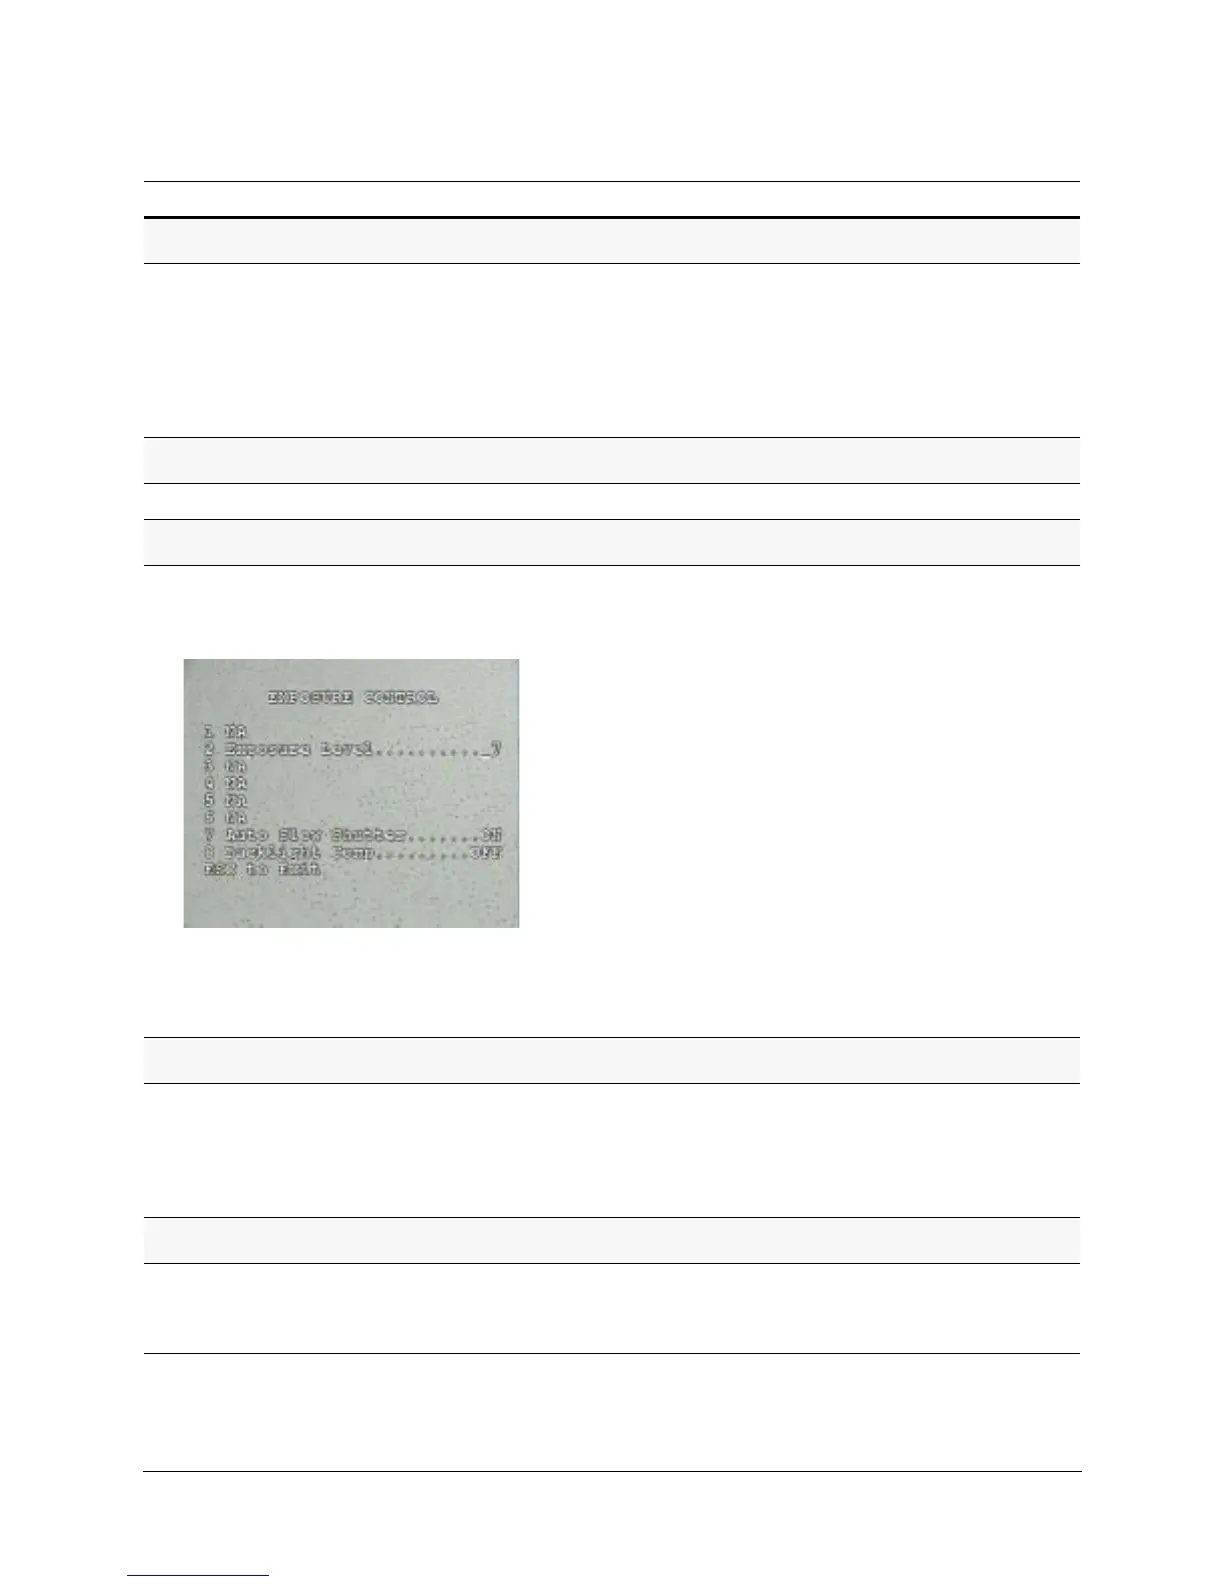
1. Select 5 Camera Options 2 Exposure Control 2
Exposure Level.
2. Select a number, where:
• 0 is for a dark/outdoor application
• 14 is for a bright/indoor application
• 7 (default)
Available with all camera models. This
explains the steps for HDXA, HDXJ and
HDXF. For HDXG cameras, go to the next
section.
Turning Auto Exposure ON or OFF
Press 92 Preset.
Setting the Auto Slow Shutter
1. Select 5 Camera Options 2 Exposure Control 7 Auto
Slow Shutter.
2. Select ON or OFF.
With Auto Slow Shutter, the camera
automatically slows the shutter speed
when it detects low light.
HDXA, HDXF, HDXJ cameras only.
To ensure that your dome maintains the
best low light performance in all
conditions, with firmware V3.2, Wide
Dynamic Range (WDR) is automatically
disabled when the camera reaches the
Auto Slow Shutter limit. This prevents the
video level from oscillating between WDR
and Auto Slow Shutter.
HDXF and HDXJ cameras only.
With V3.0 and later, when Auto Slow
Shutter and NightShot features are ON,
WDR will not be allowed to turn on. As
well, when Auto Slow Shutter and WDR
features are ON, if the camera goes to
NightShot mode, then WDR turns off.
Turning Backlight Compensation ON or OFF
1. Press 92 Preset to turn auto exposure ON.
2. Press 93
Preset.
- OR-
Select 5 Camera Options
2 Exposure Control 8
Backlight Compensation ON or OFF (default).
Available with all camera models. This
explains the steps for HDXA, HDXJ and
HDXF. For HDXG cameras, go to the next
section.
Setting NightShot Control (TDN) to Manual or Auto
1. Press 92 Preset to turn auto exposure ON.
2. Select 5 Camera Options
3 NightShot Control 1
NightShot Mode
MAN (default) or AUTO.
Available with camera models HDXJ,
HDXF and HDXG (NOT HDXA).
Task/Action (with Default) Notes
 Loading...