EasyManuals Logo

Honeywell ACUIX Installation And Configuration Guide

Honeywell ACUIX
142 pages
To Next Page IconTo Next Page
To Previous Page IconTo Previous Page
Page #58 background imageLoading...
Page #58 background image
58
Installation
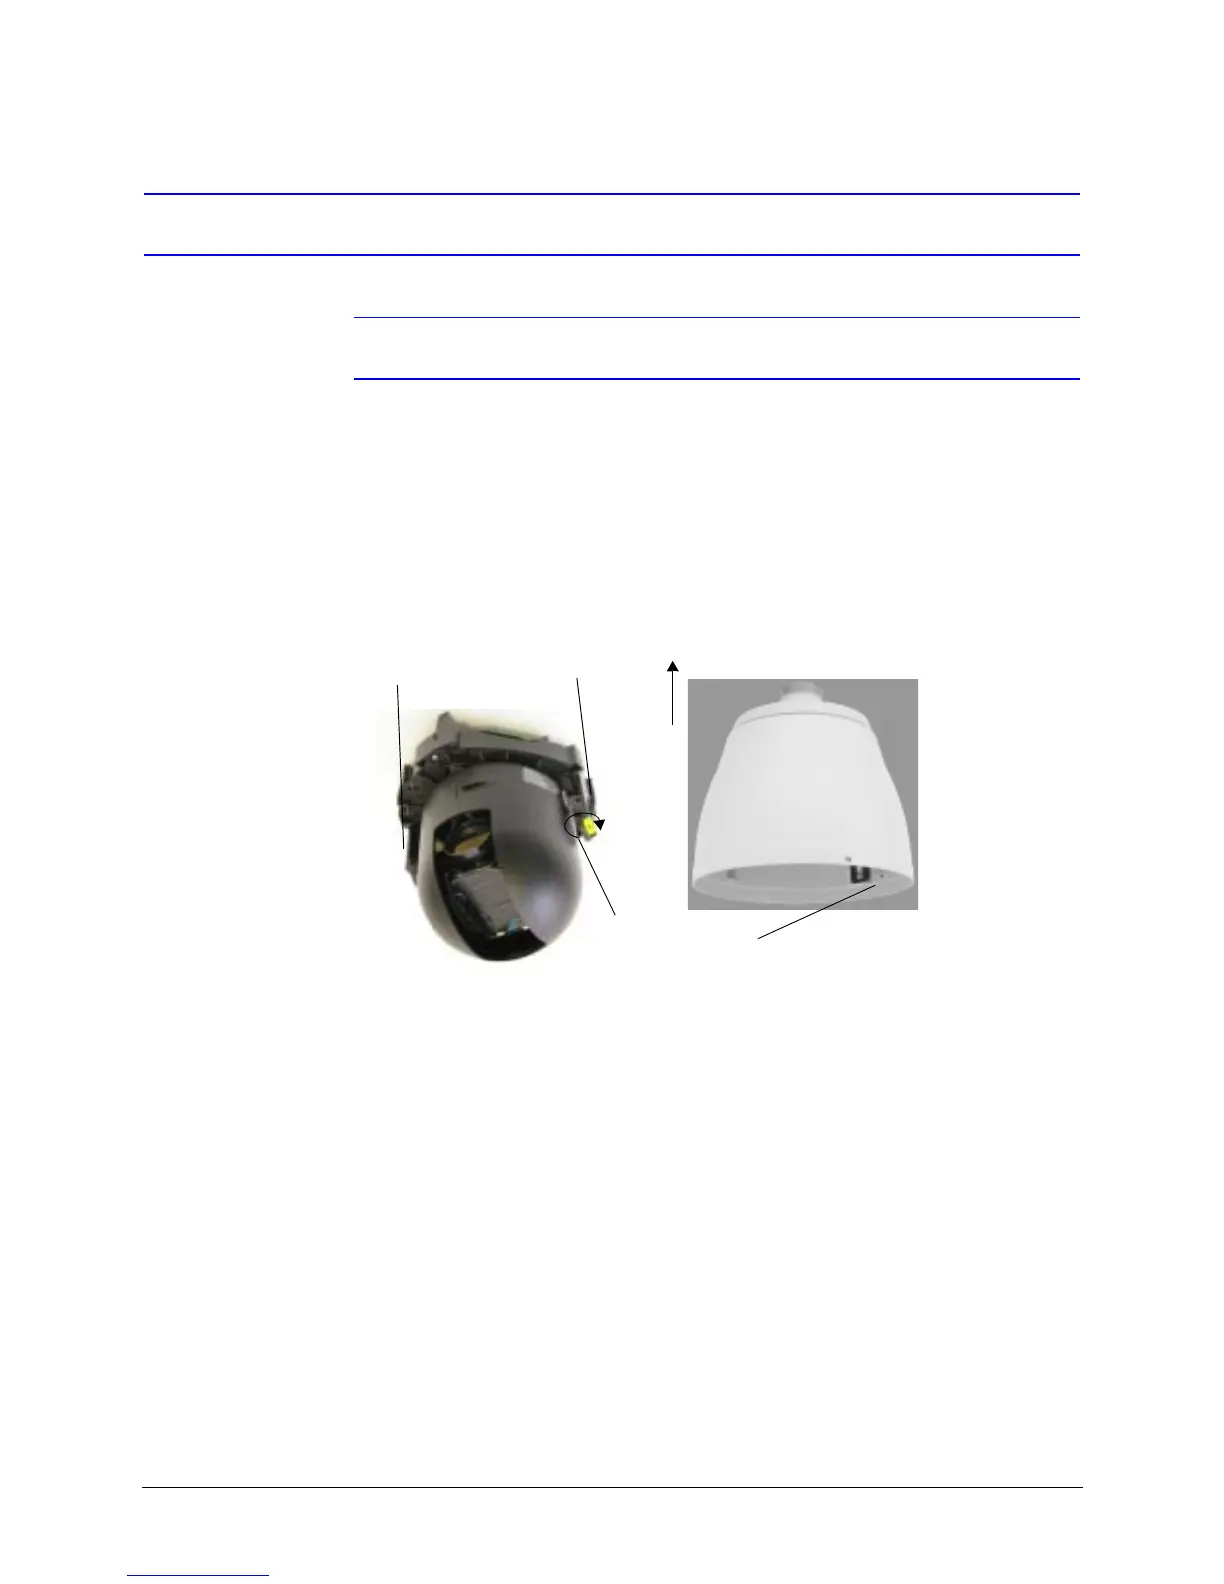
Step 6: Install the Scan Assembly into the Housing
Note Scan assembly installation is the same with all housing types.
1. Carefully remove the plastic lens cap from the scan assembly. Do not touch the
lens.
2. Rotate and line up the scan assembly yellow label to the mounted housing yellow
label.
3. Gently push the scan assembly into the housing until the two guides on the scan
assembly lock/snap into the holes on the housing guides.
4. Gently pull down on the assembly to ensure it has properly latched into place.
Figure 3-21 Installing the Scan Assembly into the Housing
Scan assembly locking guides
Up
Rotate to align with the
housing yellow labels

Table of Contents

Other manuals for Honeywell ACUIX

Questions and Answers:

Question and Answer IconNeed help?

Do you have a question about the Honeywell ACUIX and is the answer not in the manual?

Honeywell ACUIX Specifications

General IconGeneral
Lens TypeFixed
Focal Length2.8 mm
Night VisionYes
Weather ResistanceYes
EnvironmentOutdoor
Resolution1920x1080
IR Distance30m
Video CompressionH.264
Power Supply12V DC, PoE

Related product manuals