Page: 71
JFS-A1 INSTALLATION, OPERATION, AND INSTRUCTION MANUAL
Document # : DOC230
Issued: August 27, 2012
Revised: N/A
ConguringZones
e next step is to customize a zone’s attributes, which includes changing the name, selecting type of zone, and other
characteristics (i.e., constant, double time output pattern, latching or non-latching, silenceable, auto-silence timer, etc.).
To congure a zone:
1. Double-click in the Zone’s “Name” eld to modify default name.
Note: Up to 16 alphanumeric characters may be entered. For example: “Main Lobby” or “Server Room.”
2. Click in “Style” eld. Click the drop-down arrow to display zone styles.
.
3. Choose the applicable zone style (refer to the Zone Styles Table in this section for descriptions of zone styles).
4. Continue editing zone’s elds. Refer to the Zone Attributes Table for eld descriptions.
ConguringPoints
is section addresses how to dene or congure points through the Points function. Each device may have a
unique function in relation to the zone as well as the entire system. e user determines the Point's role, specic
behavior characteristics, and customizes its name, if desired. e list of available functions is associated to the device
or module type selected.
Notes:
• Points may be congured from either the Zones or Points functions; however, for purposes of this manual,
points are congured in the Points function.
• Points can be congured individually, or by groups or ranges of devices.
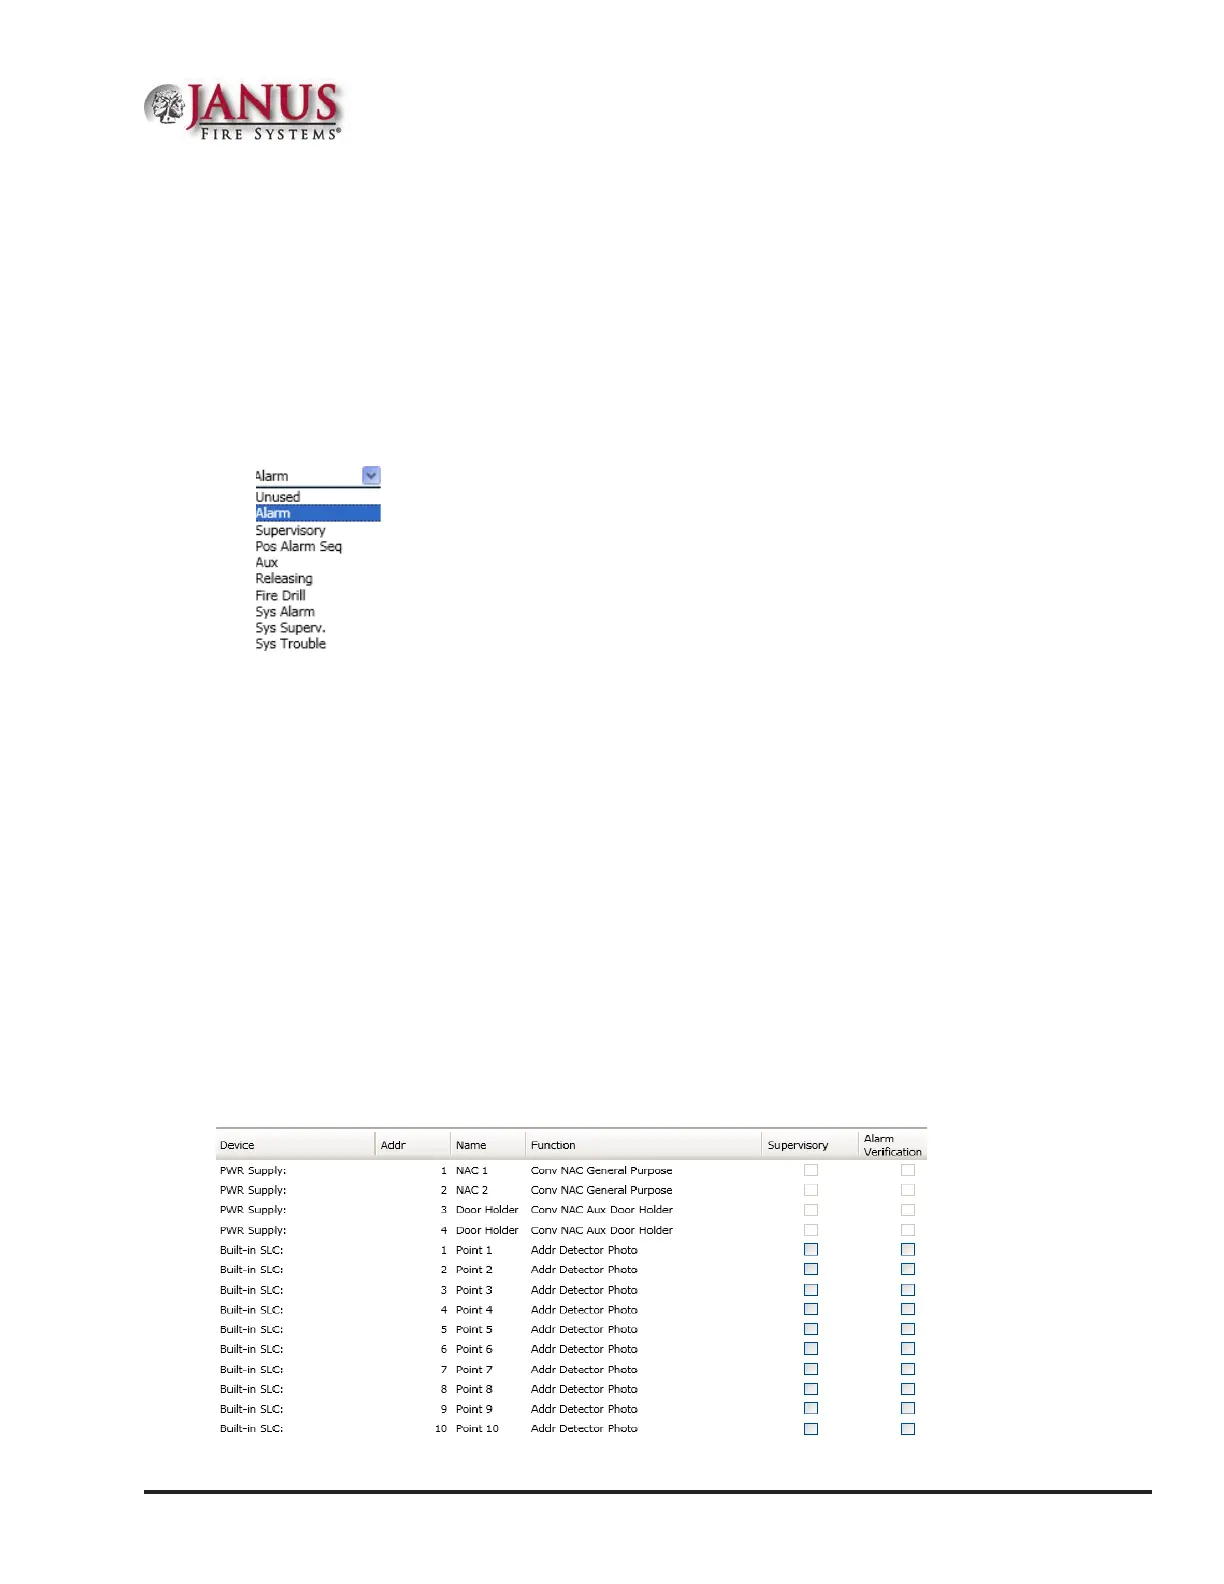
An example of the Points window is shown below.
Figure 86. Example of Points Window
 Loading...