31
STEP 2: PUT THE SDP-75 AND YOUR DEVICE ON THE SAME
NETWORK
2.2.3.1 OPTION A: YOUR DEVICE JOINS THE SDP-75’S WI-FI
NETWORK
The factory settings of the SDP-75
are preconfigured to allow it to run as a Wi-Fi Access Point. Provided that the Wi-Fi
antenna is connected to its back panel, the SD¨-75
will run its own Wi-Fi Access Point. The SDP-75
access point should
appear in the list of Wi-Fi networks under the name “SDP-XX”, where XX is the serial number of your SDP-75.
The fully wireless option for connecting to the SDP-75
is as follows:
• Disconnect your device (computer or tablet) from your usual Wi-Fi network;
• Connect your device to the SDP-75’s own Wi-Fi network: in your list of Wi-Fi networks, choose the network
named “SDP-XX”, where “XX” is the serial number of your SDP-75. Enter the following password: calibration
• Use the SDP-75 front panel to check its network status: go to the Setup/Network menu to see its IP address.
Once your computer or tablet is on the SDP-75’s own Wi-Fi network, you can move to the Next Step of this procedure to
configure and connect your VNC client to the SDP-75’s VNC server.
IMPORTANT NOTE: The SDP-75 Access Point’s password is calibration
The SDP-75’s Access Point details are available through the front panel menu in the Setup > Network
> Wi-Fi page.
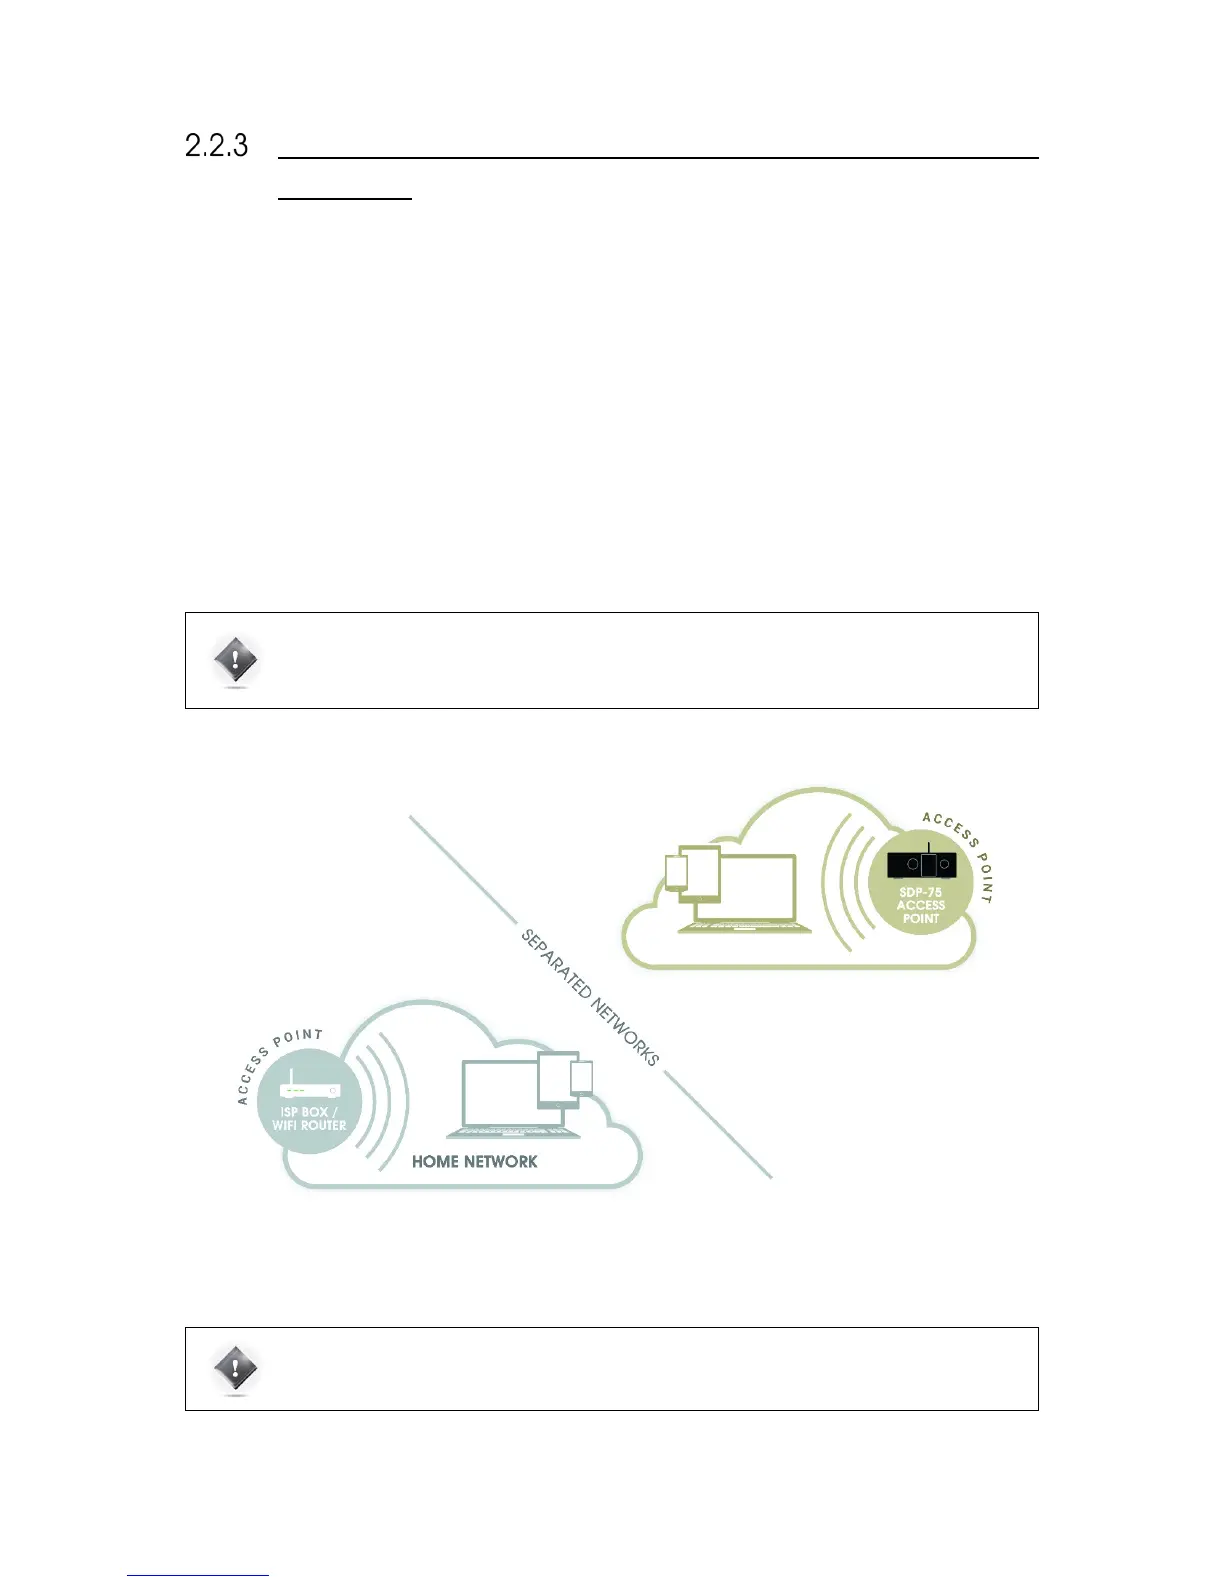
IMPORTANT NOTE: Once connected to the SDP-75’s Access Point, it is possible to remotely access the
SDP-75’s graphic user interface, but access to Internet will be lost, as indicated in the figure above.
You must switch back to your usual Wi-Fi network in order to reconnect to the internet.