LABORIE Goby Owner’s Manual GOBY-UM02 20
3.2.8 Set up Ambulatory Remote Control (optional)
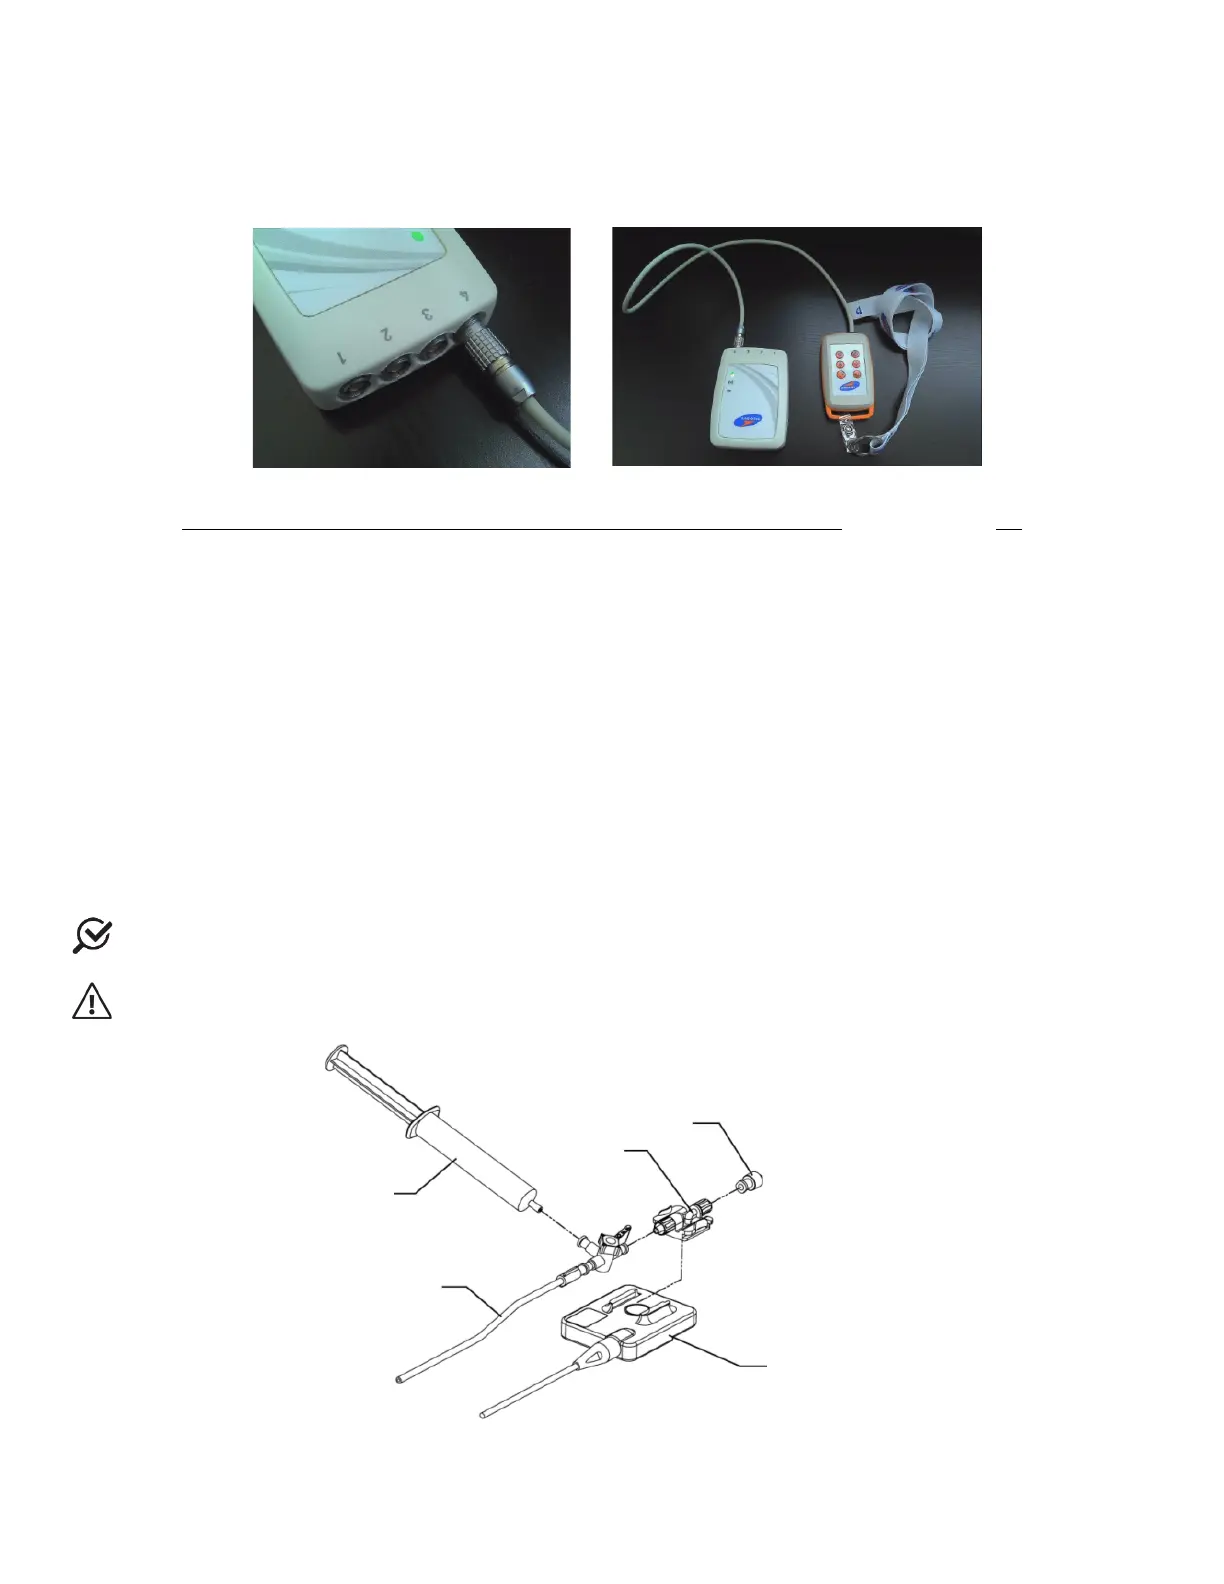
If a remote control (COM762) is used for ambulatory Urodynamics testing, first set up the remote control for patient use
and then instruct the patient on how to use the remote during a procedure.
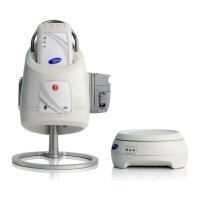
Insert the event marker cable attached to the remote into the UDS Roam port labeled “4” (Figure 12).
Figure 12: Connecting the Remote Control to the UDS Roam
Refer to the Setting Up the Remote Control and UDS Roam for Ambulatory Testing section on page 84.
3.3 CONSUMABLES AND TRANSDUCER SETUP
3.3.1 Fluid-Filled Pressure Transducer Setup
To Set-up the Fluid-Filled Pressure Transducer for a test follow the instructions below. Refer to Figure 13 for a visual
representation of the steps provided.
1. Take each pressure cartridge out of its package. Remove protective covers from the back and from the
connector ends.
2. Slide a cartridge over each transducer until it clicks in place.
3. Attach pressure measurement tubing, with a three-way stopcock, to the lower (male) end of the pressure
cartridge.
4. Attach a 10 ml sterile fluid filled syringe to the side port of the stopcock.
5. By turning the stopcock lever in appropriate directions, flush fluid from syringe through both the pressure
cartridge and the pressure measurement tubing. Refer to Figure 14: Stopcock Flow Directions.
NOTE: Be sure that the stopper cap is always securely in place whenever the stopcock position is being changed.
CAUTION: AIR BUBBLES must not be present in the system during testing.
Figure 13: Fluid-Filled Pressure Transducer Setup
Cartridge
MEDEX Transducer