LABORIE Goby Owner’s Manual GOBY-UM02 16
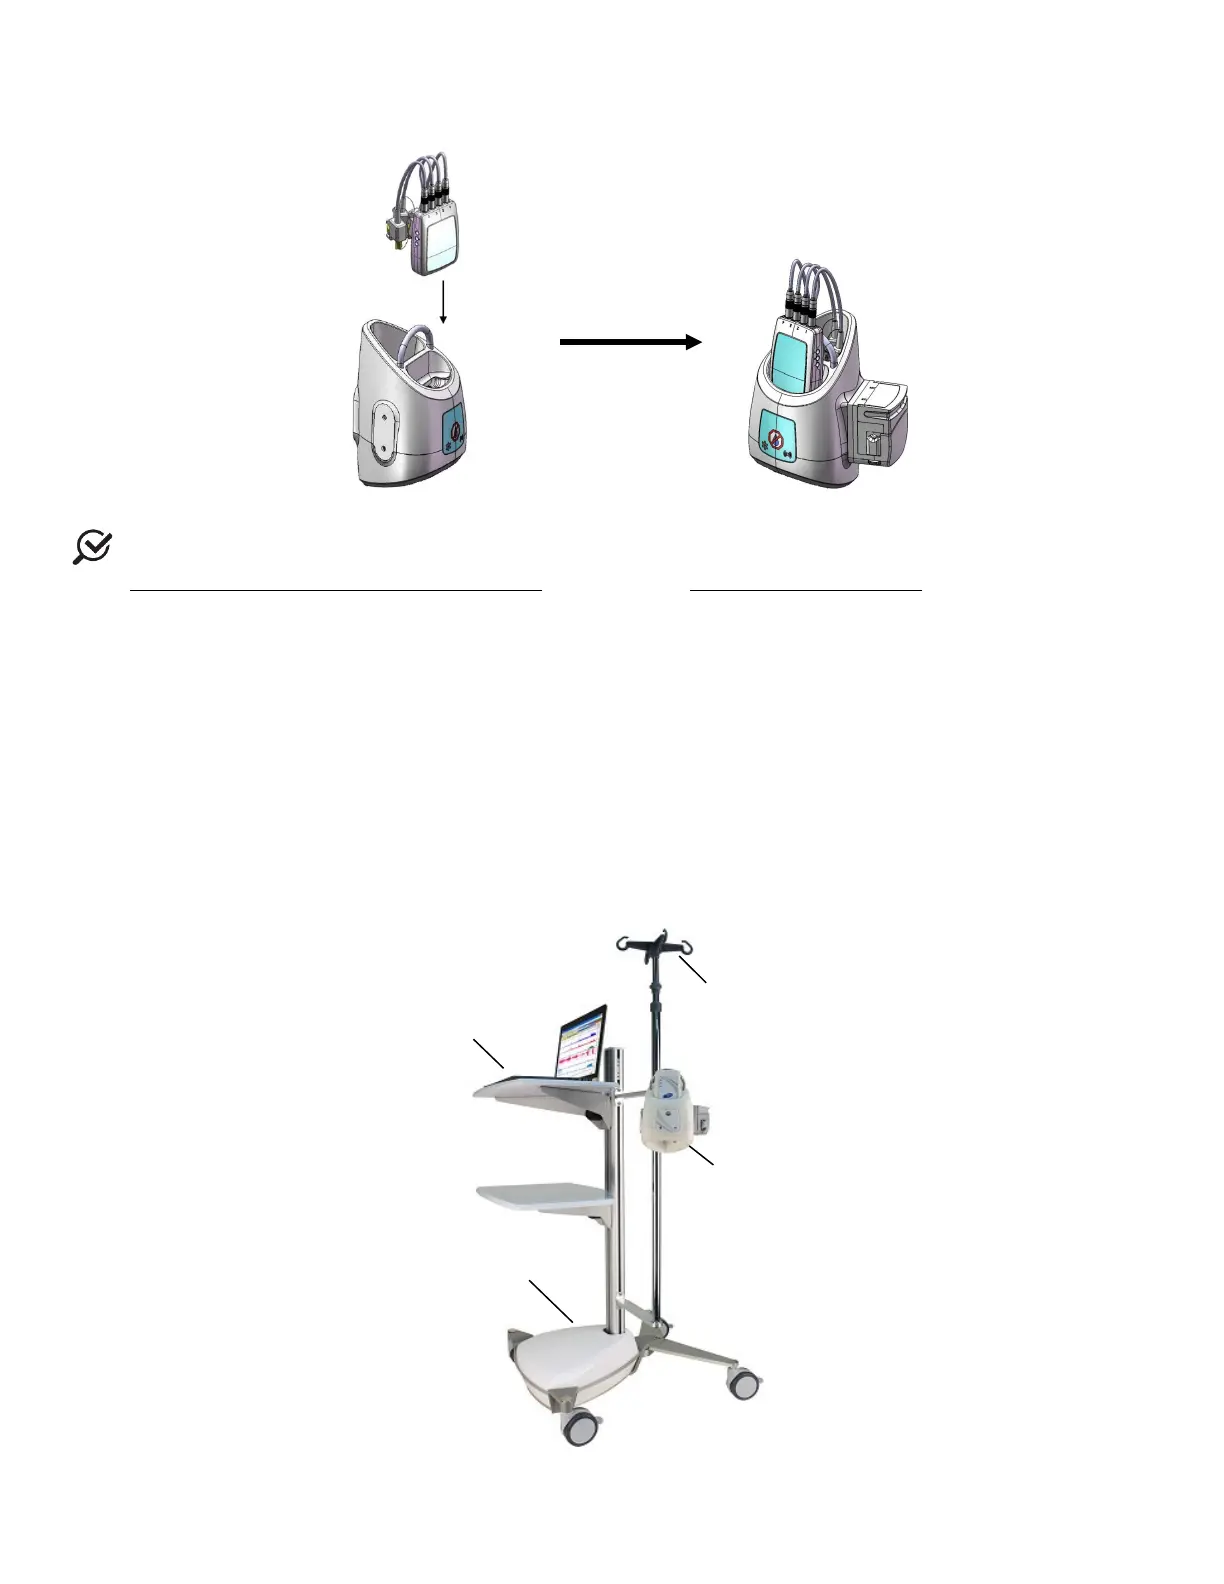
• Place the UDS Roam cartridge into the Goby™ Hub and make sure the connector at the bottom of the UDS Roam
cartridge clicks securely into place into the
Goby™ Hub (Figure 5).
Figure 5: Connecting the UDS Roam to the Goby™ Hub
NOTE: The UDS Roam, transducers, and consumables may be setup with a patient using the belt and holster. Refer
to the
How do I attach the UDS Roam™ to a patient? guidance in the Quick Reference and FAQ section.
3.2.2 Assemble Goby™ with Cart
Follow the instructions provided to assemble the Goby™ with Cart:
• Place the Goby™ Hub into the IV mount and lock in place using the gold screw. Clamp the mount on the IV pole
at the desired height.
• Plug the power supply cord of the cart into an electrical outlet.
• Place the Urocap™ IV on the floor as needed for tests. Plug into the power supply to begin charging.
• (Optional) Insert the UPP puller securely into the clamp on the IV pole. Plug the UPP cable into the rectangular
connector at the bottom of the
Goby™ Hub.
• The IV pole is not designed to support the weight of the system. Do not lift the cart or table by holding the IV pole.
• To prevent possible injury to the patient, exercise caution when adjusting IV pole height during a procedure.
Refer to Figure 6 for identification of each component described in the setup.
Figure 6: Goby™ with Cart Setup
with UDS
Hook
LIT & Cabling
Compartment