LABORIE Goby Owner’s Manual GOBY-UM02 80
6 HOW TO RUN TESTS
This section provides instructions on how to run tests with the GOBY™ System. For more information on equipment or
accessories setup, refer to the
Set Up Goby™ Equipment and Accessories section on page 15.
6.1 UROFLOW TEST
A Uroflow test is a measurement of the rate at which urine flows out of the body. It can be performed with the UDS120
Goby software’s automatic method or it can be performed through manual use of the software.
NOTE: Make sure the battery of the Urocap™ IV is fully charged before the start of the test.
6.1.1 Urocap IV Setup for Uroflow Test
1. Gather the supplies needed for a Uroflow test. (Beaker, commode chair, funnel, etc…).
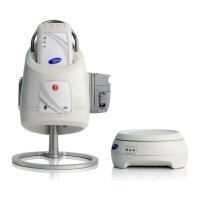
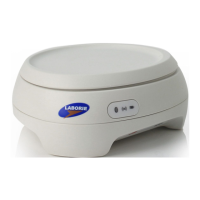
2. Carefully place the Urocap™ IV on the floor or on an approved Uroflow transducer stand.
3. Gently position a graduated beaker on top of the Urocap™ IV.
4. Place the funnel on the plastic frame of the commode chair and position both over the Urocap™ IV and beaker.
Ensure that the beaker and the funnel are aligned but not touching.
5. Turn on the computer and then turn on the printer.
6.1.2 Run a Uroflow Test
6.1.2.1 Run a Uroflow Test: Auto Method
1. Complete Urocap IV Setup as instructed in the Urocap IV Setup for Uroflow Test section on page 80.
2. Invite the patient to get ready to take the test.
3. Start the UDS120 GOBY software.
4. Click the Uroflow button on the control panel.
5. Confirm that
Auto Recording Mode
is displayed in the blue title bar above the graph.
6. Tap on the Urocap™ IV to make sure it is responding.
7. Notify the patient that the test is set to proceed. The program will automatically begin to process the data when
the transducer detects the start of flow. Alternatively, click the
Run button to start the test.
CAUTION: DO NOT TOUCH the beaker during voiding.
8. Wait for the patient to finish voiding. The graph will stop automatically 50 seconds after voiding has ended.
9. When the Patient Information screen appears enter any required information and click OK.
10. Straight catheterize the patient to obtain post-void residual measurement (PVR), then remove the catheter. When
the Uroflow Summary screen appears, enter the PVR value and click
OK.
11. Click the Save button on the control panel to save the test or click Reporter to save, view, and print a test report
in iList.
12. Empty the beaker and thoroughly wash for reuse.
6.1.2.2 Run a Uroflow Test: Manual Method
1. Complete Urocap IV Setup as instructed in the Urocap IV Setup for Uroflow Test section on page 80.
2. Invite the patient to get ready to take the test.
3. Start the UDS120 GOBY software and
4. Click the Uroflow button on the control panel.
5. Click Set Zeroes on the main menu bar.
6. Click the Run button to start the test.
7. Instruct the patient to void. If possible, leave the room to allow patient privacy.
CAUTION: DO NOT TOUCH the beaker during voiding.
8. When voiding is complete, click the Stop button.
9. Straight catheterize the patient to obtain a PVR measurement, then remove the catheter.
10. Click Info, then Voiding Summary. Enter the PVR measurement into the associated box and click OK.
11. Click the Save button on the control panel to save the test or click Reporter to save, view, and print a test report.
12. Empty the beaker and thoroughly wash for reuse.