LABORIE Goby Owner’s Manual GOBY-UM02 92
7.4 CALIBRATE THE INFUSION TRANSDUCER
1. Plug the infusion transducer cable into the connector at the bottom of the Goby™ Hub.
2. Switch ON the
.
3. Start the UDS120 Goby software and double-click the
icon in the main window to open the Goby
Device Manager window (Figure 108).
4. Click the Setup button in the
Goby™ Hub
section to launch the Setup window. Click the Device Calibration
button (Figure 109).
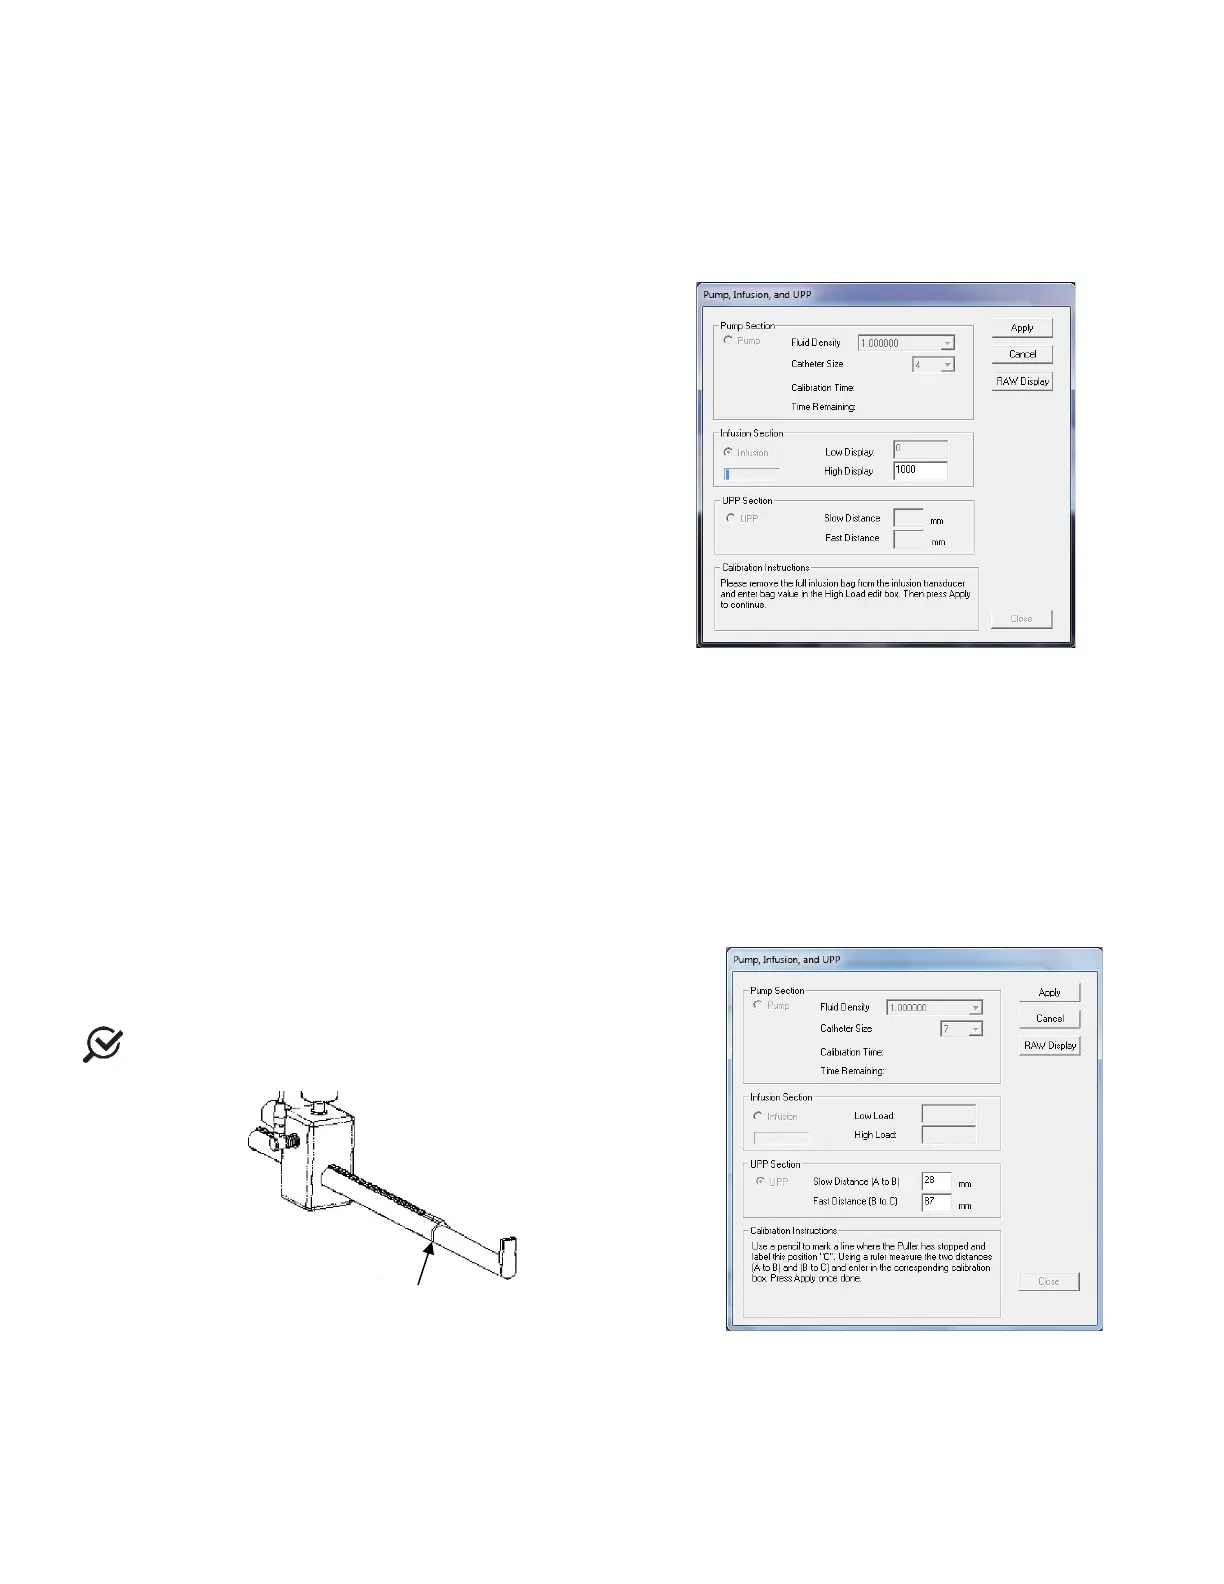
5. Select Infusion under the Infusion Section option
(Figure 114).
6. Place a full infusion bag on the infusion transducer.
7. Follow the on-
screen instructions to complete the
calibration.
Figure 114: Pump, Infusion, and UPP Calibration
Window – Infusion Section
7.5 CALIBRATE THE UPP
1.
Gather a sharpened pencil for marking purposes and a ruler with millimeter (mm) markings.
2. Plug the UPP cable into the connector at the bottom of the
.
3. Switch ON the
.
4. Start the UDS120 Goby software and double-click the
icon in the main window to open the Goby
Device Manager window (Figure 108).
5. Click the Setup button in the
Goby™ Hub
section.
6. In the Setup window click the Device Calibration button (Figure 109).
7. Click UPP under the UPP Section option (Figure 115).
8. Follow the on-screen instructions to
calibration.
When marking distances on the puller,
edge of the mobile clamp that stops along the nose tube.
Figure 115: Pump, Infusion, and UPP Calibration
Window – UPP Section
7.6 RESTORE FACTORY CALIBRATION
Not available.
clamp stops along