LABORIE Goby Owner’s Manual GOBY-UM02 71
5.8.5 Digital Value Indicator
The Digital Value window displays the data of channels with digital attributes. While all channels will print as curves, the
screen can display a maximum of eight channels at one time. If more than eight channels are used, additional channels
may be displayed as digital or overlay. Digital channels are displayed in the Digital window, while curves of overlay
channels are displayed on the channels in which they overlay.
To set the Digital Attributes of Channels:
1. Click Config > Set up/Modify.
2. Select the Display Digital attribute in the Display Attribute column.
3. If necessary, repeat for other channels.
4. Click OK.
To switch the Digital Window On/Off:
Click Options > Digital Value Indicator or press F8 on the keyboard.
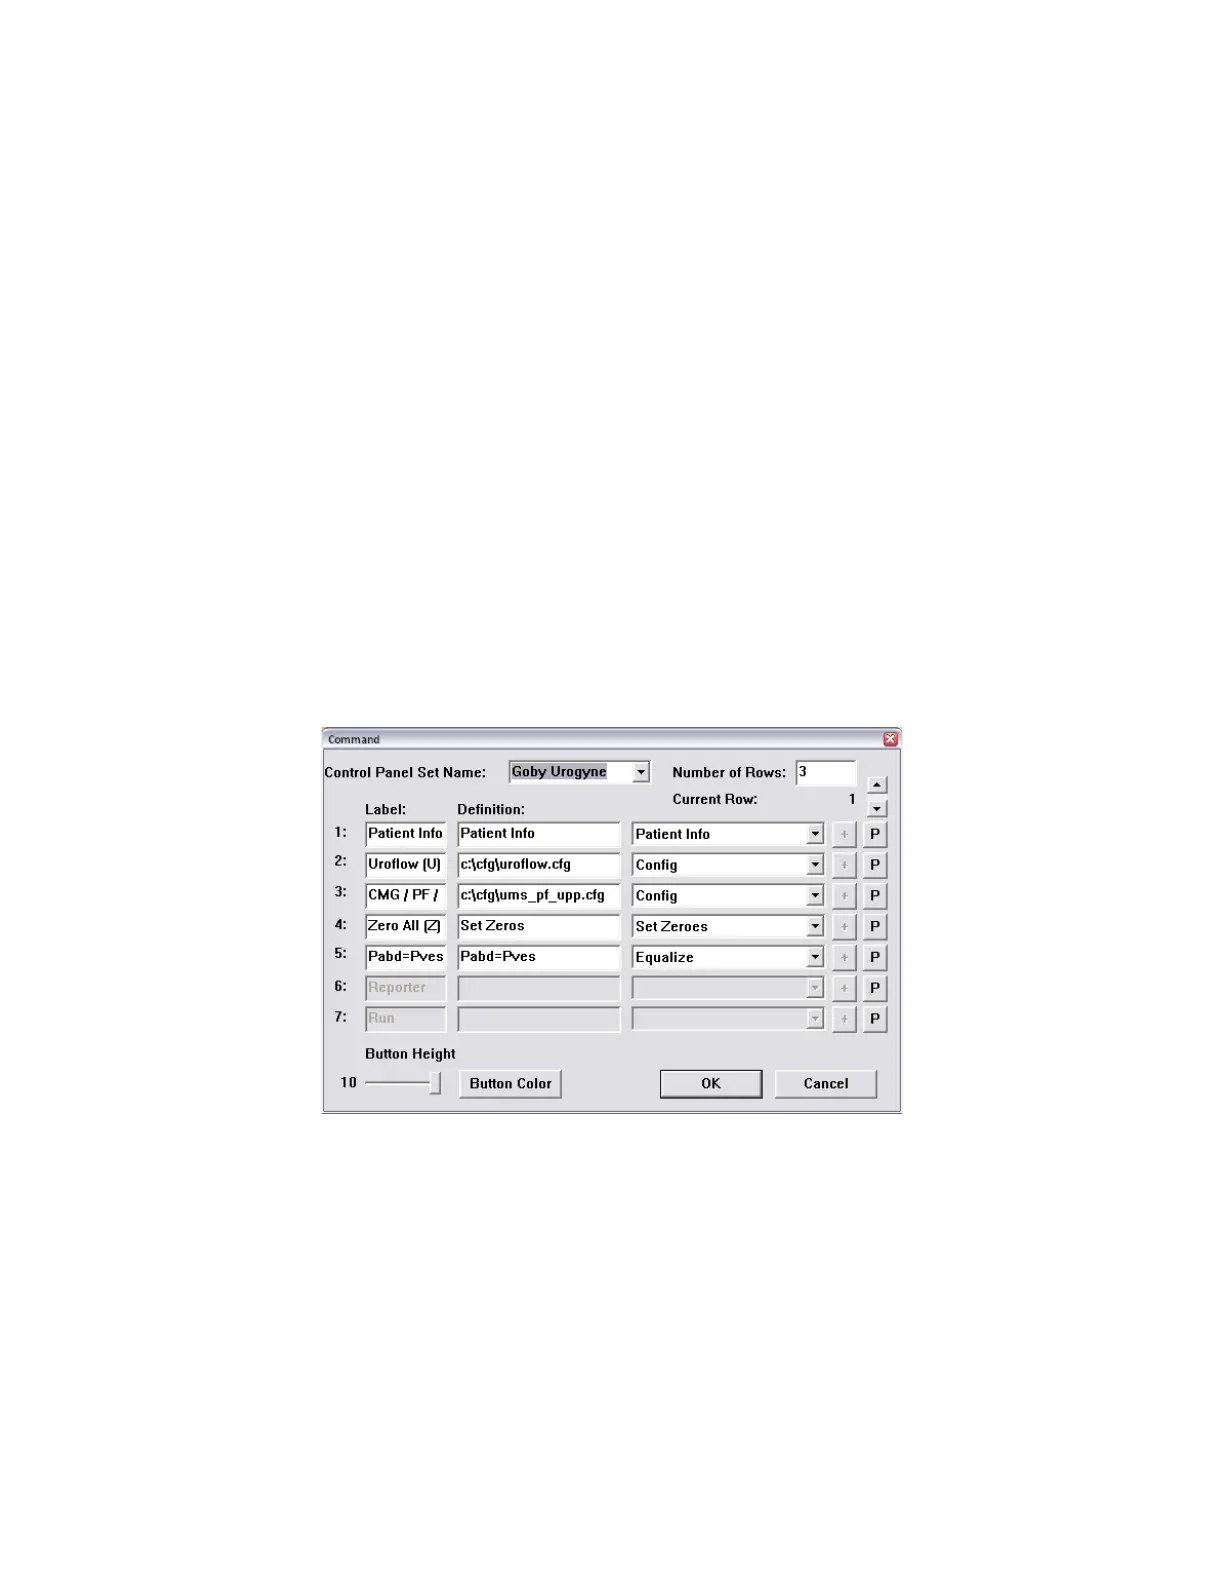
5.8.6 Control Panel Settings
The Control Panel provides quick access to events, tests and features during a study. There are five basic control panels
already configured in the software. Custom control panels can be configured if desired. There are seven buttons in each
control panel row; the number of rows can be modified if desired. Use the Command window to select the group of
buttons available for procedures in the Control Panel.
To configure the Control Panel:
1. Click Options from the menu bar and select Control Panel Settings. The Command window will appear
displaying the first row of Control Panel buttons (
Figure 84).
Figure 84: Command Window
2. Change the Label, Definition, and command type.
a. To change the Name of the function button, double-click the label of the button and enter a new name
(entered text will be displayed on the Control Panel button in the UDS Client screen).
b. Change the definition for the button by clicking the appropriate box under the Definition column. Type
the new definition into the field.
IMPORTANT! The meaning of the definition depends on the type
of Control Panel Button
c. Change the type of function by clicking on the drop-down arrow of the appropriate combo box. Select
the appropriate function command type.
3. Click the down arrow of the Current Row field to move to the second row of buttons. Repeat configuration steps
until Label, Definitions, and Command type fields are set for all Control Panel buttons.
4. Click OK when all buttons are configured.